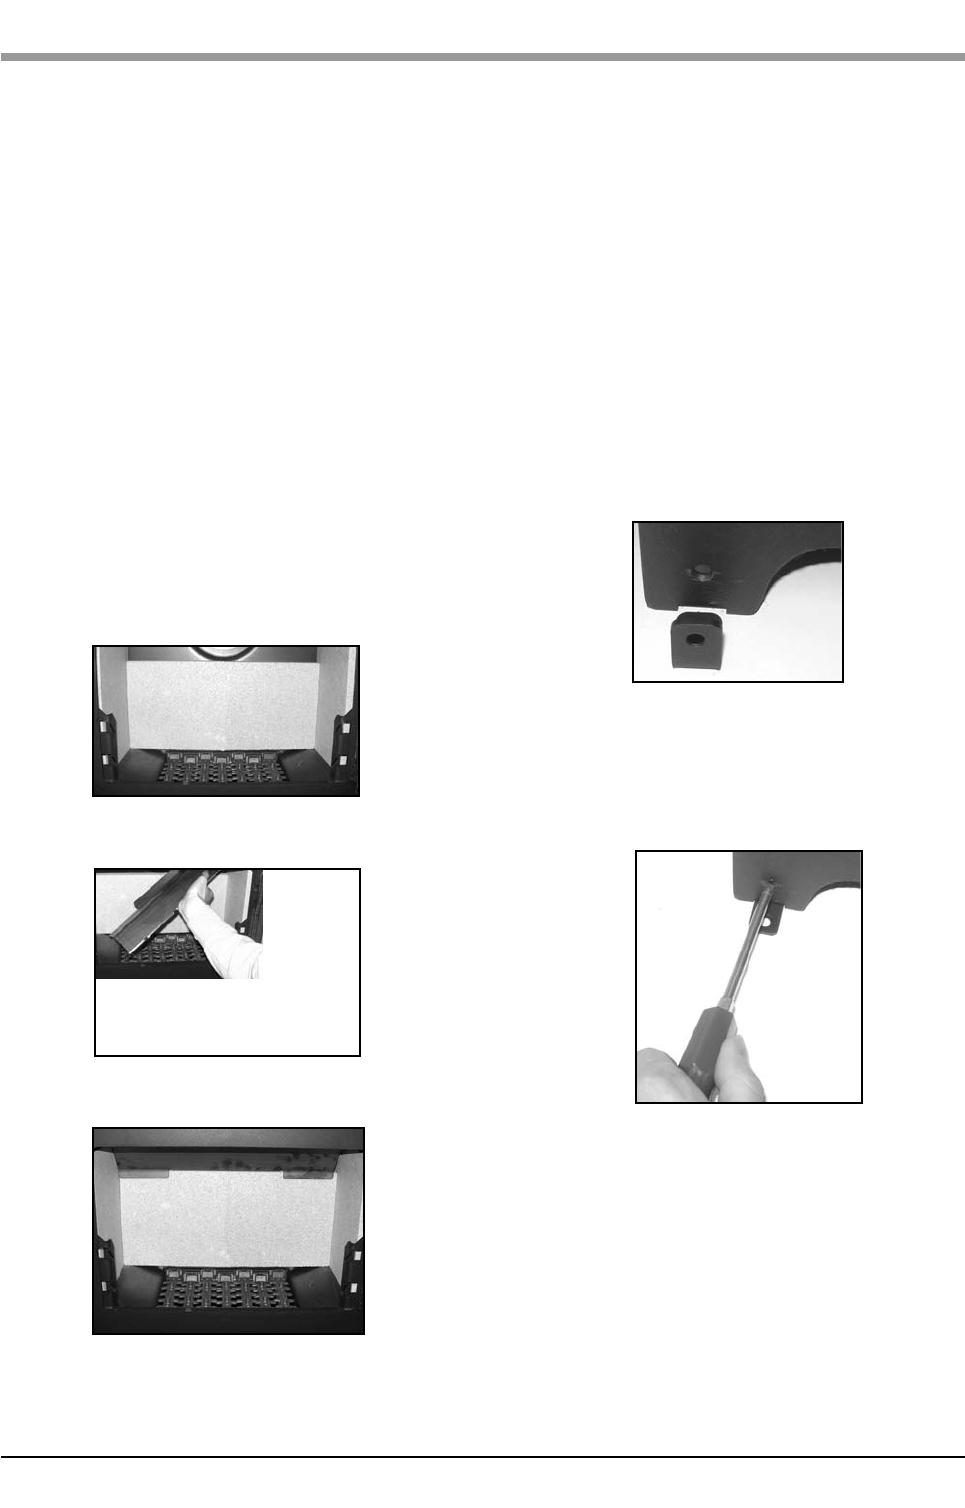
FIREBOX LINER PANELS
The Acorn Multifuel stoves have reflective liners to
the sides and back. The throat plate sits on top of
the side and rear panels. These should come fitted
to your fire, if however they are not proceed as
follows to fit them.
•Remove the front brace retainer.
•Set the small liner into the back of the fire.
•Insert side liner panels
•Fit the throat plate with the single bend and two
cut outs to the front facing up. The projecting lugs
sit on top of the side liners. The long centre tab on
the back edge rests on the rear liners. The shorter
turn-down tabs against the vertical face.
•Replace the front brace retainer.
Note: Neither the rear firebox liners nor the side
firebox liners are "handed", both faces are
suitable for direct contact with the fire.
Fig. 1 Liners inserted in Acorn
Fig. 2 Inserting throat plate
Fig. 3 Liners, throat plate and
grate in the Acorn.
REMOVAL OF THE THROAT PLATE
Blocked chimneys cause dangerous fumes to
escape. Remove the throat plate at least monthly to
clean. Keep chimney and flue ways clear.
FITTING THE OPTIONAL FLOOR
FIXING KIT
Once the stove is in the correct position it is
recommended that the fire is fixed to the floor for
safety purposes:
You will need a No. 2 pozi drive screw driver to
carry out this operation. Place the brackets each
side of the appliance.
Fig. 4 Lining up the bracket
Slide the small threaded hole underneath the gap
(as shown above) and turn inside so the both holes
match the pre-drilled one. Repeat for the other side.
Fig. 5 Inserting and tightening the screws.
When both are in place, tighten the screws until
they are firmly inserted.
Then proceed to drill your hearth and insert and
anchor bolt or similar fixing (Not supplied in kit)
and bolt down the brackets once the appliance is in
place. For further instructions please consult the
floor fixing instructions attached to the kit.
Acorn Multifuel Stoves 9
INSTALLATION


