Getting the Most from Your A
ERO
P
RESS
™
Coffee and Espresso Maker
Congratulations. As the owner of an AeroPress coffee
maker, you have in your hands a device for making the
best coffee or espresso you've ever tasted. It's easy
and fun.
BREWING:
You can make from one to four cups per pressing.
Each pressing only takes about a minute, so you can
serve a houseful of guests in a few minutes. Just
follow these easy steps.
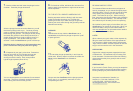
1.
Remove the plunger and the cap from the chamber.
2.
Put a micro-filter inside the cap and twist the cap
onto the chamber.
3.
Stand the chamber on a sturdy mug. A glass mug
is fun. It lets you watch the process.
4.
Put ground coffee into the chamber - one scoop for
each espresso or five ounce American cup, up to a
maximum of four scoops.
-
Grinding Coffee:
We recommend drip grind when
using two or more scoops because
it's easy to push and yields rich
flavor. For single-scoop pressings,
espresso grind will yield more
flavor yet still be easy to push.
A funnel is provided for use with a coffee grinder. Use
the scoop to measure the beans into the grinder. Grind
only the scoops you need for each pressing. Then use
the funnel to empty the grinder into the AeroPress
chamber.
Coffee lovers agree that grinding just before brewing is
important for great flavor. Remember too, that freshly
roasted beans yield a richer flavor.
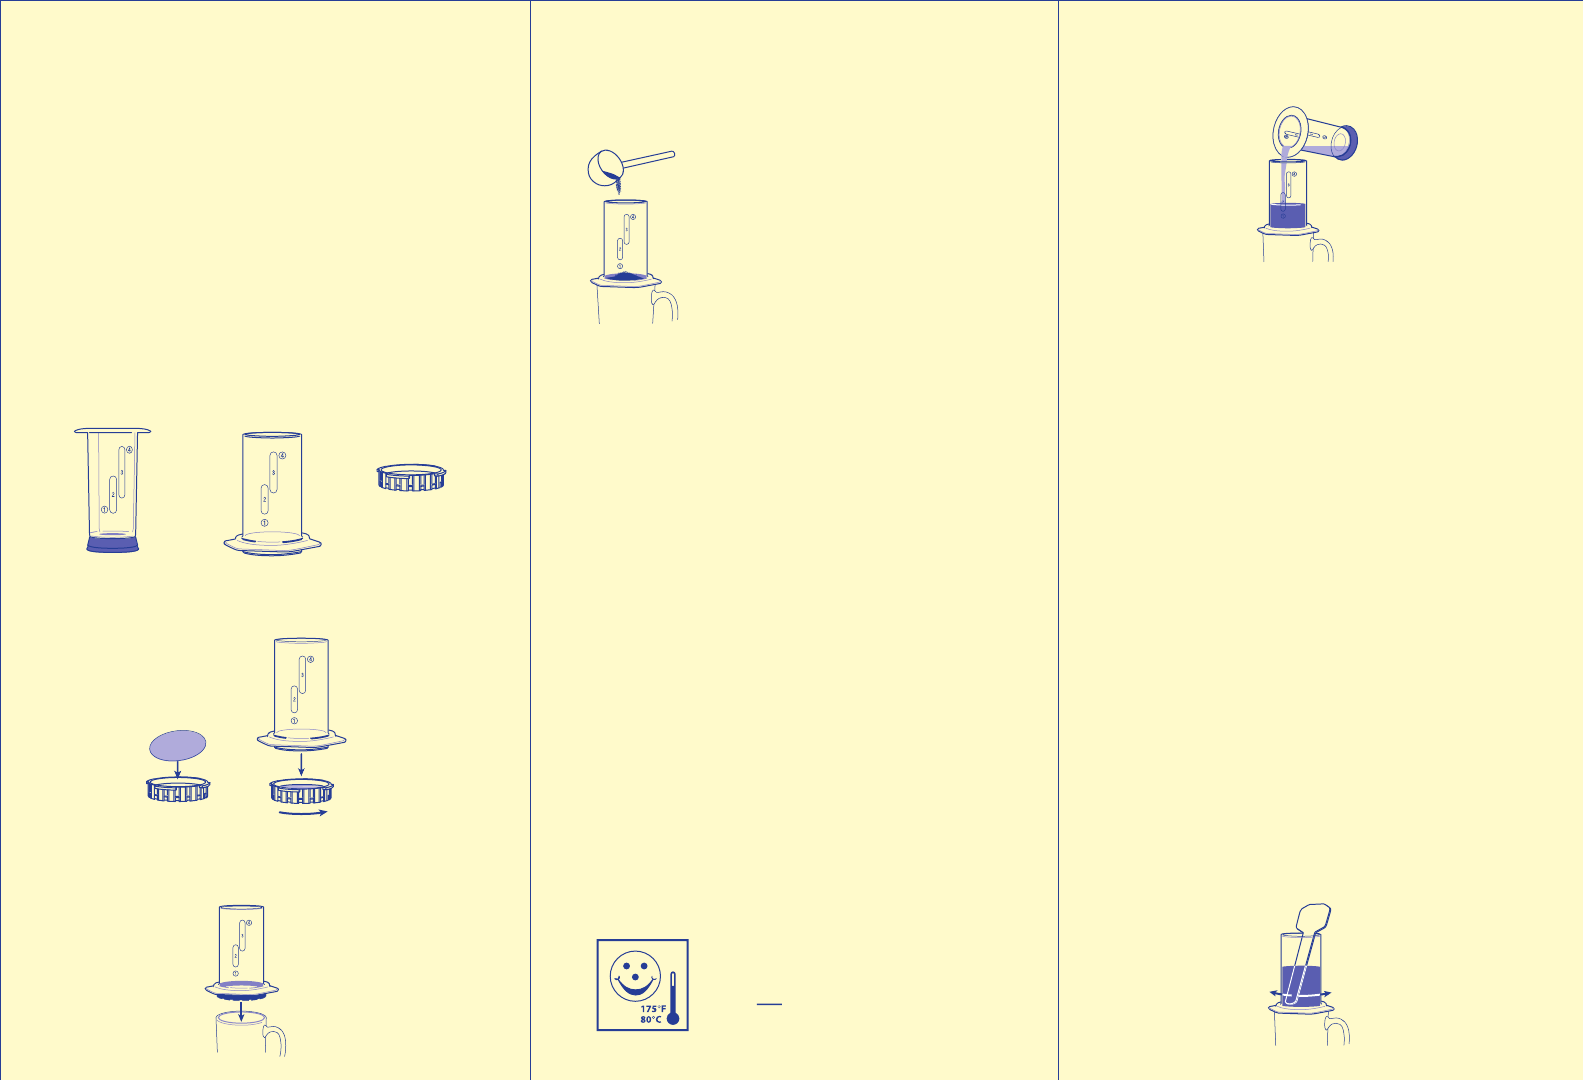
5.
Pour heated water slowly into the chamber.
Water Temperature:
Everyone we tested, from coffee lovers to professional
coffee tasters, preferred coffee brewed with the water
temperature between 165 and 175
o
F (75 to 80
o
C).
Lower temperature water makes a smoother brew.
If you have instant hot water in your kitchen, spend a
few minutes adjusting the temperature to 175
o
F (80
o
C).
That's also the best temperature for tea.
Be careful, hot liquids can cause serious injury.
If you heat the water in a microwave or kettle, experiment
with time. About three-quarters of the time to the first
bubbles will yield the ideal temperature.
Measuring and Pouring the Water:
The chamber is marked 1, 2, 3, and 4 for the number
of scoops of coffee which corresponds to the number
of servings.
With 1 or 4 scoops, just fill with hot water to the number
1 or 4 on the chamber.
With 2 or 3 scoops you can choose from the
bottom of
the ovals marked 2 or 3 for a richer brew to the top of the
ovals for an average strength brew.
If American coffee is your goal, use the top of the
ovals.
For espresso, adjust the quantity of water to
brew the
strength desired. For latte, use the bottom of the ovals.
A richer brew makes the best tasting latte.
Dribble the water slowly into the chamber for the first
few seconds to wet the grounds. Then fill to the desired
level. Never fill higher than number 4.
The plunger can be used to measure water. Just fill to
the appropriate number. You can also use the plunger
to heat water in a microwave oven.
165 - 175
o
F water tastes best.
Do not use boiling water.
6.
Stir the water and coffee together with the paddle
for about ten seconds.
Plunger
Chamber
Cap