


Attention Installer
Amana cannot be responsible
for improper installation.
A
B
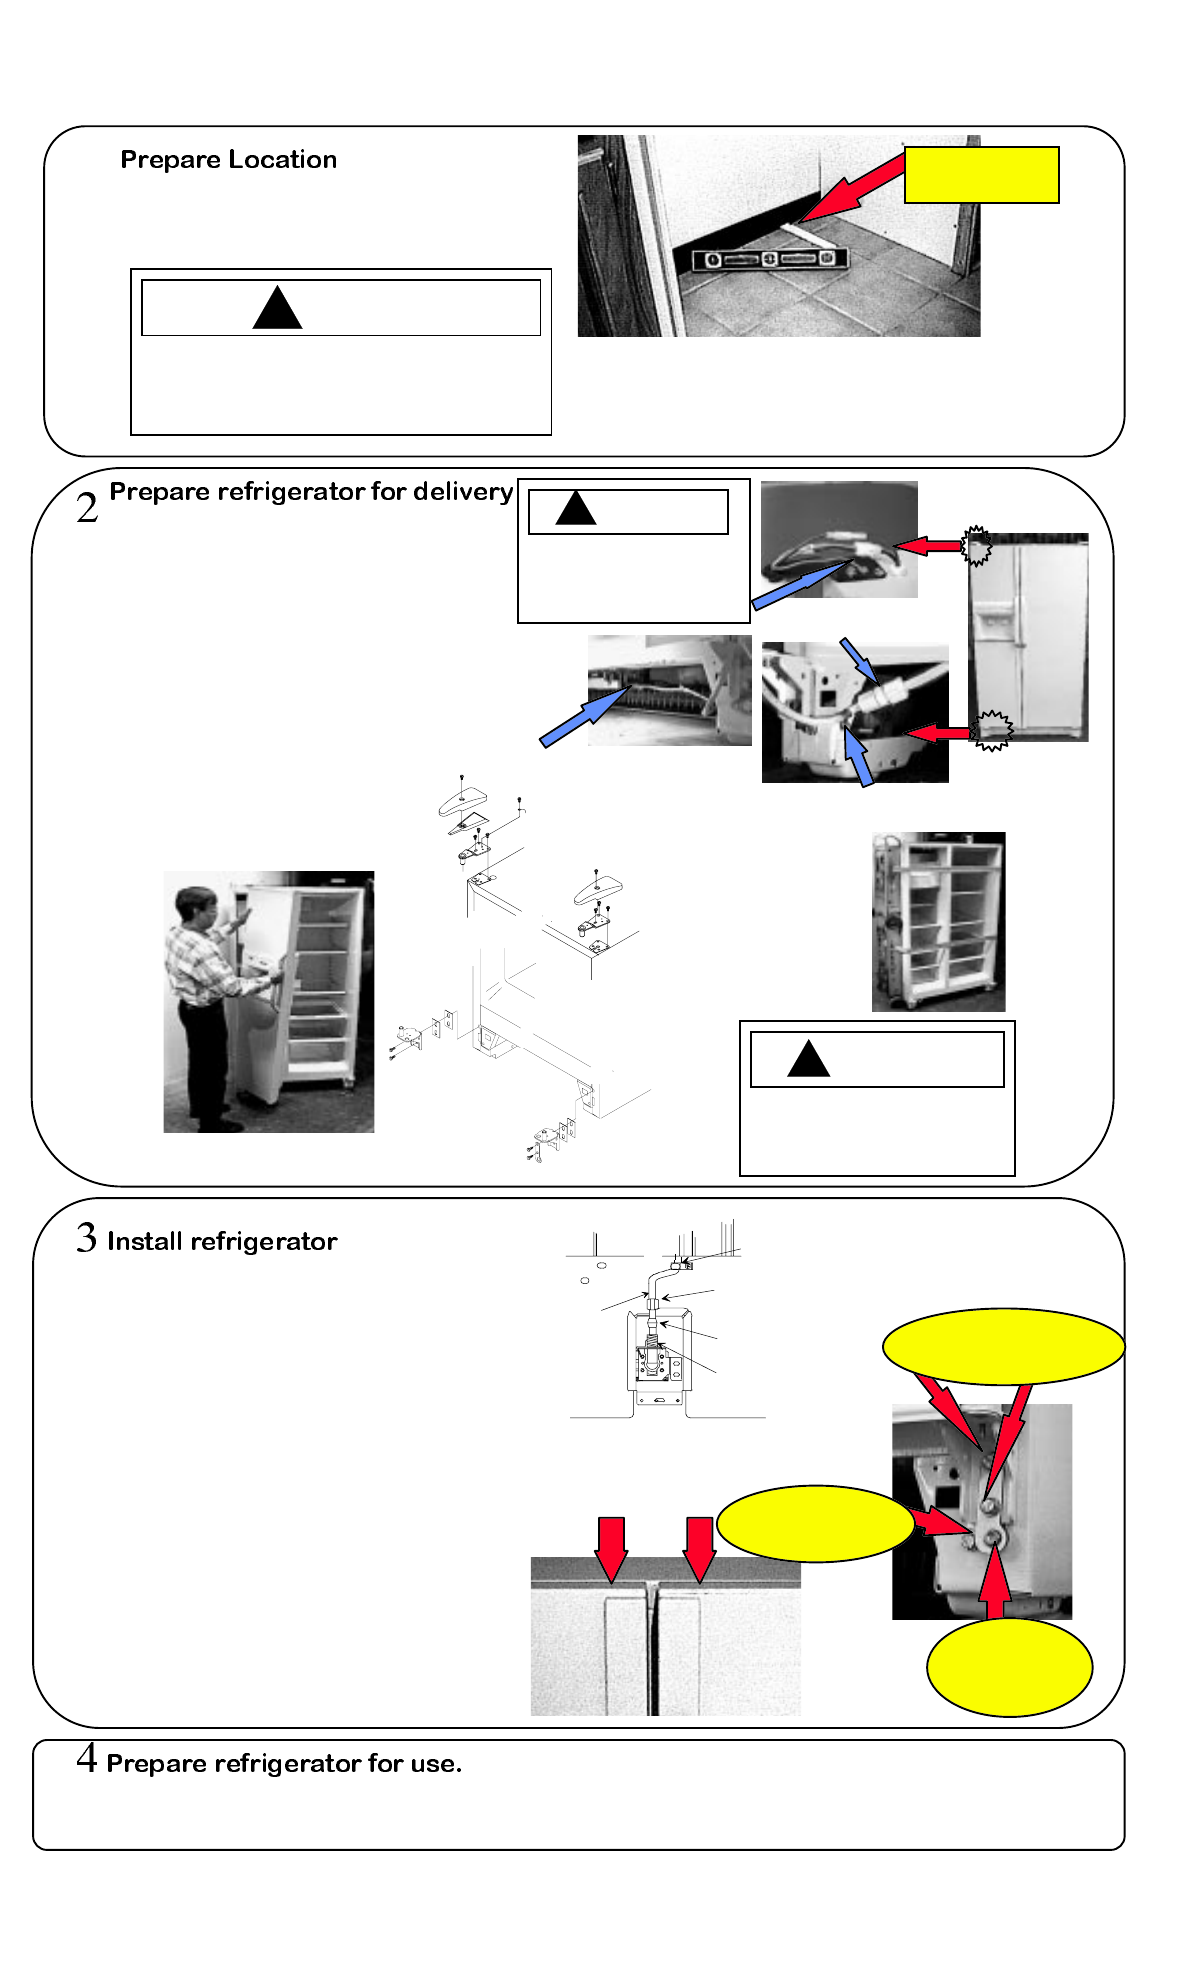
• Make sure cutout floor is level. If the floor is not
level it is necessary to shim the rear wheels onto
a piece of plywood or other shim material so
refrigerator is level.
Shim refrigerator
wheels as needed
Some installations may require door removal to
get the refrigerator into the home.
1. Remove toe grille.
2. Remove top hinge cover and top hinge.
Dispensing and Electronic Models
• Disconnect wire connectors.
Loosen the water tube clamp (A). Loosen the
water tube union nut (B). Pull the water tube
away from the union nut and through the tube
clamp.
• Unplug electrical connector from voltage box (C).
3. Remove doors.
Bottom
right
Bottom
left
4. Attach
refrigerator to
appliance cart.
!
CAUTION
To avoid floor and wall damage
protect walls and soft vinyl or other
flooring with masonite or other protective
material when moving the refrigerator.
1. Reinstall doors by performing section 2 in
reverse order.
2. Connect ice maker water supply line. (Refer to
Owner’s Manual)
3. Plug power cord into electrical receptacle.
4. Move refrigerator into final location.
!
To avoid electrical shock which
can cause severe personal
injury or death, green ground wire
must remain attached to hinge
.
CAUTION
5. Once refrigerator is located and stable, level
refrigerator by adjusting front, and rear (some
models) cabinet leveling adjustment screws.
6. Reconnect power from power source to electrical
receptacle.
7. Align doors.
• To align tops of doors loosen the 2 bottom
right side hinge screws. Turn cam to raise or
lower refrigerator door (Some models). (Refer
to label inside refrigerator compartment on
bottom mullion.)
• Tighten the 2 hinge screws.
Door alignment
adjustment cam
(some models)
cabinet
leveling
adjustment screw
8. Replace toe grille.
1. Remove all interior packaging material.
2. Clean interior and exterior of refrigerator.
3. Instruct consumer on controls and features.
Part No. 12123312 Printed in U.S.A.
Loosen hinge screws
2 turns counterclockwise
Top left
Top right
C
• Remove top hinges.
• Remove doors from bottom hinge.
• Remove bottom hinge.
!
WARNING
To avoid electrical shock which can cause severe
personal injury or death, disconnect power outlet
from main power supply before installing or
servicing refrigerator.
ALIGN
4. Verify power to refrigerator is connected.
"P" clamp
Copper
tubing
Brass nut
Brass sleeve
Water valve
inlet connection