


13
ASSEMBLING YOUR BREVILLE PRODUCT
BEFORE FIRST USE
Before first use remove all promotional stickers
and packaging material. Carefully unpack
the microwave oven and keep all the packing
material until all the parts of the microwave
oven have been found and the appliance
has been assembled. It is recommended to
keep all the packing material in a safe place
in case you wish to repack the product for
shipping purposes.
To remove any dust that may have
accumulated during packing, wash the
turntable roller and glass turntable in warm
soapy water, rinse in clean water then dry
thoroughly. Wipe the interior and exterior of
the microwave oven with a soft, damp cloth
then dry thoroughly.
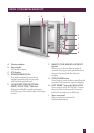
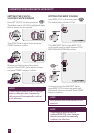
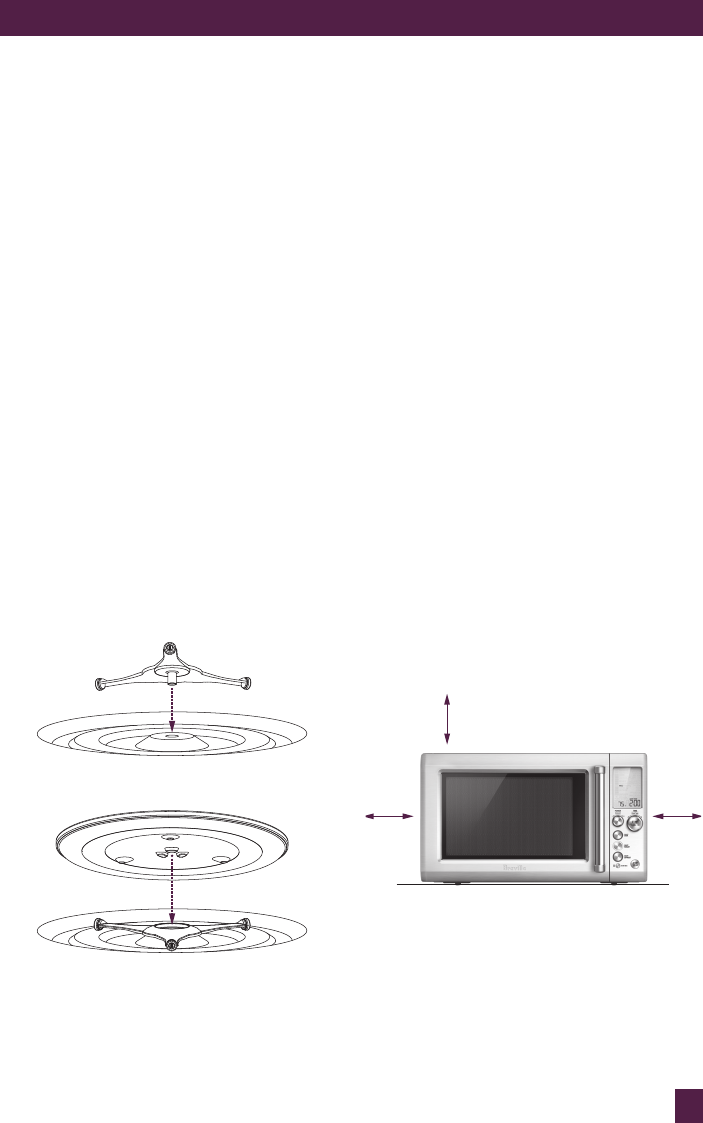
ASSEMBLING THE GLASS
TURNTABLE
1. Insert the turntable roller into position in
the indented space in the oven cavity base.
2. Place the glass turntable on top of the
turntable roller, matching the indents of
turntable roller at the center area.
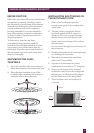
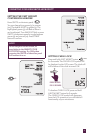
INSTALLATION AND TURNING ON
THE MICROWAVE OVEN
1. Select a level surface that provides
enough open space for the intake and/or
outlet vents.
2. The rear surface of appliance should
be placed against a wall. A minimum
clearance of 10cm is required between
the microwave and any adjacent walls.
• Leave a minimum clearance 10cm above
the microwave.
• Do not remove the legs from the bottom of
the microwave.
3. Blocking the intake and/or outlet openings
can damage the microwave.
4. Place the microwave as far away from
radios and TV as possible.
5. Operation of microwave may cause
interference to your radio or TV reception.
6. Plug your microwave into a standard
household outlet. Be sure the voltage and
the frequency is the same as the voltage
and the frequency on the rating label.
7. The microwave must not be placed in
a cabinet.
10cm
5cm
5cm