


BULLDOG [CABD2B]
4
Windows:
Once you’ve found your drive in Disk Management using the Find Your Drive Guide, take note of the Disk Number.
Right-click the white-horizontal rectangle next to the disk number of your drive.
Select the “Change Drive Letter or Path” option. Follow the Wizard carefully, and take note of the drive-letter assigned
to your Cavalry enclosure.
Look for your drive-letter in (My) Computer and begin using it as normal.
Mac OS X 10.4.0+:
Once you have found your disk in Disk Utility using the Find Your Drive Guide, click on the rst entry for your Cavalry
drive; the one closest to the top.
This will show you what le system the drive contains at the bottom of the Disk Utility window.
If the disk is unresponsive, you may need to perform “First Aid” and repair the le system of the disk. You may also
need to “Partition” it for use with Mac. Be careful, partitioning will erase your data!
If you still decide to partition your disk, refer to the Mac Initialization guide below.
A)
B)
C)
D)
A)
B)
C)
D)
First, look for your drive directly in (My) Computer or the Desktop. If it appears, you can begin using it as normal;
without further setup. If it does not show up, you will need to use the guides below according to your operating system:
Windows:
Once you’ve found your drive in Disk Management using the Find Your Drive Guide, right-click the disk number, and
then select the “Initialize” option.
Select “MBR/Primary Partition” and “NTFS” for XP, or for drives that are smaller than 1TB. For later versions of
Windows (7 and Vista), select “GPT/GUID” and “NTFS” for drives that are larger than 1 TB. Caution! GPT/GUID is
not compatible with XP!
Let Windows select a drive letter, as well as the rest of the options. Then press “Finish”. Double-check that Windows
assigned a drive-letter to your new drive(s). Otherwise, you will not see the drive(s) in (My) Computer.
Now, look for your drive-letter(s) in (My) Computer. Enjoy your new drive!
Mac OS X 10.4.0+:
Once you’ve found your drive in Disk Utility using the Find Your Drive Guide, click on the rst entry for your Cavalry
drive; the one closest to the top.
On the right, there will be a row listing operations you can perform on your drive. Select “Partition”.
Now select “Volume Format>Mac OS Extended (Journaled)”.
Click “Options” and select “Apple Partition Map”.
Click “Partition”.
Check for your drive in Computer and/or the Desktop. Enjoy your new drive!
A)
B)
C)
D)
A)
B)
C)
D)
E)
F)
3
STEP 3: INITIALIZING A BLANK HDD
2
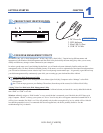
CHAPTERINSTALLATION GUIDE
3
STEP 3: INITIALIZING AN HDD WITH DATA