30
c. Testing Water Supply Lines
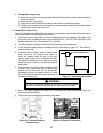
(1) Check all connections for proper tightness. Remove the side panel to inspect water connections
inside the steamer.
(2) Open the water supply valves.
(3) Check all lines and connections for leakage, both inside and outside the steamer.
(4) If Startup and Checkout will be performed next, leave the right side panel off; otherwise, replace
the side panel and secure it to the unit.
11. Install Electric Power Lines
The electrical supply must match the power requirements specified on the steamers rating plate and be
made in accordance with the following requirements:
a. The steamer must be grounded and have the electrical power lines installed in accordance with
local codes and/or the National Electric Code, ANSI/NFPA No. 70-LATEST EDITION (USA) or the
Canadian Electrical Code, CSA Standard C22.1 (Canada).
b. The wiring diagram is located on the back of the control-side removal side panel.
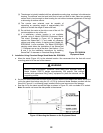
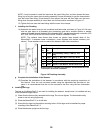
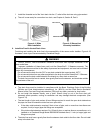
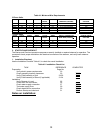
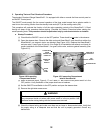
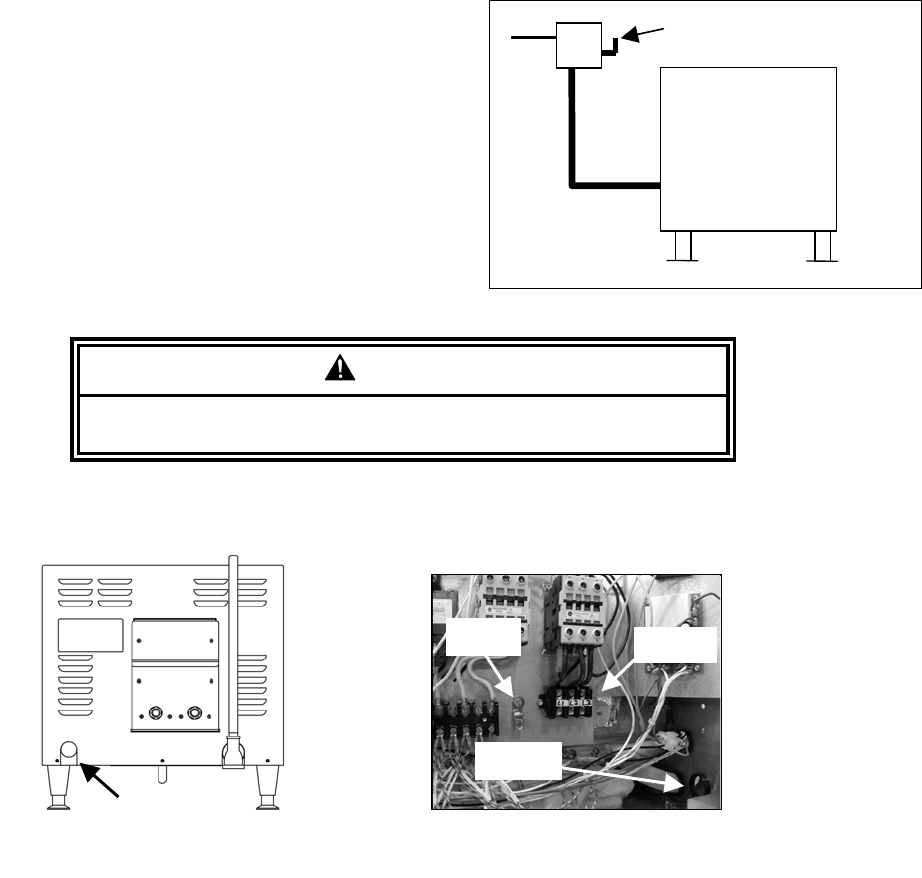
c. A main disconnect switch should be installed near the unit as shown in Figure 4-17. See Table 4-1
for electrical wire size.
d. A separate fuse or breaker sized to meet the line
amps required by the steamer (see Table 4-1)
should be installed either as part of the main
external power switch or in a separate fuse box.
Throughout the remainder of this manual the fused
disconnect switch is referred to as the main external
power switch.
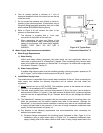
e. There should be a sufficient length of flexible conduit
or Power Cord (if local codes permit it) between the
steamer and the wall so the unit can be serviced.
Mechanically secure the flexible conduit or power
cord to the electrical access hole found at the rear of
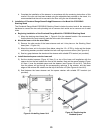
the steamer (Figure 4-18).
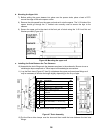
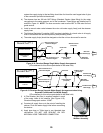
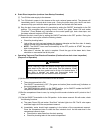
f. Refer to the wiring diagrams and Figure 4-19, and connect the wires to the terminal block and
ground connector accordingly.
g. The steamer must be electrically grounded by the installer.
MAIN POWER SWITCH
SteamChef
¥
3
Figure 4-17, Recommended Electrical
WARNING
Do not turn on the main power supply to this unit until the installation
has been completed and the steamer has been properly grounded.
Figure 4-19, Electrical Connections
GROUND
LUG
TERMINAL
BLOCK
WIRING
INLET
Figure 4-18, Customer Electrical
Connection Inlet
ELECTRICAL
CONDUIT INLET


