


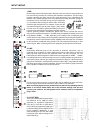

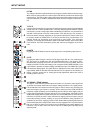

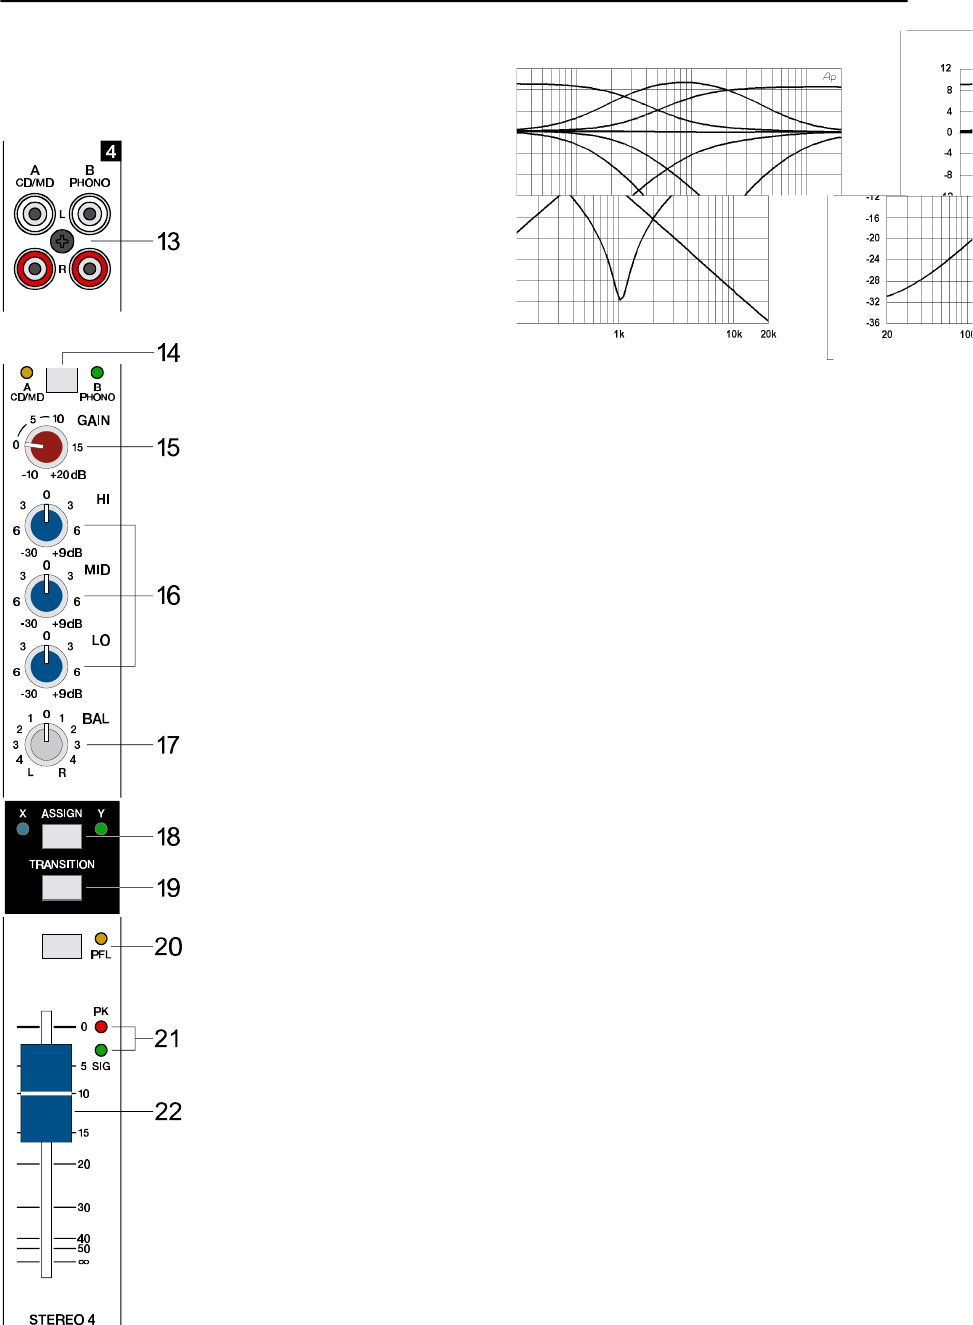
16. TONE CONTROL
The mixer’s tone control section allows
very differentiated and effective sha-
ping of the incoming audio signal within
miscellaneous frequency bands. Tur-
ning one of the tone controls to the right
enhances/amplifies the corresponding
frequency range while turning it to the
left lowers/attenuates the signal of the
specific frequency band. Before alte-
ring the sound, all tone controls should
be set to their neutral position; i.e. their
marker points straight up (detent posi-
tion). Please, keep in mind that the
stereo channel EQ’s are so called Kill-
EQ’s. Up to turning them to their -6dB marking the tone controls behave analogue to their
counterparts in the mono-channels. When turning the controls further, the “Kill”-function
becomes active and nearly totally attenuates the corresponding frequency band. The
“Kill”-function is meant to be used as special effect providing you with the opportunity to
produce mixes that are as creative and entertaining as possible. In this way and when using
the MP7 for Karaoke, the MID-control lets you effectively mute the lead vocals of the original
recording.
17. BAL
This control lets you determine the proportion between a stereo-channels left and right audio
levels. During the playback of pre-recorded music leaving the BAL-control as close as
possible to its center position is strongly recommended. Extreme settings for this control
should be left for effect purposes only.
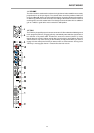
TRANSITION SECTION
The TRANSITION FADER in the master section allows conveniently cross-fading between
two channels. Assigning each stereo channel to one of the two fader-sides “X” or “Y” is
possible via corresponding switches.
18. ASSIGN X/Y
This switch allows assigning the corresponding channel’s audio signal to either side “X” or
“Y” of the TRANSITION FADER. The two LED’s next to the switch indicate the ASSIGN-
status (blue = X, green = Y, off = TRANSITION inactive).
19. TRANSITION
This switch allows assigning the corresponding channel to the TRANSITION FADER.
CAUTION: Whenever you want to listen to a channel’s audio signal via the master
while the corresponding TRANSITION-switch is set to “on”, you have to raise the
channel fader and slide the TRANSITION FADER to the side, which you have
previously selected using the ASSIGN X/Y (18) switch.
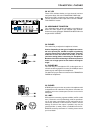
20. PFL
Engaging this button assigns a channel’s audio signal to the PFL bus. For monitoring the
PFL bus signal via headphones slide the PHONES MIX fader in the direction “PFL”.
Simultaneously assigning more than one channel to the PFL bus is possible, while the
individual channel’s volume fader setting is not recognized (PRE FADER LISTEN). This
allows you setting a signal’s correct level or making special EQ-adjustments without the
need of including it in the main mix. Once a PFL button is pressed, the master display
automatically enters PFL/PGM mode (yellow LED below the display lights). The right
LED-chain indicates the level of the master audio signal (PGM), while the left LED-chain
indicates the PFL bus signal level.
INPUT/STEREO
31