EN
8
8
INSTALLATION
Drilling the Support surface and Fitting the Hood
• The Hood can be fitted directly on the
lower surface of the Wall Units (650 mm
min. above the Cooker Top) using the snap-
on Side Supports.
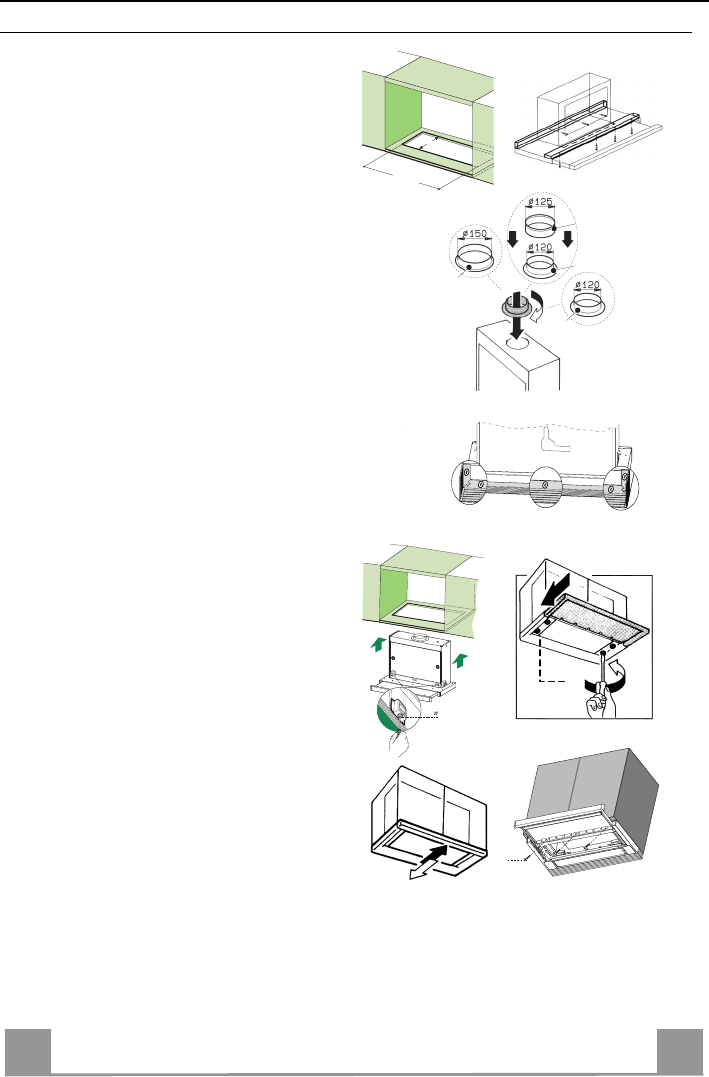
• Make an opening on the lower surface of
the Wall Unit, as indicated. (fig.1)
• Before carrying out the installation, the
wooden transportation protections screwed
on the visor and on the canopy body must
be removed. (fig.2)
• Choose the correct flange measure basing
on the air outlet diameter and insert it to the
upper air outlet opening. (fig.3)
• Screw the closing profile 20 onto the rear
part of the hood, using the screws 12f (2.9
x 9.5) provided. (fig.4)
• Open the sliding suction panel.
• Remove the metal grease filters one by one
after having disconnected the relative fas-
tening elements.
• Close the sliding suction panel again.
• Insert the Hood until the snap-on side sup-
ports click into place. (fig.5)
• Open the sliding suction panel.
• Lock in position by tightening the screws
Vf from underneath the Hood. (fig.5)
• If necessary, adjust the whole filter holder
unit and proceed as follows:
• Loosen the four adjustment screws Vr
and close the sliding panel again. (fig.6)
• Move the entire filter holder unit until it
is properly aligned with the wall unit.
(fig.7)
• Keeping the hood canopy still, remove
the sliding panel and lock the adjustment
screws again. (fig.6)
• The hood can now be fastened to the
wall unit using the four screws 12a (3.5
x 16) provided. (fig.8)
• Replace the metal grease filters.
• Close the sliding suction panel again.
523
162
1
2
9
10a
10a
10b
3
5
Vr
6
7
12a
8
4


