5
Installation
Your compactor has been designed to require minimum
space without loss of capacity whether free-standing or
built-in.
As shipped, the Compactor is only configured for built in
installations. This appliance can be converted from built-
in to free-standing with the use of Toe Kick Accessory
Kit Model ETC15TKH (sold separately). If additional cord
length is required for free-standing installation, remove
the cord clamp and wire tie on the back of the unit.
CAUTION: Failure to use Toe Kick Accessory Kit Model
ETC15TKH in a free-standing installation may cause the
compactor to be unstable during operation.
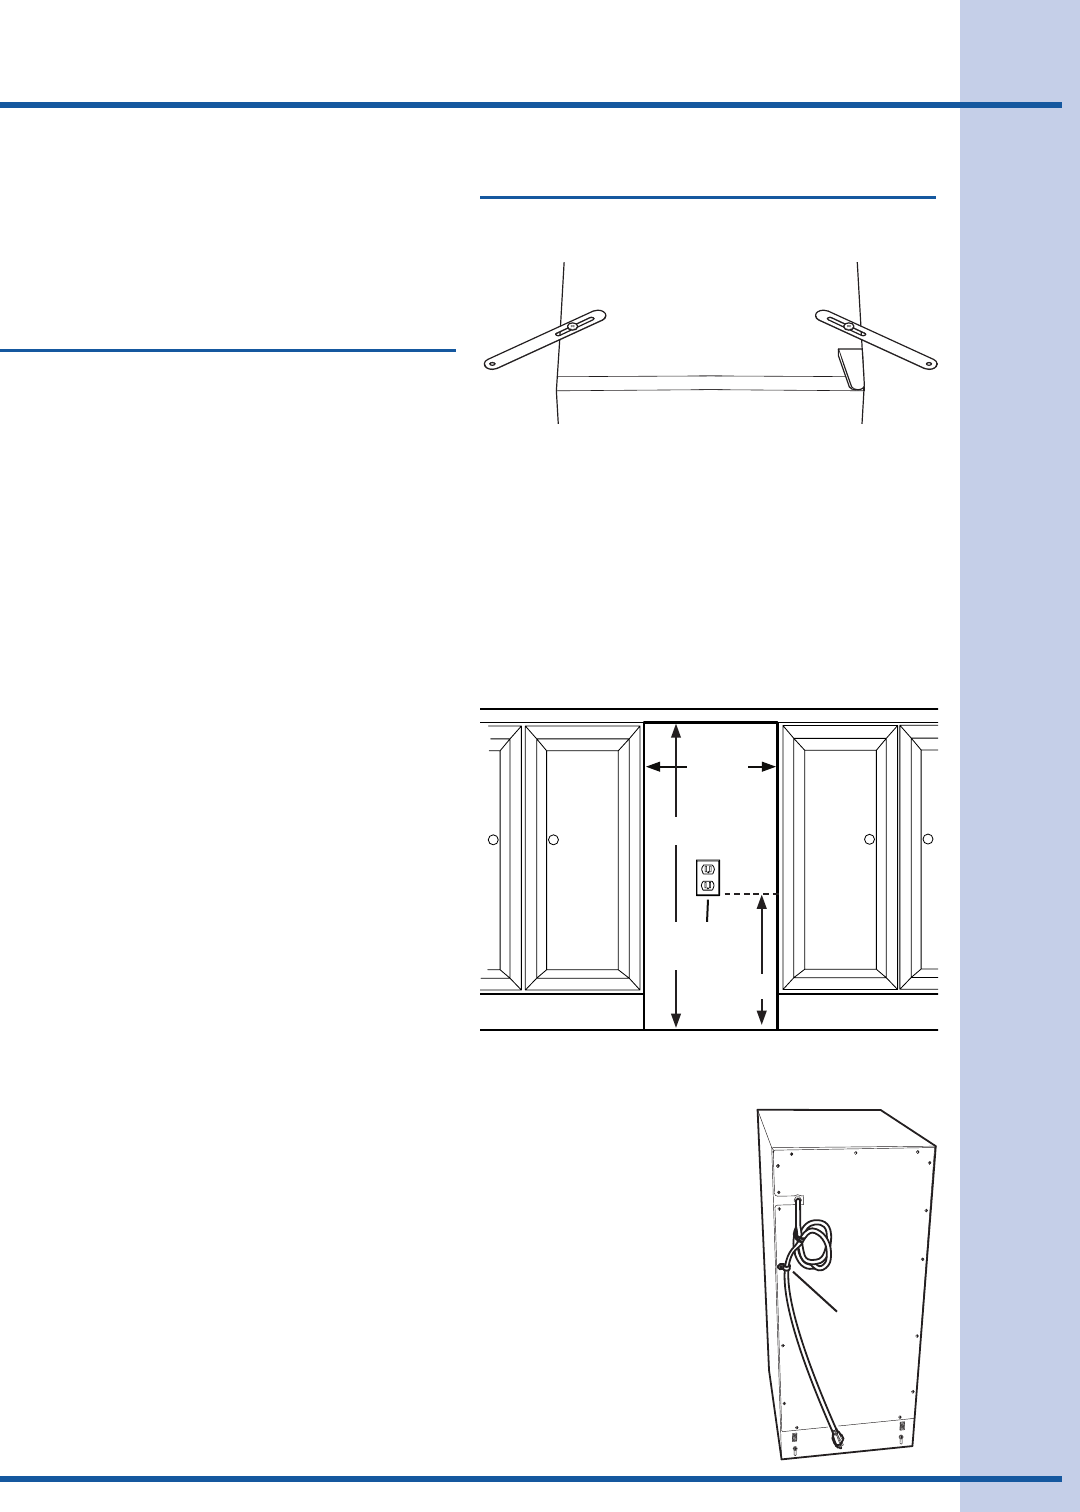
MOUNTING STRAPS
Two under-counter mounting straps are provided. Use
these straps to secure the compactor to the underside of
a countertop. Fasten the slotted end of the straps to the
compactor using the holes in the top of the compactor
cabinet as shown.
NOTE: When installing compactor under granite or solid-
surface countertops, bend the mounting straps so they
can be secured to the adjacent cabinetry.
UNDER-COUNTER OPENING
The compactor requires an under-counter opening 15-in.
wide, 34
5
/8-in. high, and 24-in. deep.
Plan to provide an electrical
outlet in the opening that
meets all applicable electrical
codes and requirements.
See “Grounding Instructions”
section on Page 3 for specific
information.
TOP OF
COMPACTOR
FRONT OF
COMPACTOR
CORD CLAMP
The compactor is equipped
with a 6-ft. long power cord.
Use the cord clamp to prevent
excess power cord from being
pinched beneath the cabinet
during installation or service.
CORD
CLAMP
Free Standing
Built-in Installations
Opening
15" Wide
34-1/2" High
22" Deep
15” W
34
5
/8” H
ELECTRICAL
OUTLET
24” d
12” MIN.
