


Finalize
installation
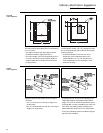
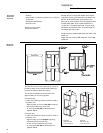
Caution:
Do not lift oven or
oven door by handle. Door glass
breakage or handle damage may
occur. Glass surface of door face
extends beyond door frame on
each side; be careful not to
impact this exposed glass.
Caution:
When door is
removed and hinge arms are at
stop position, do not bump or try
to move hinge arms. Hinges
could snap back, causing an
injury to hands or damage to
porcelain surface.
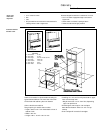
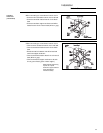
Remove oven door:
• Open the door to stop position.
• Grasp each side of door, lifting up and off the hinges.
• Cover hinges with toweling while working in oven
area.
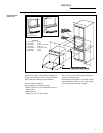
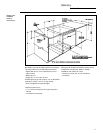
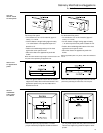
Install lower
oven trim
17
Installation
Built-In Ovens
Note:
The lower front trim is packed separately and should not be
attached until the oven is installed and secured to the installation
opening.
• Secure lower front trim to the front frame with 3
Phillips head screws provided.
• Secure trim to the side trim with 2 #20 torx head
screws as illustrated.
CAUTION
CAUTION
The bottom trim provides an opening for
cooling air to enter the cabinet. This
opening should never be blocked.
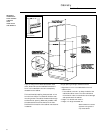
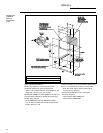
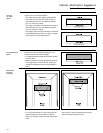
Route
cable
through
cutout
Note:
It is best that 2 people
perform this step: one to hold
oven in position and one to feed
cable.
CAUTION
CAUTION
Be sure you do not tip the unit forward
during installation or you may bend the
Lower Side Trim.
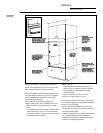
With oven in front of cabinet opening:
• Start feeding the flexible power cable through
cutout.
• Insert oven 3/4 way into cabinet opening. Continue
to feed flexible power cable while sliding oven into
place. This is to insure that the flexible power cable
will not get trapped between the back of the oven
and the back of the cabinet wall.