


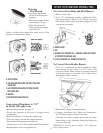


Lubrication
Lubricate the following with white lubricant:
• Oven door hinges (if they squeak).
• If burner control knobs stick, remove knobs and lubricate
around switch shaft with a small amount of white lube.
Replace knobs on switches.
IMPORTANT
If in doubt about how to handle service, call us at the
factory for help at: 1-800-295-8498.
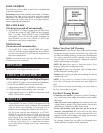
OPTIONAL – WARMER DRAWER
WARMING DRAWER CONTROLS
Setting the Temperature
Turn the warmer thermostat knob to the desired setting.
Temperatures can range from 80 degrees to 225 degrees.
WARNING: Food Poisoning Hazard! Do not let food sit
for more than one hour before or after cooking. Doing so
can result in food poisoning or sickness.
Moist-Dry Slide
The Moist-Dry slide allows you to open or close the vent
slots in the door. The MOIST setting holds moisture in,
while the DRY setting allows steam and moisture to escape
from the drawer.
To keep foods moist, put slide on MOIST, closing the
vents. Closing the vents will seal the drawer and keep hot
food soft and moist.
To keeps foods crisp, put slide on DRY, opening the vents.
Opening the vents releases moisture from the drawer and
keeps hot food crisp and dry.
The warming drawer is ideal for keeping hot cooked foods
at serving temperature. It may also be used for warming
breads and pastries.
Different types of food may be placed in the warming
drawer at the same time. For best results, do not hold food
longer than one hour. For small quantities or heat-sensitive
foods (such as eggs), do not hold longer than 30 minutes.
Food must be at serving temperature before being placed in
the warming drawer. (Breads, pastries, and fruit pies may
be heated from room temperature on the HI setting.)
Remove food from plastic bags and place in oven-safe
container. Cover foods with a lid or aluminum foil. Do
not cover with plastic wrap. Empty serving dishes and
dinner plates can be heated while the warming drawer is
preheating.
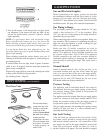
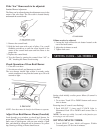
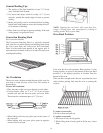
Storage or Warmer Drawer
Removal Instructions
• If the storage or warmer drawer is not removed or installed
properly, ball bearing race could be damaged.
• DO NOT REMOVE THE DRAWER UNLESS
ABSOLUTELY NECESSARY.
• If removing drawer, pull it out to the stop.
• Slide the black nylon tab on each side towards you.
• Slowly pull the drawer straight out of the ball bearing
track.
• When reinstalling the drawer, extend the ball bearing
track inside the stove fully towards you.
• It works best with 2 people, one on each side of the
drawer.
• Slowly push drawer straight into the track until it is fully
closed.
• Drawer should now open and close freely.
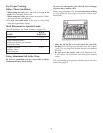
Proofing Bread
Proofing bread prepares dough for baking by activating the
yeast. Proofing twice is recommended.
To Proof:
1. Cover dough with lighly oiled wax paper and place
temperature safe bowl(s) directly on bottom of drawer.
2. Set control knob to 80°F
3. Place vent on MOIST setting.
4. Check dough periodically for proofing progress.
5. Verify doneness by pressing 2 fingers 1/2” (1.27 cm)
into dough. If indentation remains, the dough is ready.
For second proofing of dough, follow steps 1-4.
Warming Tips
• Do not line warming drawer with aluminum foil.
• Keep food covered if it was cooked with a cover on it.
• Use narrow strips of foil to shield pie crust edges from
further browning in drawer.
• Place tent-shaped foil loosely over meat or poultry to
prevent dryness and further browning while in the drawer.
• The use of aluminum foil to cover foods may cause
moisture to collect and drip into the drawer.
17