


5
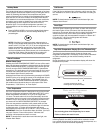
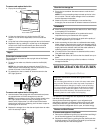
Classic, Overlay and Complete Series
To remove top grille:
1. Grasp both ends of the top grille.
2. Push the top grille straight up, then pull straight out. Lay the
grille on a soft surface.
To replace top grille:
1. Insert top grille hooks (located on the back of the top grille)
into the slots on the side trim.
2. Pull grille down slightly to lock into place.
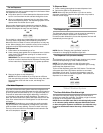
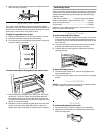
Architect
®
Series
To remove top grille:
1. Grasp both ends of louver panel. Push louver panel straight
up, then pull straight out. Lay the panel on a soft surface.
2. Grasp both ends of the top grille. Push top grille straight up,
then pull straight out. Lay the top grille on a soft surface.
To replace top grille:
1. Insert top grille hooks (located on the back of the top grille
panel) into the slots on side trim. Pull grille down slightly to
lock into place.
2. Insert louver panel hooks (located on the back of the louver
panel) into the slots on the side trim. Pull panel down slightly
to lock into place.
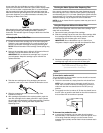
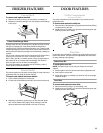
Pro Line
®
Series
To remove top grille:
1. Grasp both ends of the top grille.
2. Push the top grille straight up, and then pull straight out.
3. Disconnect the wiring harness from the back of the top grille.
4. Lay the grille on a soft surface.
5. Place wiring on the top of the cabinet, ensuring it is out of the
way of the doors.
To replace top grille:
1. Reattach wiring harness into grille back.
2. Insert top grille hooks into slots on the side trim. Pull grille
down slightly to lock into place.
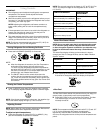
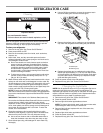
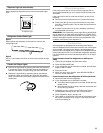
To Turn Power On or Off:
1. Remove top grille.
2. Press main power switch to the ON or OFF position.
3. Replace top grille.
IMPORTANT: Be sure the power switch is set to the ON position
after cleaning refrigerator or changing light bulbs.
A.Top grille
B.Cabinet side trims
A.Top grille
B.Cabinet side trim
C. Louver panel
B BA
AB
B
C
A. Power On/Off switch
A