


14
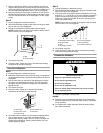
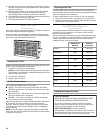
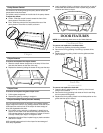
Ice Storage Bin
1. Wash the ice storage bin with mild soap and warm water.
2. Slide the ice storage bin under the ice maker, and push it
toward the back as far as it will go.
3. Lower the arm on the ice maker to the “On” position.
NOTE: It usually takes approximately 24 hours for the ice
maker to begin producing ice. You may notice the ice has an
“off-taste.” If so, discard the first three batches of ice
produced. After that the “off-taste” should be gone.
Ice Production Rate
The ice maker should produce approximately 8 to 12 batches
of ice in a 24-hour period. Allow 3 days to completely fill the
ice container.
To increase ice production, lower the freezer and refrigerator
temperature. See “Using the Controls.” Wait 24 hours
between adjustments.
Remember
The quality of your ice will be only as good as the quality of the
water supplied to your ice maker. Avoid connecting the ice
maker to a softened water supply. Water softener chemicals
(such as salt) can damage parts of the ice maker and lead to
poor quality ice. If a softened water supply cannot be avoided,
make sure the water softener is operating properly and is well
maintained.
Do not use anything sharp to break up the ice in the bin. This
can cause damage to the ice storage bin and the dispenser
mechanism.
Do not store anything on top of or in the ice maker or ice
storage bin.
REFRIGERATOR
FEATURES
NOTE: Your model may have some or all of these features.
Refrigerator Shelves
The shelves in your refrigerator are adjustable to match your
individual storage needs.
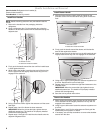
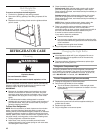
Glass Shelves
To remove a shelf:
1. Remove items from the shelf.
2. Slide the shelf straight out to the stop.
3. Depending on your model, lift the back or front of the shelf
past the stop. Pull the shelf out the rest of the way.
To replace a shelf:
1. Slide the back of the shelf into the track in the wall of the
cabinet.
2. Guide the front of the shelf into the shelf track. Be sure to slide
the shelf in all the way.
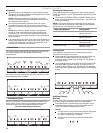
Fold Away Shelf (on some models)
To retract the fold away shelf:
Retract the fold away section of the shelf by holding the front
of the shelf with one hand and lifting up on the center front of
the shelf. Then push back and down on the shelf until it slides
beneath the back section of the shelf.
To replace the fold away shelf:
Replace the fold away section of the shelf by holding the front
of the shelf with one hand and pulling the center of the shelf
until the fold away section is returned to its full shelf position.
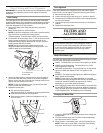
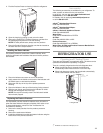
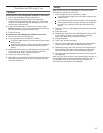
Pantry Drawer
Pantry Drawer
To remove and replace the pantry drawer:
1. Slide pantry drawer out to the stop.
2. Lift front of pantry drawer with one hand while supporting
bottom of drawer with other hand. Slide drawer out the rest of
the way.
3. Replace the drawer by sliding it back in fully past the drawer
stop.
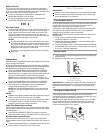
Pantry Drawer Cover
To remove and replace the pantry drawer cover:
1. Remove the pantry drawer.
2. From underneath, push up on the glass cover and pull it out.
3. Replace the pantry drawer cover by lowering it into place.
4. Replace the pantry drawer.
Important information to know about glass shelves
and covers:
Do not clean glass shelves or covers with warm water when
they are cold. Shelves and covers may break if exposed to
sudden temperature changes or impact, such as bumping.
Tempered glass is designed to shatter into many small,
pebble-size pieces. This is normal. Glass shelves and covers
are heavy. Use both hands when removing them to avoid
dropping.