


8
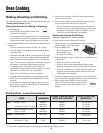
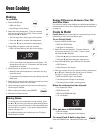
Oven Cooking
For additional baking, roasting and broiling times and tips, see
“Cooking Made Simple” booklet.
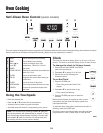
Setting the Controls For Baking or Roasting:
Baking, Roasting and Broiling
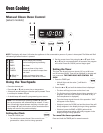
1. Press BAKE pad.
• 000 will light and the Bake indicator light
will flash in the display.
• If you press the BAKE pad and do not set an oven temp-
erature within 30 seconds, the program will automatically
cancel and the time of day will reappear in the display.
2. Press the ▲ or ▼ pad until the desired oven temperature is
displayed.
• The oven temperature can be set from 170° to 550° F.
• 350° will appear in the display when either ▲ or ▼ pad
is pressed once.
• Press and tap the ▲ or ▼ pad to change the oven temp-
erature by 5° increments or press and hold the ▲ or ▼
pad to change the oven temperature by 10° increments.
• 100° or the actual oven temperature, whichever is higher,
will appear in the display when the oven turns on.
• The temperature in the display will increase in 5°
increments until preset temperature is reached. A single
beep will sound when the oven is preheated.
• Allow 10 to 15 minutes for the oven to preheat.
• To recall preset temperature during preheat, press the
BAKE pad. The temperature will be displayed for three
seconds.
• To change oven temperature during cooking, press the
BAKE pad, then press the ▲ or ▼ pad until the desired
temperature is displayed.
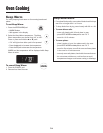
LOWER COMPARTMENT TOTAL COOK TIME
FOOD DONENESS BROILING POSITION* (MINUTES)**
Beef Steaks, 1” thick Medium Middle 14 - 20 min.
Well Done Middle 16 - 24 min.
Hamburger Patties, 3/4” thick Well Done Middle 16 - 24 min.
Pork Ham, precooked 1/2” slice Warm Middle 8 - 12 min.
Chops, 1” thick Well Done Middle 18 - 25 min.
Poultry Chicken Pieces Well Done Bottom (Lo Broil 450° F)
30-45 min.
Seafood Fish filets Flaky Middle 8 - 12 min.
Fish steaks, 1” thick Flaky Middle 10 - 15 min.
Broiling Chart - Lower Compartment
* Upper is the top position; middle is the lower position; bottom is the bottom of the broiler compartment (remove the rack).
** This chart is a suggested guide. The times may vary with the food being cooked.
Setting the Controls For Broiling:
(lower compartment - select models)
For best results, use pan designed for broiling.
1. Place broiler pan on recommended broiling compartment
position shown in the chart below.
2. Press the BROIL pad.
• SET will light and the
Broil indicator light
will flash in the display.
3. Press the ▲ pad to select Hi (high) broil or the ▼ pad to set
Lo (low) broil.
• Select Hi broil for normal broiling.
• Select Lo broil for low temperature broiling to avoid
excessive browning of longer cooking foods like poultry.
• If you do not select Hi or Lo Broil within 30 seconds, the
program will automatically cancel and the time of day
will reappear in the display.
4. Follow the suggested times in the broil chart below. Meat
should be turned once about halfway through cooking time.
5. After broiling, press CANCEL to turn the oven
off and remove the broiler pan from the oven.
The current time of day will reappear in the
display.
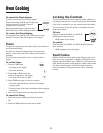
3. Place food in the oven. Check food for doneness at the
minimum cooking time.
4. At the end of cooking, press the CANCEL pad to turn the
oven off and remove the food from the oven.
• The oven features an automatic shut-off. If the oven is
left on for 12 hours it will automatically turn off and 000
will appear in the display. Press the CANCEL pad and
the time of day will reappear in the display.