


34
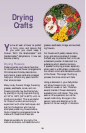
transparent and non penetrating so
that the surface of your dough-art is
strengthened with a hard protective
coating. The best choice is a polyure-
thane varnish.
Be sure to remove your ornaments from
your dehydrator and place in a well
ventilated area (preferably out-of-doors)
before applying varnish. Carefully place
objects (on aluminum foil making sure
that no foil covers the center hole or
outer ring vents) in dehydrator to dry.
CAUTION: Make sure your dehydrator
is placed in a room with adequate venti-
lation or an open window.
Place your ornaments in your dehydra-
tor. Set at the highest temperature
setting to speed drying. Most varnishes
will dry in an hour or so in your
dehydrator.
Repeat the varnishing process until a
minimum of 4 complete coats (both
sides of object) have been applied,
allowing ornament to dry thoroughly
between coats. Again, it is handy to use
your dehydrator for this process to
speed the drying time.
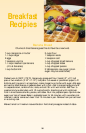
Bread and Glue
Ornaments
This recipe is a no-bake mixture that is
particularly adaptable to making small
delicate forms.
It is made with slices of white bread and
glue, resulting in a pliable mixture that
can be rolled very thin and formed into
fragile ornaments.
3 slices white bread
3 tbl. white glue
1 tsp. white shoe polish or acrylic
paint
1 tsp. glycerin
(available at the drugstore)
The shoe polish or acrylic paint add
whiteness to the dough. Glycerin
softens the dough to prevent it from
cracking and bubbling.
Remove crusts from bread and tear into
small pieces. Mix all ingredients togeth-
er and knead until mixture no longer
sticks to your fingers and has a smooth
texture. Kneading usually takes about
10 to 15 minutes. A few drops of glyc-
erin on your fingers keeps the dough
from sticking as you knead it.
Keep in a plastic bag while not working
with the dough to prevent it from dry-
ing out. Remove small bits of the dough
at a time, leaving remainder of dough in
the plastic bag. If the dough tends to
dry out, add a little more glue and
reknead.
Roll thin layers of dough between layers
of waxed paper. This dough is easier to
handle than salt dough and can be used
for more intricate objects.
Dough can be colored by using liquid
or paste food colors, watercolors, or liq-
uid temperas. Do not mix in acrylics
because they dry too fast. Acrylics can
be used to paint the dried objects.
Pieces of the dough can be colored
differently, simply by kneading in the
color to each different piece of dough.
Knead until dough is evenly colored
throughout.
Shape dough on pieces of aluminum
foil and follow directions for shaping
salt dough.
Dry shaped dough in the dehydrator at
the highest temperature setting. This
recipe does not need to be baked in the
oven. If air dried, objects may take from