24
Table no.2
Air adjusting (mm)
Gas type
Oven Grill
G20 2,5 25,5
G30 3,5 24
G31 3,5 24
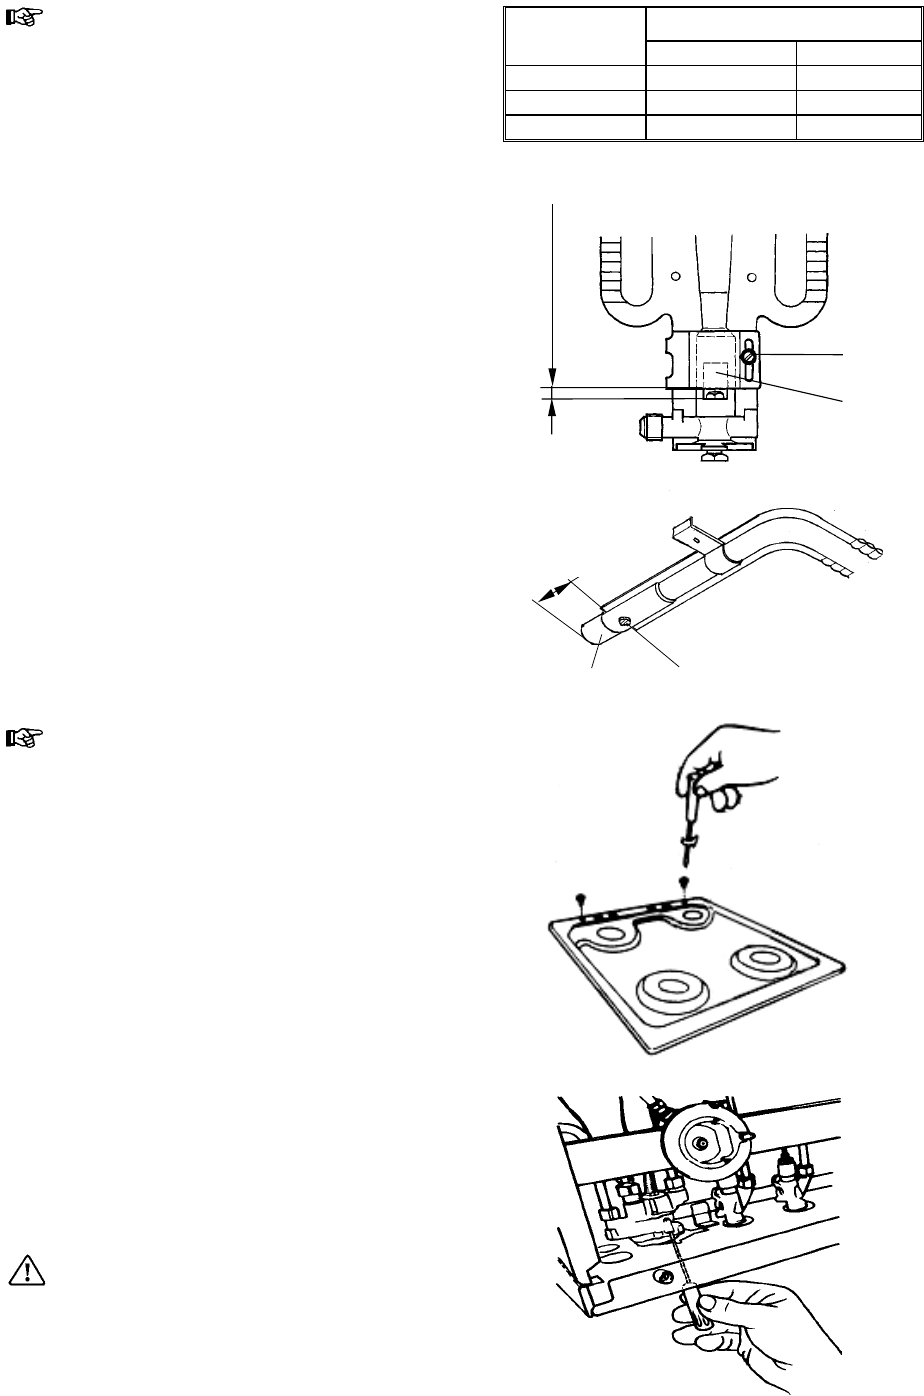
Flame adjustment
Oven burners
The burner is correctly adjusted when the flame
is stable, silent and goes out without any noise.
• When the flames are too short, the nozzle is
whistling or the flames have the tendency to
detach from the burner, it means that there is
too much air in the valve. If there is too much
air there is a risk that the flames will
extinguish.
• But, if the flames are too long, soft, lighting,
there is not enough air in the valves. These
flames discolour the bottom of pans.
• Loosen the screw M which fixing the air
adjuster A;
• Move the air adjuster A forward or backward
until achieving the right mixture (see table no.
2);
• Tighten the fixing screw M.
Grill burner
• Loosen the screw fixing the Venturi.
• Move the adjusting collar left or right until
achieving the correct flame picture (see table
no. 2).
• Tighten the fixing screw.
Adjustment of minimum level
Oven burner
• Remove the top pan support as well as the
burner caps and the burner crowns.
• Unscrew and remove the 2 top plate fixing
screws and remove the top plate.
• Light the burner knob on position 9 and leave
the oven door closed for about 10 min.
• Turn the knob slowly to position 1.
• Pull off the knob to adjust minimum flow.
• Unscrew or screw the by-pass screw (is it
above of tap shaft) until a regular small flame
is reached.
• For LPG screw completely the by-pass screw.
The flame shouldn’t extinguish when closing the
oven door.
Grill burner
The grill temperature cannot be adjusted. To
obtain a lower temperature or slower cooking
time the grill pan must be lowered away from the
flame.
AFTER COMPLETION OF ANY
REPAIRS, ADJUSTMENTS OR CONVERSION
THE STATUTORY SAFETY TESTS MUST BE
CARRIED OUT.
M
A
air adjusting
adjusting collar screw
opening


