For the optimal Home Café
®
coffee experience, use Folgers
®
or
Millstone
®
Home Café coffee pods. Using other coffee pods or using
loose grounds with a filter may not produce the same quality of
coffee and could potentially damage the Home Café
®
unit.
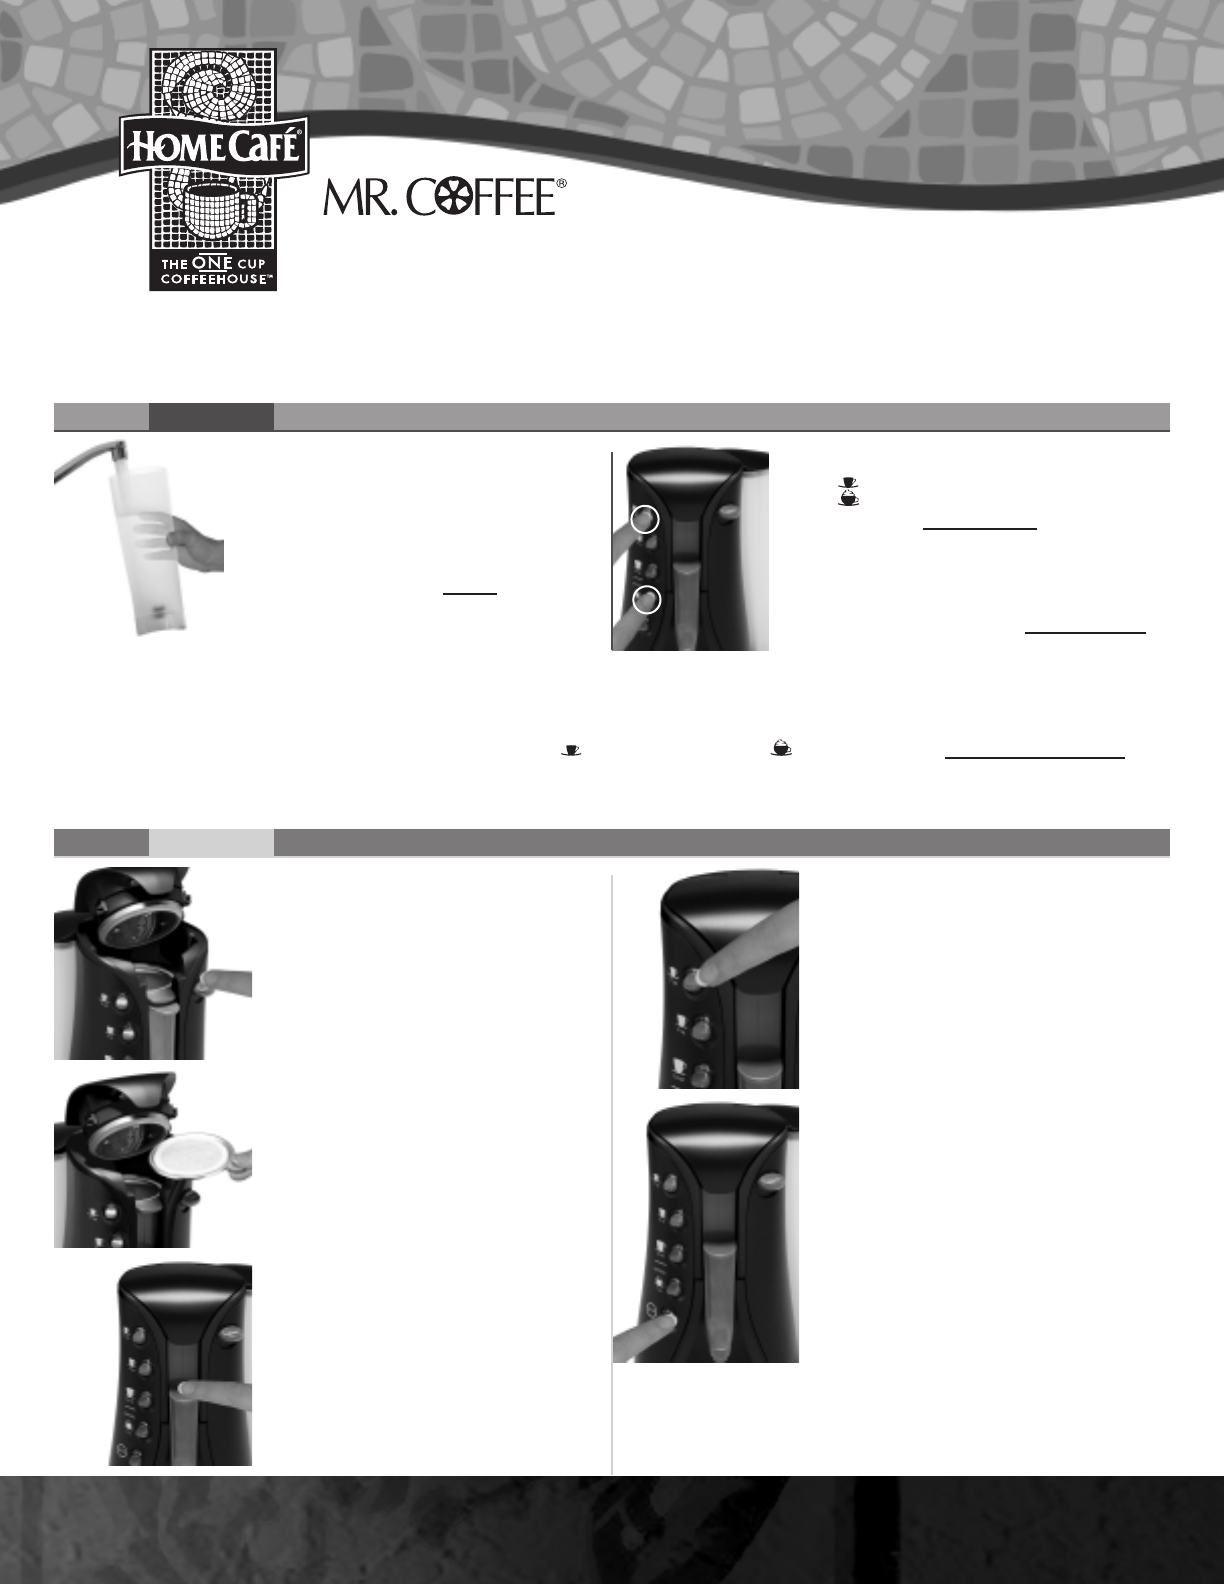
QuickStart INSTRUCTIONS
PLEASE read ALL of the instructions in the User Manual before using this appliance. You MUST PRIME the unit prior to the
very
FIRST BREW. Priming the unit causes the boiler to be filled with water. After this the brewer is ready for use.
NOTE: Priming the unit is only needed for the initial setup of the unit. Steaming and noise are nor
mal during this process.
1 Fill the Water Reservoir with water up to
the Max line.
(Picture 1)
2 Press the OPEN Button to open the
Coffeemaker Lid.
(Picture 2).
3 Read and remove the yellow insert.
4 Insert a Pod Holder without a pod and
close the lid.
5 Plug the unit in. The red STOP Indicator
Light will turn on.
6 Place a mug on the coffeemaker large
enough to hold 9oz. of water.
7 Press TOGETHER, at the SAME TIME, the
7 oz. Button (top button on left)
AND the
Specialty Button (4th button on left).
(Picture 1a) See note below.
The unit will begin brewing and the green
indicator light will remain lit while coffee
is brewing. When the brew is complete a
signal will sound.
8
After hearing the signal, wait one minute
until the red STOP light turns on again
before opening the Coffeemaker Lid.
Discard
the water from the mug and follow instructions
below.
Your unit is primed and now ready to brew.
TO PRIME:
TO BREW:
1 Remove and fill the Water Reservoir
with water and replace it in the unit.
(Picture 1) Plug the unit in.
2 Open the lid by pushing the Open
Button on the right front of the
appliance.
(Picture 2)
3 Always inser
t a coffee pod into the
pod holder with the flat side up.
(Picture 3) The unit comes with three
pod holders; Single, Double and
a Specialty holder for larger
cappuccino/latte pods.
4 Close the lid and push down
fir
mly to lock in place. Adjust the
Dispensing Spout by sliding it up
or down to fit your mug height.
(Picture 4)
5 Center your favorite cup or mug under the
Dispensing Spout. Remove the Drip Tray to
accommodate tall mugs.
6 Push the green Brew Button corresponding
to the amount of coffee you want to brew.
The Br
ew Button Indicator Light will blink
while the unit heats up.
(Picture 5)
7 The unit will begin brewing and the green
indicator light will r
emain lit while coffee
is br
ewing. When
the br
ew is complete a
signal will sound. After hearing the signal,
wait one minute until the r
ed STOP light
turns on again before opening the
Cof
feemaker Lid.
8 If you decide to stop the coffeemaker at
any time during the brew cycle press the
Stop Button.
(Picture 6)
1
2
1a
5
6
3
4
Go to home-cafe.com for more infor
mation or call 1-800-HOME CAFE.
©2005 Sunbeam Products, Inc., d/b/a Jarden Consumer Solutions. All rights reserved.
Home Cafe,
®
Folgers,
®
Millstone
®
and its logos are trademarks of The Procter & Gamble Company, Cincinnati, Ohio used under license by Sunbeam Products, Inc.
Distributed by Sunbeam Products, Inc., d/b/a Jar
den Consumer Solutions, Boca Raton, FL 33431
P
.N.
117568
PLEASE READ
NOTE: IF YOU DO NOT PRESS TOGETHER, AT THE SAME TIME, THE 7 OZ. BUTTON AND THE SPECIALITY BUTTON THE UNIT WILL SHUT OFF.
ALLOW THE UNIT TO COOL FOR UP TO 20 MINUTES. WHEN THE RED LIGHT COMES ON FOLLOW THE PRIMING INSTRUCTIONS ABOVE.
IF YOU HAVE ANY QUESTIONS OR PROBLEMS WITH YOUR MR. COFFEE
®
HOME CAFÉ
®
UNIT AFTER PRIMING, PLEASE CALL 1-800-MRCOFFEE.
Our consumer service representatives will be more than happy to assist you in priming your unit.


