


1
1
⁄2" (38mm)
13
3
⁄4"
(350mm)
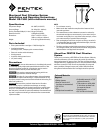
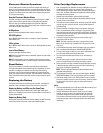
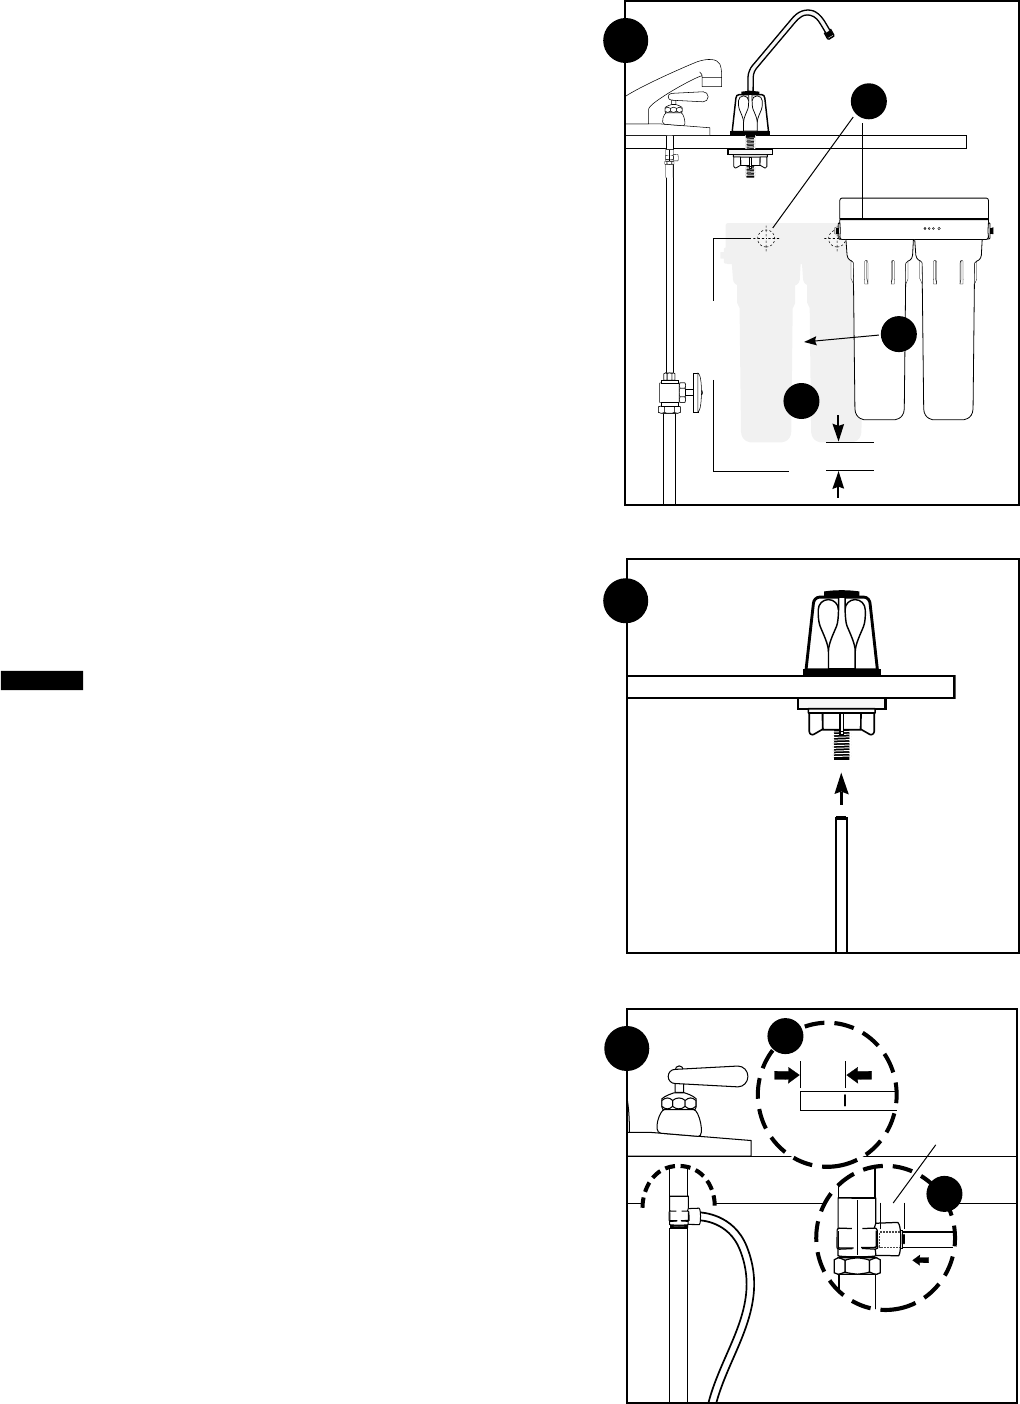
4. Mounting the System
(A) Center system between water supply adapter and drinking water faucet.
NOTE: Allow 1
1
⁄2" (38 mm) clearance below system for changing filter cartridges.
(B) Install mounting screws at least 13
3
⁄4" (350 mm) from cabinet floor and 4
1
⁄8" (124
mm) apart. Leave enough space (approximately 1/2" [13 mm]) between the head of
the screw and the wall to slip system onto screws.
(C) Place system over screws on wall and slide downwards to lock into place. Make
certain system is firmly attached to wall to prevent it from falling and possibly
being damaged.
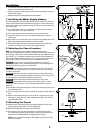
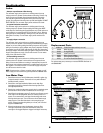
5. Connecting the Faucet
(A) Insert one end of the 1/4" tube, supplied in the installation kit, into the gray quick-
connect fitting collar located on the bottom of the threaded shaft of the faucet.
Push tubing into the fitting until you come to a hard stop.
CAUTION:
Do not bend or crimp tube when inserting.
(B) Gently pull back on the tube to ensure it is connected properly. If the tube comes
out of fitting, cut a small section of the tube off and reconnect.
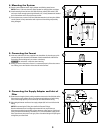
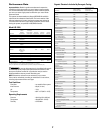
6. Connecting the Supply Adapter and Inlet of
Filter
(A) Determine the length of plastic tubing needed to connect the inlet (left) side of the
filter with the supply adapter. Be sure to allow enough tubing to prevent kinking
and cut the tubing squarely. Place a mark 5/8" from the end of the tubing.
(B) Wet tubing with water and insert into supply adapter 5/8" until mark is flush with
fitting.
NOTE: Disconnecting the Tubing from the Quick-Connect Fittings.
Routine maintenance and cartridge replacement will not require that you
disconnect the tubing from the filter system; however, tubing may be quickly and
easily removed from the fitting if necessary. First, turn off the water supply to the
filter. Open faucet, then press in the grey collar around the fitting while pulling the
tubing with your other hand.
3
4
5
5/8"
(16mm)
6
A
B
C
5/8"
(16mm)
A
B