


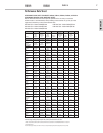
3
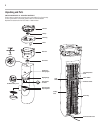
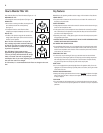
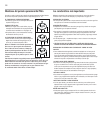
7. INSERT FILTER
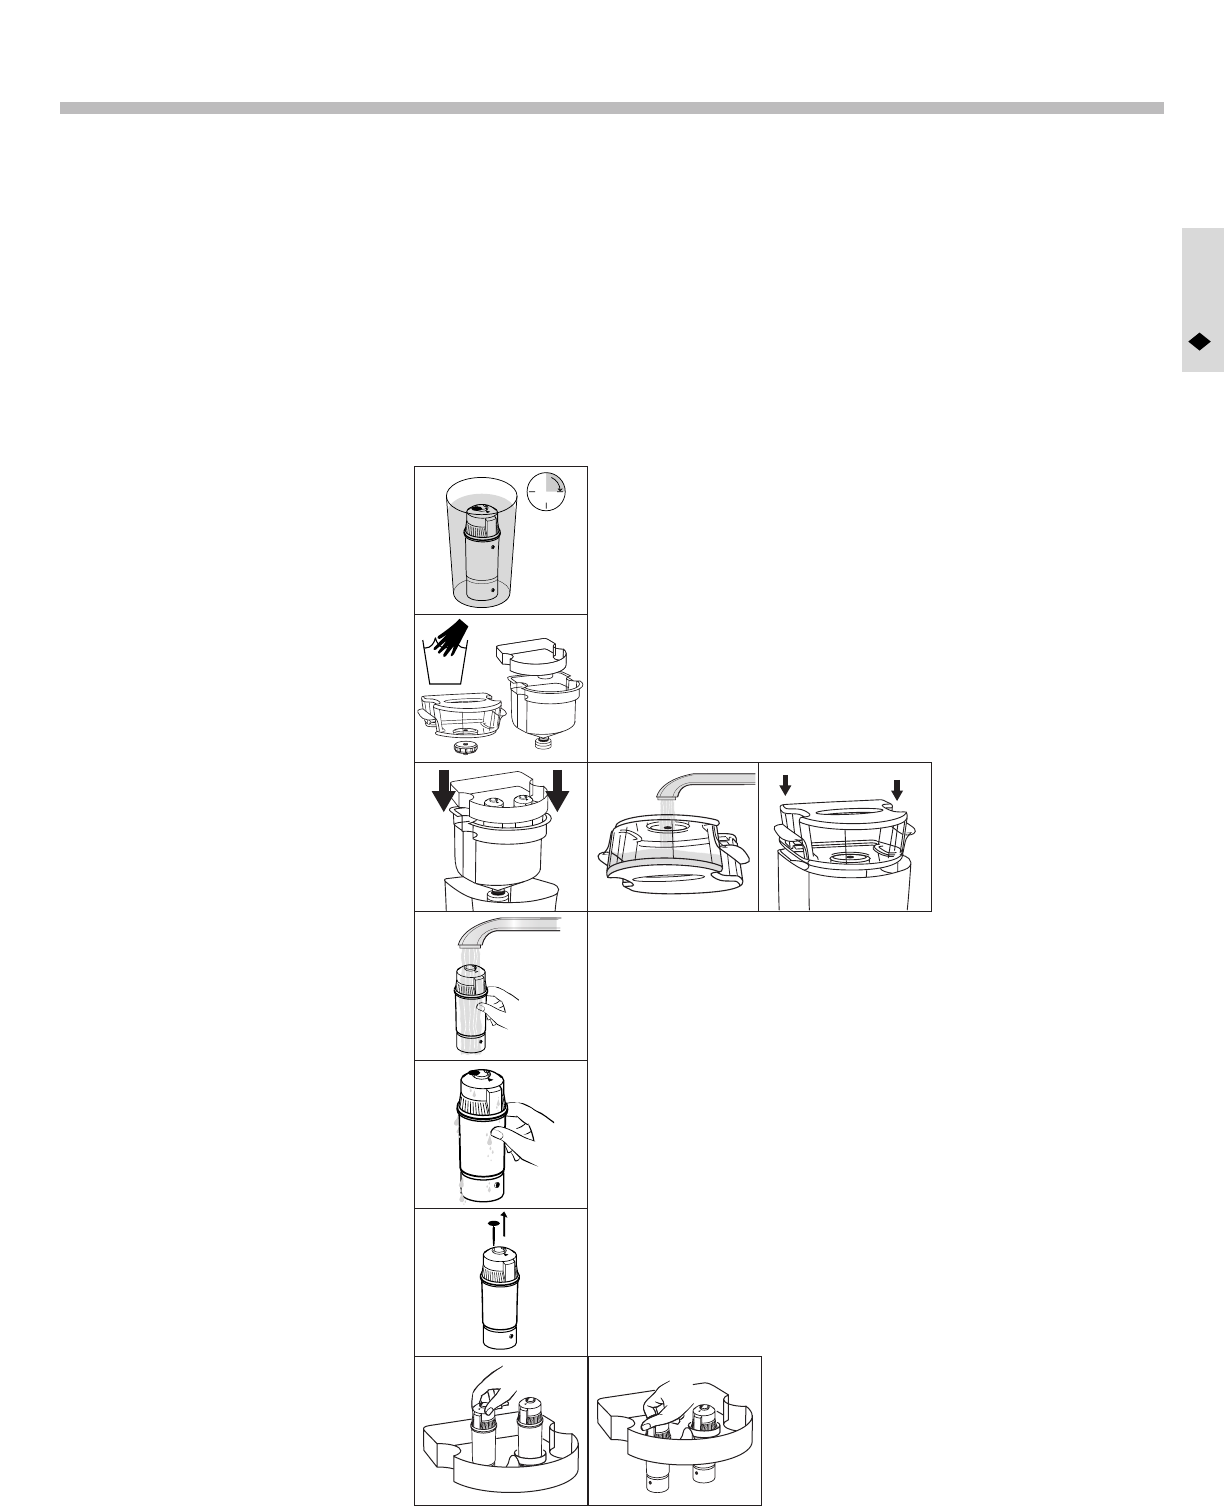
• Insert filter into filter tray by lining up the notches on the filter with the grooves in the
filter tray. (See figure 9A)
• When the filter has dropped into the grooves, twist the filter 45 degrees according to the
arrow on the filter tray to lock and seal the filter into place. Each filter goes into the filter
tray in an opposite direction. (See figure 9B)
• Filter should feel snug in filter tray.
• Do not try to force the filter in when it is not lined up as it may cause damage to the product.
8. FILL TANK
• Fill with cold water to the fill line and place on unit. (See figures 4 & 5)
9. ALLOW FILTRATION TO START
• Wait approximately 15 minutes.
• Plug in the power cord and turn on all 3 switches on the back of the cooler.
• Cold and hot water will be ready to serve when the heating and cooling lights above the
water dispensing push buttons shut off.
For the Filter Life Indicator to function, fill water to the fill line on top of the fill tank each
time it is refilled and allow the water to drain completely out of the filter tray before
refilling the fill tank.
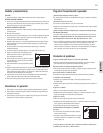
Setting Up Your Water Cooler
SETTING UP YOUR WATER COOLER
1. DO NOT PLUG UNIT IN
2. Allow the water cooler to stand in an upright position for at least 30 minutes before
turning on the power to allow all cooling refrigerant to settle.
3. Allow at least 1" of space for ventilation around the sides of the unit for air circulation
and electrical connections.
4. Select a firm level floor for system away from radiators.
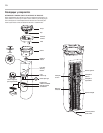
Pre-activating & Installing the Filter System
HOW TO INSTALL FILTERS:
Note: Moisture may be present in the filter bag. This is to
prevent the filter from drying out.
Important: Do not remove shipping retainer until cartridge
has been soaked and drained. Refer to Figure #5.
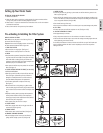
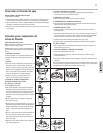
1. SOAK THE FILTERS
• Place each filter in a large glass. (See figure 1)
• Soak two filters in cold tap water for 15 minutes.
2. WASH
• Hand-wash all components (except filters): Reservoir, filter
tray, float valve, fill tank and fill tank cap with mild soapy
water while filter is soaking. (See figure 2) Rinse each
component with water. Note: Do not place components in
dishwasher, they are not dishwasher safe.
• Insert reservoir and filter tray into product. Do not install
filters. (See figure 3)
3. FLUSH SYSTEM WITHOUT FILTERS (1st Use Only)
• USE COLD WATER ONLY.
• Open fill cap and fill the fill tank to the fill line with cold
water. (See figure 4) Close fill cap firmly. If fill tank is
damaged or cracked, discontinue use and contact our
Consumer Relations Department for replacement.
• Turn fill tank upside down and place on filter tray.
(See figure 5)
• Remove water from unit by placing a 3-gallon bucket
under the drain plug. Unscrew drain plug to release water
into the bucket. Caution-water could be hot. Replace drain
plug.
• Dispense remaining water by pressing cold temperature
button (marked with blue waves), room temperature
button (gray waves) and hot temperature water (marked
with red waves) into a large glass.
• Flush system twice, then move on to step 4.
4. FLUSH FILTERS
• Hold filters upright under cold running tap water for 10
seconds to flush. (See figure 6)
5. DRAIN FILTERS
• Allow excess water to drain from filters. (See figure 7)
6. REMOVE SHIPPING RETAINER
• Remove shipping retainer from top of each filter by
pulling retainer straight up and out. (See figure 8)
ENGLISH
1
ENGLISH
1
12
1
2
7
8
9A 9B
4 53
6