12
Troubleshooting
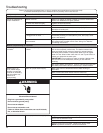
Electrical Shock Hazard
Plug into a grounded 3 prong outlet.
Do not remove ground prong.
Do not use an adapter.
Do not use an extension cord.
Failure to follow these instructions can result in death,
re, or electrical shock.
WARNING
If you experience Possible Causes Solution
Water Leaks
Check the following for
proper installation:
Washer not level. Water may splash off basket if washer is not level. Check that
load is not unbalanced or tightly packed.
Fill hoses not attached tightly. Tighten ll-hose connection.
Fill hose washers. Make sure all four ll hose at washers are properly seated.
Drain hose connection. Pull drain hose from washer cabinet and properly secure it to
drainpipe or laundry tub.
Do not place tape over drain opening.
Check household plumbing for leaks
or clogged sink or drain.
Water can back up out of a clogged sink or drainpipe. Check all
household plumbing for leaks (laundry tubs, drain pipe, water
pipes, and faucets.)
Washer not loaded as
recommended.
Improper loading can cause basket to be out of alignment
and cause water to splash off tub. See “Using Your Washer”
for loading instructions.
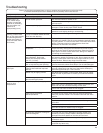
Washer not performing as expected
Not enough water
in washer
Load not completely covered
in water.
This is normal operation for an HE low-water washer. The load
will not be completely under water. The washer senses load
sizes and adds correct amount of water for optimal cleaning.
Use Bulky Items/Sheets or Deep Water Wash cycle for higher
water ll. See “What’s New under the Lid” and “Cycle Guide” to
match your load with the best cycle.
IMPORTANT: Do not add more water to washer. Adding water
lifts the items off the washplate, resulting in less effective
cleaning.
Run Clean Washer with affresh
®
cycle to optimize the water level
and wash performance due to soil build-up in washer basket.
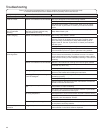
Washer won’t run
or ll, washer stops
working or wash light
remains on (indicating
that the washer was
unable to ll
appropriately)
Check for proper water supply. Both hoses must be attached and have water owing to
inlet valve.
Both hot and cold water faucets must be turned on.
Check that inlet valve screens have not become clogged.
Check for any kinks in inlet hoses, which can restrict water ow.
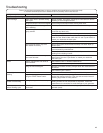
First try the solutions suggested here or visit our website at www.whirlpool.com/product_help -
In Canada www.whirlpool.ca for assistance and to possibly avoid a service call.
Check proper electrical supply. Plug power cord into a grounded 3 prong outlet.
Do not use an extension cord.
Ensure there is power to outlet.
Reset a tripped circuit breaker. Replace any blown fuses.
NOTE: If problems continue, contact an electrician.


