


6
Adjusting Surface Burner Flame
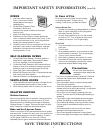
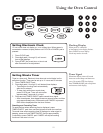
Placing burner caps
Burner cap must be correctly seated on the burner base for proper operation
of the burner. Verify cap is properly aligned and leveled by moving the burner
cap around on burner base while rangetop is cool.
The cap should not be loose.
The pegs in the burner base should fit into the recess on the underside
of burner cap.
Cap should be the correct size for each burner base.
Cap must be clean and dry for proper ignition.
Place grate over cap and burner base once cap is properly placed.
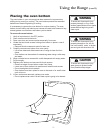
Open
Close
EXUQHUNQRE
SLYRWSRLQW
RULILFHKRRG
DLUVKXWWHU
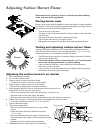
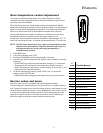
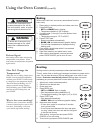
Testing and adjusting surface burner flame
A properly adjusted surface burner on a high setting has flames that are
clean and blue with a distinct inner cone approximately
1
/4" to
1
/2" inch long.
Some yellow flame is normal when burning LP/Propane.
See Delayed Ignition section in Important Safety Information for safety
warnings and procedures.
Flames will not be a uniform size around the cap. This distribution
around the cap and grate allows for optimal heating.
If burner flame is blowing or noisy, airflow should be reduced to
the burner (close air shutter).
If burner flame is weak and does not hold its shape, airflow should be
increased to the burner (open air shutter).
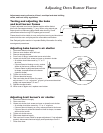
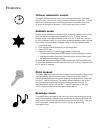
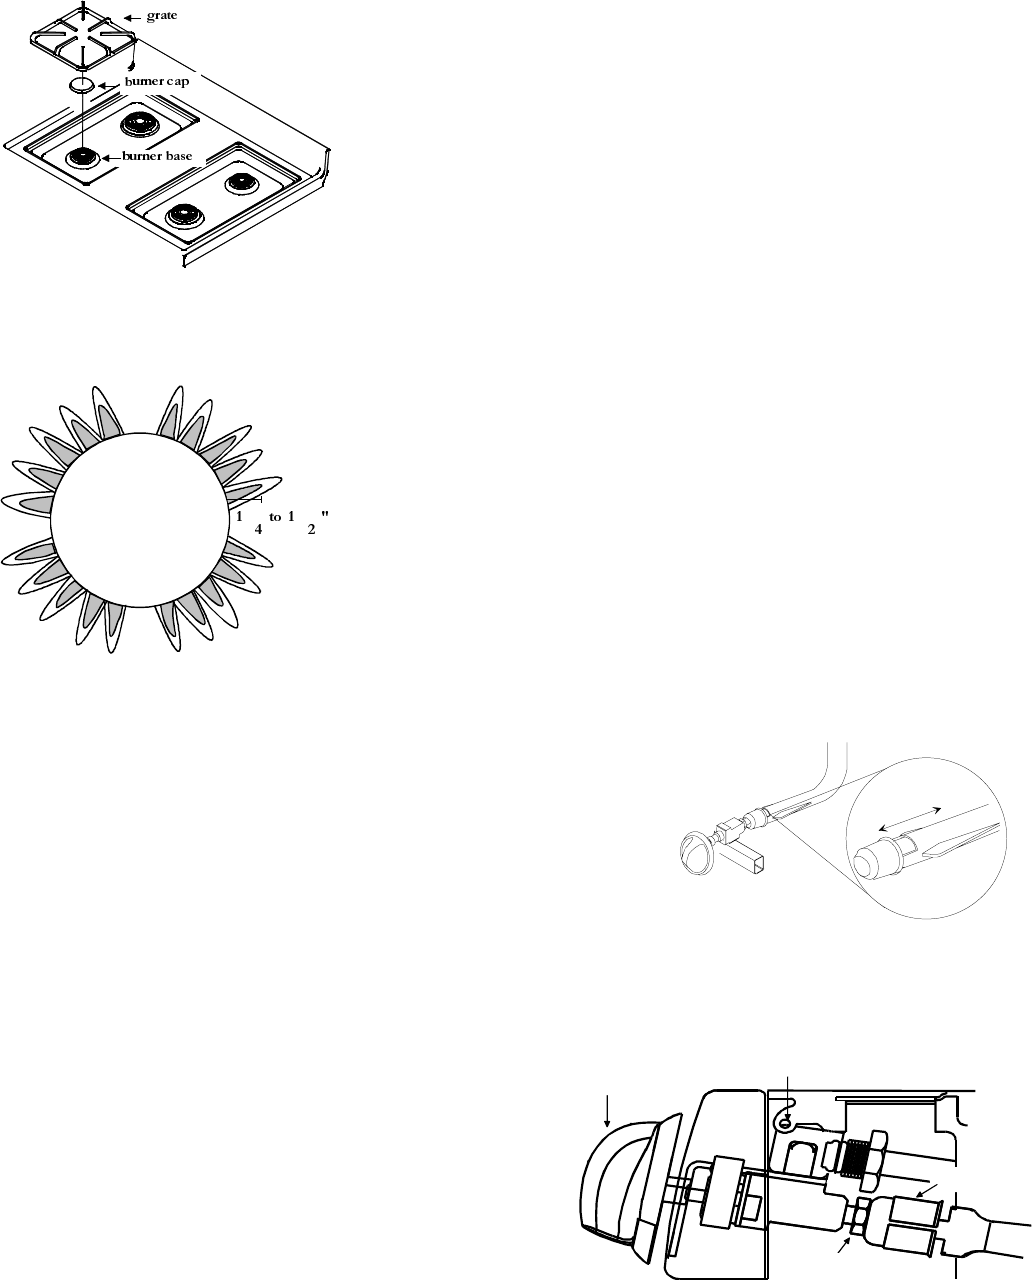
Adjusting the surface burners air shutter
1. Disconnect electrical supply
2. Turn off all surface burners.
3. Remove burner control knobs from range.
2 screws are visible on the burner control panel.
4. Remove both screws from burner control panel.
Panel will drop slightly after screws are removed.
5. While grasping bottom of burner control panel, gently lift and pull out
panel until it is clear of burner valve stems.
After burner control panel clears the valve stems, continue to roll
the panel until free from the range. Set aside.
Both gas valve and orifice hood are visible after burner control panel is removed.
6. Slide air shutter open or closed depending on the appearance of burner flame.
Air shutter should be moved by
1
/16" to
1
/8" at a time.
7. Connect electrical supply.
8. Check flame adjustment.
Slide knob onto valve shaft and turn to lite surface
burner.
Flame should be blue with a distinct inner cone
1
/4" to
1
/2" long.
Shut off burner after flame is viewed. Remove knob.
Disconnect electrical supply if further adjustments are
needed.
Repeat air shutter adjustments as necessary.
9. Reassemble burner control panel in reverse order.
%XUQHU
Adjustments must conform to all local, municipal and state building
codes, and local utility regulations.