


9
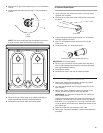
3. If range is not level, pull range forward until rear leveling leg is
removed from the anti-tip bracket. Use
3
⁄8" drive ratchet and
slip-joint pliers to adjust leveling legs up or down until range is
level.
4. Push range back into position.
5. Check that rear leveling leg is engaged in anti-tip bracket.
NOTE: Range must be level for satisfactory baking performance.
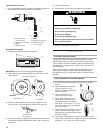
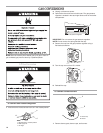
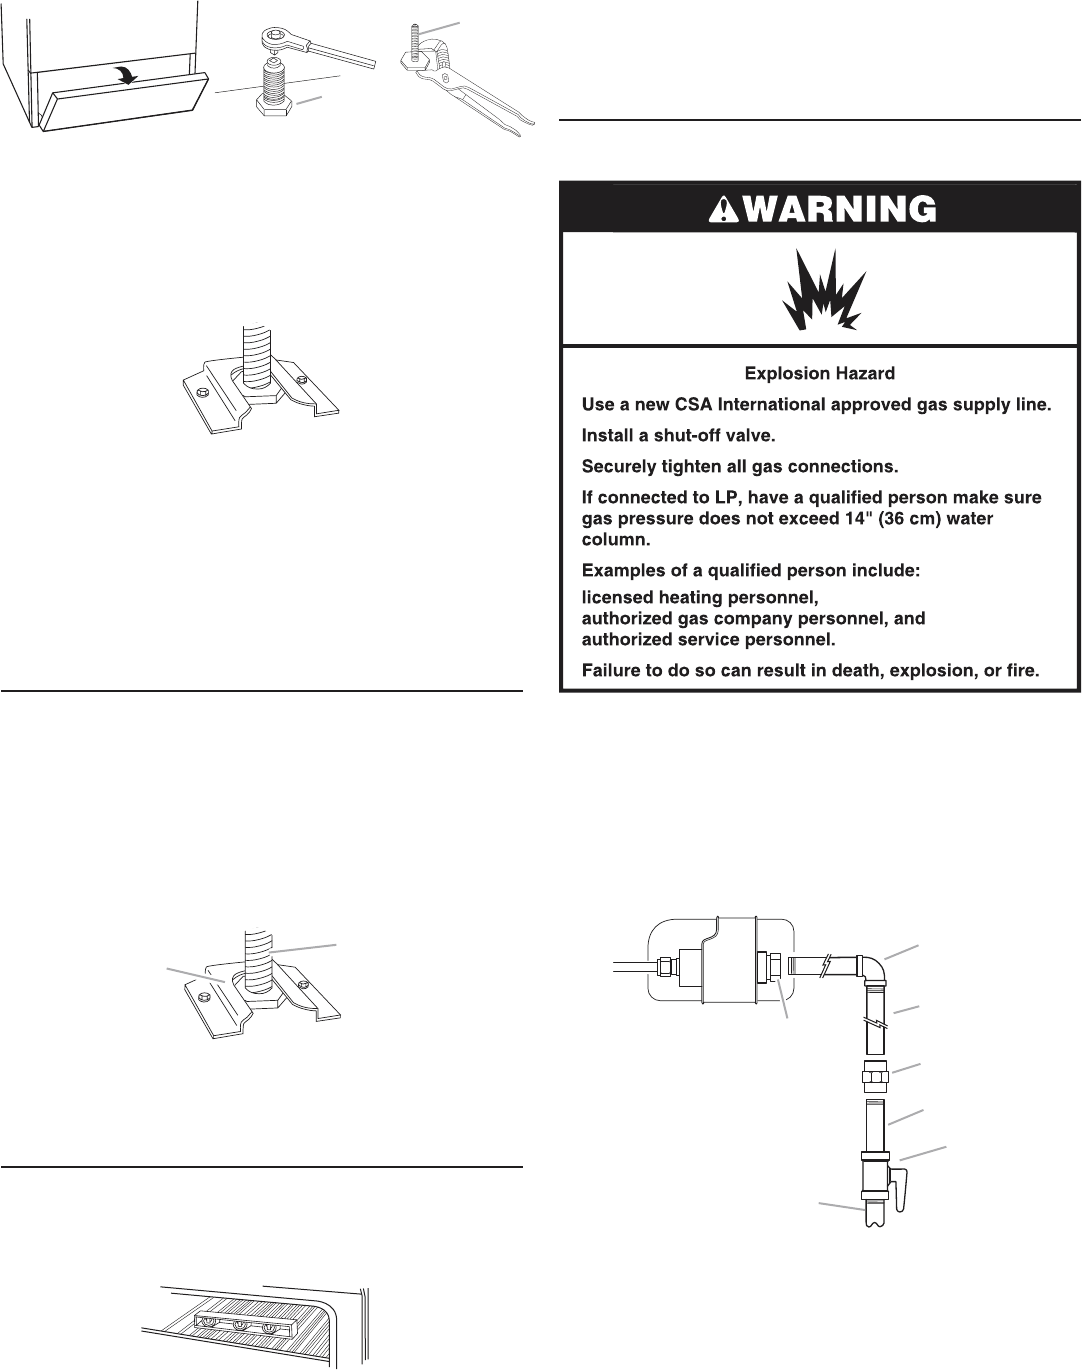
Make Gas Connection
Typical rigid pipe connection
A combination of pipe fittings must be used to connect the range
to the existing gas line. Your connection may be different;
according to the supply line type, size, and location.
1. Apply pipe joint compound made for use with LP gas to all
pipe thread connections.
2. Using a pipe wrench to tighten, connect the gas supply to the
range.
9. Open the broiler door. Use a
3
⁄8" drive ratchet to lower the rear
leveling legs one-half turn. Use slip-joint pliers to lower the
front leveling legs one-half turn.
10. Adjust the leveling legs to the correct height. Leveling legs
can be loosened to add up to a maximum of 1" (2.5 cm). A
minimum of
3
⁄16" (0.5 cm) is needed to engage the anti-tip
bracket.
11. Move the range into final location making sure the rear
leveling leg slides into the anti-tip bracket.
12. If installing the range in a mobile home, you must secure the
range to the floor. The method of securing the range must
conform to the Manufactured Home Construction and Safety
Standard, Title 24 CFR, Part 3280 (formerly the Federal
Standard for Mobile Home Construction and Safety, Title 24,
HUD Part 280). When such standard is not applicable, use the
Standard for Manufactured Home Installations, ANSI
A225.1/NFPA 501A or with local codes.
13. Continue installing your range using the following installation
instructions.
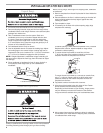
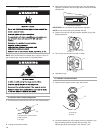
Verify Anti-Tip Bracket Location
1. Make sure the anti-tip bracket is installed:
■ Look for the anti-tip bracket securely attached to the floor.
■ Slide the range back so the rear range foot is under the
anti-tip bracket.
2. If installing the range in a mobile home, you must secure the
range to the floor. Any method of securing the range is
adequate as long as it conforms to the standards in the
“Location Requirements” section.
3. Continue installing your range using the following installation
instructions.
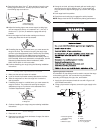
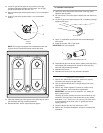
Level Range
1. Place rack in oven.
2. Place level on rack and check levelness of range, first side to
side; then front to back.
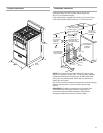
A
B
A. Rear leveling leg
B. Front leveling leg
B
A
G
E
F
C
D
A
B
A. Pressure regulator
connection fitting
B. 90˚ elbow
C. Black iron pipe
D. Union
E. Nipple
F. Manual shutoff valve
G.
1
⁄2" to
3
⁄4" gas pipe
A. Anti-tip bracket
B. Range foot