


5
CAUTION
!
Observe the following to avoid property damage:
• Confirm water pressure to water valve is between 20
and 100 pounds per square inch.
• Copper supply tubing must be routed where the
temperature is 55°F (13°C) or higher to prevent
freeze-ups.
• Start adaptor fitting and nuts by hand to avoid cross
threading. Tighten adaptor fitting and nuts with
pliers and wrenches. Do not overtighten.
• Check for water leaks and correct if necessary
before returning refrigerator to normal location, and
24 hours after connecting.
Important
• Before connecting water supply, contact a plumber to
connect copper tubing to household plumbing in
compliance with local codes and ordinances.
• DO NOT use self-piercing type or
3
/16" saddle valves!
Both reduce water flow, develop sediment build-up
more rapidly, and may cause leaks if repair is
attempted. The correct type of shut-off valve requires
a
1
/4" hole to be drilled on top or side (not bottom of
horizontal pipe) of water supply pipe prior to valve
attachment.
Materials Required
1
/4" O.D. (6 mm) flexible copper tubing. Length of copper
tubing must reach from water supply connection to water
valve inlet port on back of refrigerator plus an additional
8 ft. (2.5 m) of tubing for a service loop. A service loop
will allow refrigerator to be pulled away from the wall
without disconnecting tubing.
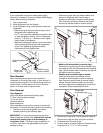
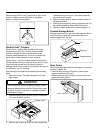
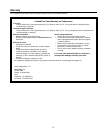
1. Remove plastic cap from water valve inlet port.
Plastic
cap
Water valve
inlet port
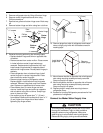
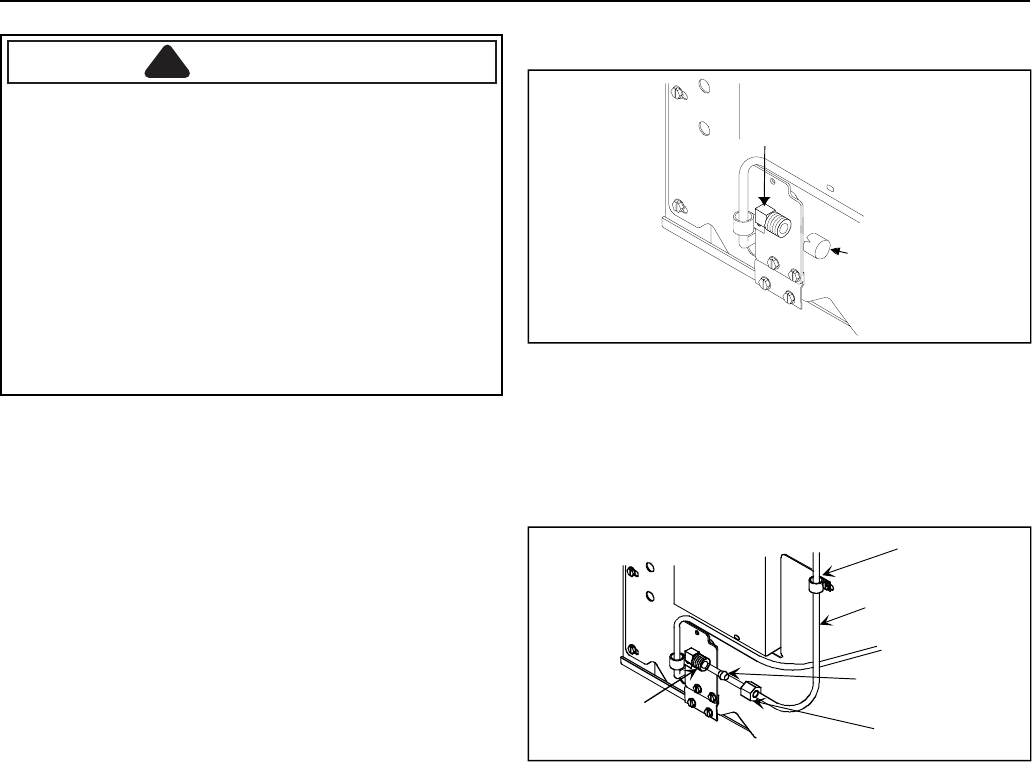
2. Place brass nut and brass sleeve on copper tubing.
(Brass nut and sleeve are found in literature packet.)
Insert copper tubing into water valve inlet port.
Connect brass nut on copper tubing to water valve
inlet port. Start connection by hand then use a
1
/2"
(13 mm) open end wrench. Make sure copper tubing
is secure by pulling on copper tubing.
"P" clamp
Copper tubing
Brass sleeve
Brass nut
Water valve
inlet port
3. Turn on water supply to refrigerator and check for
leaks. Correct any leaks at connection. Be careful
not to overtighten connection.
4. Create a service loop using extreme care to avoid
kinks. Secure copper tubing to refrigerator cabinet
with a “P” clamp.
5. Proceed to
Leveling Refrigerator
for final refrigerator
placement.
6. Review
Installation Checklist
in Owner’s Manual with
consumer.