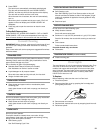
17
7.
Press START.
The start time is automatically calculated and displayed.
“DELAY” and the stop time will also appear on the oven
display.
When the start time is reached, the oven will automatically
turn on. The vertical bar countdown and minute time
countdown will appear on the oven display.
When the stop time is reached, the oven will shut off
automatically and “End” will appear on the oven display.
If enabled, end-of-cycle tones will sound, then reminder
tones will sound every minute.
8.
Press CANCEL OFF, UPPER OVEN CANCEL / OFF or, on
some models, LOWER OVEN CANCEL / OFF or open the
oven door to clear the display and/or stop reminder tones.
Dehydrating
(single, upper and, on some models, lower oven)
Dehydrating dries food. For additional information, refer to a
book written specifically about dehydrating or preserving foods.
Dehydration racks and an oven door stop are required, but not
supplied with this oven. See “Assistance or Service” section to
order.
To Dehydrate:
Before dehydrating, prepare food as recommended in the recipe
and arrange on dehydration rack(s). Position racks according to
the following chart. See “Positioning Racks and Bakeware”
section for diagram of rack positions.
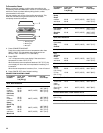
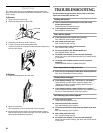
Place the oven door stop over the automatic oven light switch.
1.
On double ovens only, press UPPER OVEN or, on some
models, LOWER OVEN.
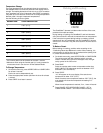
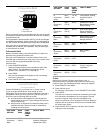
The cavity symbol will flash indicating which oven was
chosen. The left cavity symbol is the upper oven, the right
cavity symbol is the lower oven.
2.
Press and hold CONVECTION BAKE for 5 seconds.
Press the number pads to enter a temperature other than
140°F (60°C). The dehydrating range can be set between
100°F and 200°F (38°C and 95°C).
3.
Press START.
4.
Press CANCEL OFF, UPPER OVEN CANCEL / OFF or, on
some models, LOWER OVEN CANCEL / OFF when finished
dehydrating.
Proofing Bread
(single, upper and, on some models, lower oven)
Proofing bread prepares dough for baking by activating the
yeast. Proofing twice is recommended.
To Proof:
Before first proofing, place dough in a lightly greased bowl and
cover loosely with wax paper coated with shortening. Place on
rack guide 2, then place broiler pan on guide 1. See “Positioning
Racks and Bakeware” for diagram. Put 2 cups
(500 mL) of boiling water in broiler pan. Close door.
1.
On double ovens only, press UPPER OVEN or, on some
models, LOWER OVEN.
The cavity symbol will flash indicating which oven was
chosen. The left cavity symbol is the upper oven, the right
cavity symbol is the lower oven.
2.
Press and hold BAKED GOODS for 5 seconds.
Display will show 100°F (40°C).
3.
Press START.
Let dough rise until nearly doubled in size, check at 20-25
minutes. Proofing time may vary depending on dough type
and quantity.
Before second proofing, shape dough, place in baking pan(s) and
cover loosely with plastic wrap coated with cooking spray. Follow
same placement, broiler pan and water and control steps above.
Before baking, remove plastic wrap.
NUMBER OF RACKS RACK POSITION(S)
13
22 and 4
31, 3 and 5
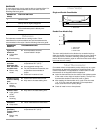
1. Oven door stop
2. Automatic oven light switch
12


