


15
To Convert Surface Burners
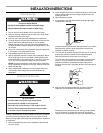
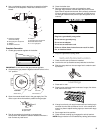
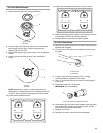
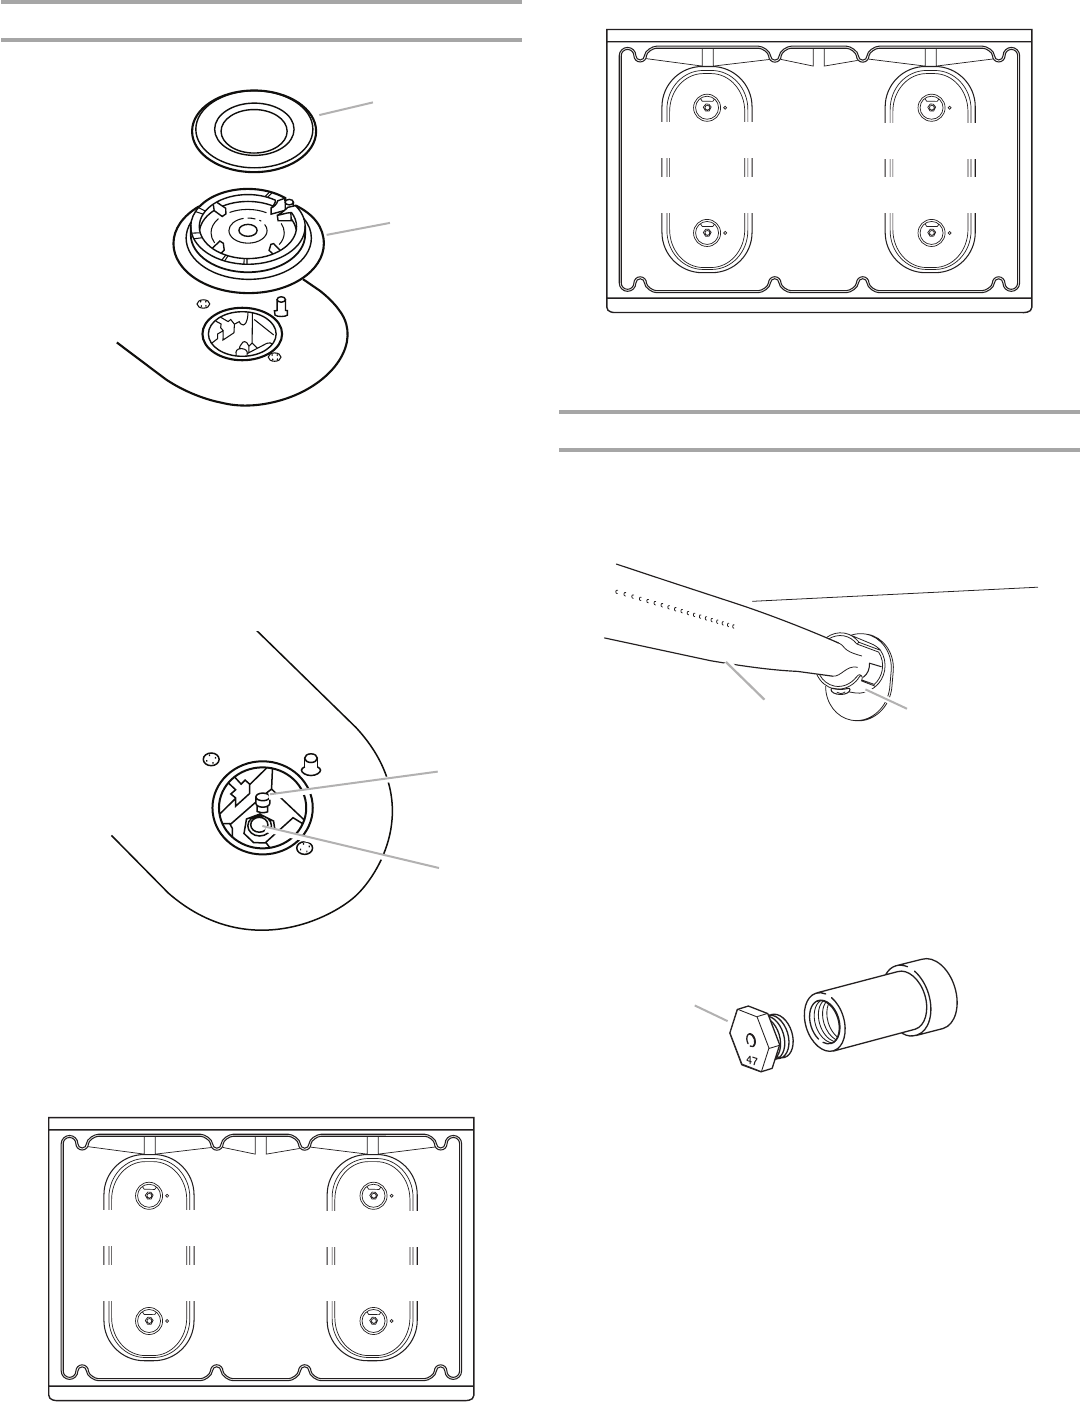
1. Remove burner grate, burner caps and burners.
2. Locate the Natural gas orifice spuds for top burners in the
literature bag included with the range. Three natural gas
spuds are stamped “149” and one “165.”
3. Remove the LP gas orifice spuds using a 7 mm combination
wrench.
4. Install the Natural gas orifice spuds using a 7 mm
combination wrench.
NOTE: Depending on model, the range cooktop may be
equipped with 4 standard burners or 3 standard burners and
1 Power™ burner. Spud size and location remain the same.
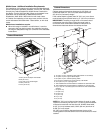
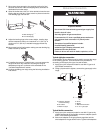
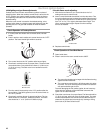
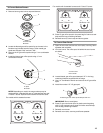
For models with 4 standard burners:
For models with 3 standard burners and 1 Power™ burner:
5. Place LP gas orifice spuds in the parts bag for future use and
keep with the bag containing literature.
6. Reinstall burners, burner caps and burner grates.
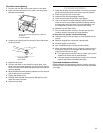
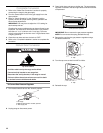
To Convert Oven Burner
1. Open the oven door and remove oven racks, oven tray, flame
spreader and set aside.
2. Lift oven burner. The orifice spud is behind the oven burner
air shutter.
3. Locate Natural gas orifice spud stamped “47” in the bag
containing literature supplied with the range.
4. Use a ³⁄₈" combination wrench and remove the LP gas orifice
spud.
5. Install the number “47” LP gas spud.
IMPORTANT: Do not overtighten.
6. Place LP gas oven burner spud in plastic parts bag along
with LP gas cooktop burner spuds for future use and keep
with the bag containing literature.
7. Reinstall oven burner.
8. Reinstall oven racks, oven tray and flame spreader.
A. Burner cap
B. Burner
A. Spud
B. Holder
A
B
A
B
Std Burner 149
Std Burner 149
Std Burner 149
Std Burner 149
A. Oven burner
B. Air shutter
A. Natural gas oven orifice spud stamped with “47”
Std Burner 149
Std Burner 149
Std Burner 149
Power™ Burner 165
B
A
A