REMOVING MINERAL DEPOSITS:
Hard water can leave mineral deposits that create scale build-up on the
interior of the kettle. To avoid this build-up, it is best to always use distilled
water. If mineral deposits do occur, follow the instructions below to
remove them.
1. Fill the kettle halfway with water and bring to a boil.
2. Add one cup of white vinegar. Let the mixture soak overnight or for at
least 6 hours.
3. Empty the mixture and rinse out the kettle.
4. Refill the kettle with water only. Bring to a boil and empty again.
5. Repeat as needed.
HOW TO CLEAN
TROUBLESHOOTING
PROBLEM SOLUTION
The kettle and
indicator light
do not work
when the power
switch is up.
•Make sure the kettle is seated properly on the power
base and that the base is connected to a functioning
electrical outlet.
•If the problem persists, please contact our customer
service department toll-free at (800) 276-6286 or
through email at CustomerService@AromaCo.com.
The water is
boiling, but the
power switch
and indicator
light do not turn
off.
•The auto-shut off function will not operate properly if
the lid is not completely closed. Allow kettle to cool,
then check to see that the the lid is properly locked
into place.
•If the problem persists, please contact our customer
service department toll-free at (800) 276-6286 or
through email at CustomerService@AromaCo.com.
The power
switch won't
depress and the
kettle will not
turn on.
•Make sure that the kettle is seated properly on the
power base and that the base is connected to a
functioning electrical outlet.
•Water or debris on the bottom of the kettle or on the
power base may interfere with the functioning of the
kettle. Be sure that the base of the kettle and the
power base are dry and free of debris.
•If the problem persists, please contact our customer
service department toll-free at (800) 276-6286 or
through email at CustomerService@AromaCo.com.
6
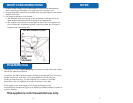
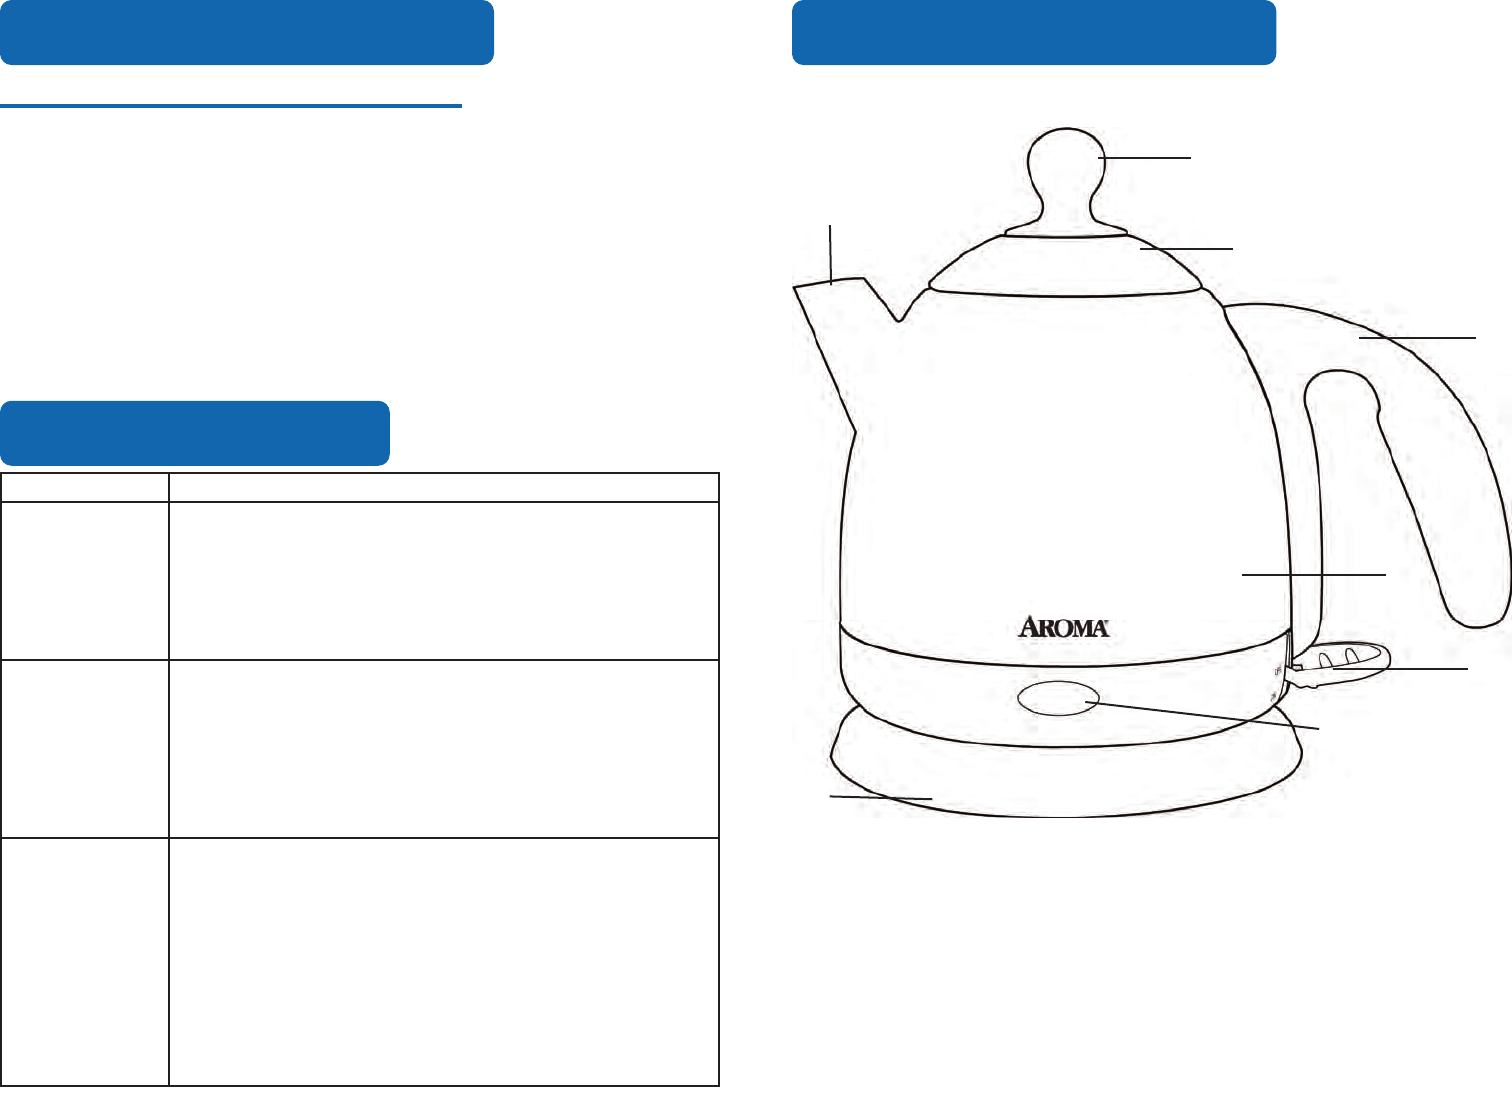
PARTS IDENTIFICATION
1. Kettle Lid Handle
2. Kettle Lid
3. Easy-Grip Handle
4. Kettle Body
5. Power Switch
6. Indicator Light
7. Power Base
8. Spout
2
7
8
6
3
1
3
4
5


