


10 XENYX QX1202USB/QX1002USB User Manual
Even though most of the tasks in a studio can nowadays be accomplished using
a computer, a mixing console remains an unavoidable piece of equipment that
lets you eectively manage audio inputs and outputs: microphone signals need
to be pre-amplied prior to being recorded, and the quality of microphone
sound is often worked on; recording and playback signals must be routed to the
appropriate connectors or integrated into the mix; the volume of headphones
and studio monitors needs to be adjusted, and so on. The extensively equipped
main section of the XENYX mixing consoles provides concrete benets to you.
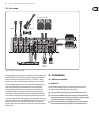
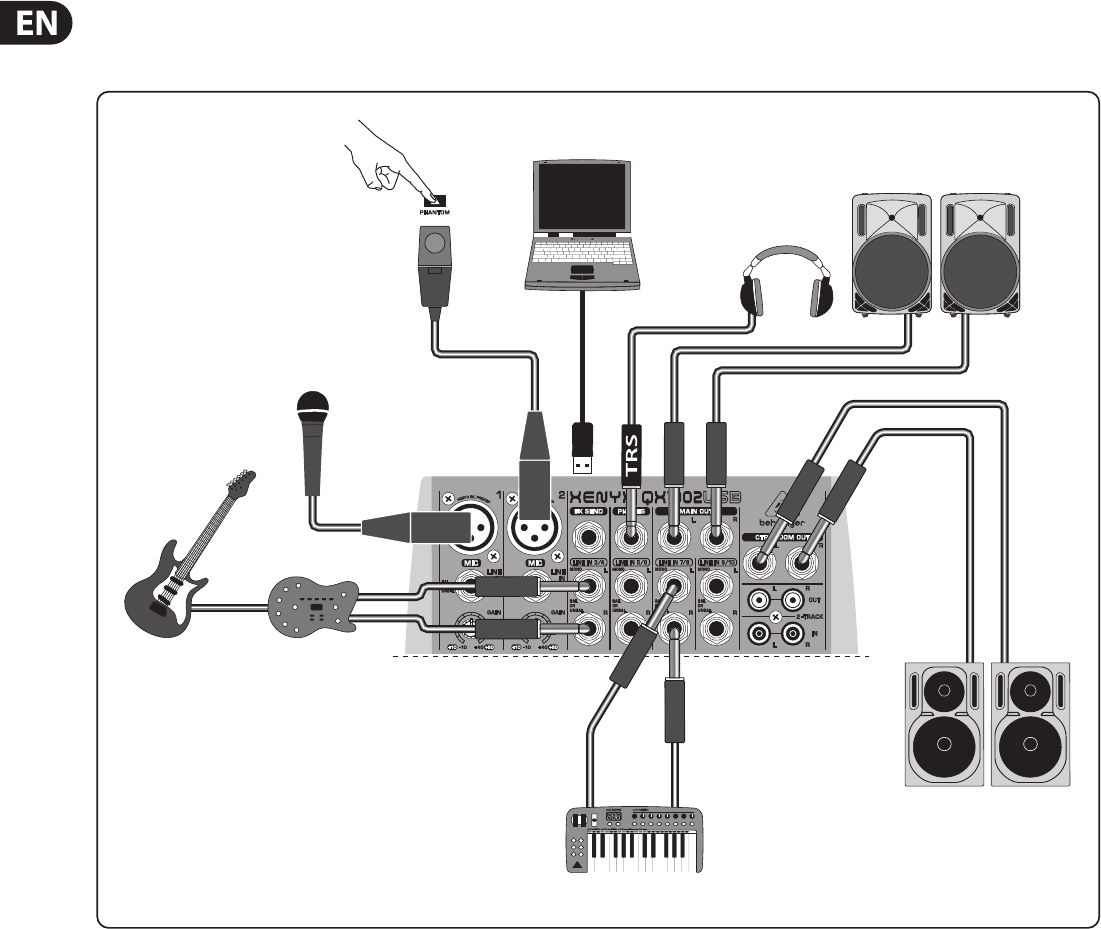
Wiring:
Connect your sound sources to the microphone/line inputs of the mixing console.
Connect a pair of reference speakers (optional) to the main outputs, and connect
a computer to the USB connector on the rear panel. Yourmonitor speakers are
connected to the control room outputs; theheadphones are connected to the
headphone output.
Recording and playback:
Each connected sound source is pre-amplied, EQ'ed and then routed to the
main bus. You may also add one of the onboard eects to any of the signals
(seeChapter 2.6). Use the LEVEL controls to adjust the relative level of your
sources. The main bus is sent to your computer via USB. The performance can be
recorded in your Digital Audio Workstation (DAW) and further edited with the
software. To monitor the recording signal and listen back to a recorded track,
press the USB/2-TR TO CTRL RM button. This sends the signal returning from your
computer to monitor speakers connected to the CONTROL ROOM OUT jacks.
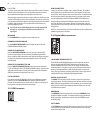
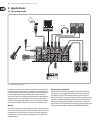
3. Applications
3.1 Recording studio
V-AMP3
XM8500
C-1
B212D
HPS3000
Keyboard
B2031A
Fig 3.1: The QX1002USB in a home studio