


6 • X13 & X13A OWNER/OPERATOR MANUAL
Intended Uses and Characteristics
Intended Uses
The model X13 and X13A slicers are designed for cutting the following types of products:
• Meat (without bones)
• Cheese
• Vegetables
The following types of items are NOT suitable for slicing on the Model X13 or X13A slicers:
• Non-food products
• Frozen foods
• Bone in products
Special Features/Characteristics
Reduced seams and joints for better sanitation
Gauge plate interlock for aid in cleaning
Left hand thickness adjustment for easier cleaning and better user interface
3 slicing speeds (automatic only)
3 slicing stroke lengths (automatic only)
Automatic return to home at the end of the cutting cycle (automatic only)
Unpacking and Installation
Note: Immediately after unpacking, check the slicer for shipping damage. If the equipment is
found to be damaged, save everything! Notify the carrier within 5 days of delivery.
1. Carefully remove the cardboard carton from around the slicer.
2.
3.
obstructions.
4. Make sure to unpack the sharpener, fence and brush. They are located in pockets in the cardboard
base.
5. Slide the product table onto the support arm and secure using the red product table locking knob.
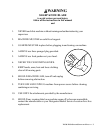
WARNING
To eliminate a potential shock hazard, a properly grounded outlet using the three-pronged plug provided
must power this unit. Before plugging the slicer in, check your outlet voltage to be sure it complies with the
voltage specified on the serial number plate on the slicer.
Note: The model/serial number plate is located on the back of the slicer.
Kick stand for cleaning under the slicer
Get assistance from another individual and place the slicer on a solid, level surface that is free of any
Slide the product table off the guage plate. It is in the cardboard box on the gauge plate.