


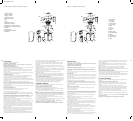
Size: 19.685" x 17.5"
Este producto puede variar ligeramente del que aparece ilustrado.
Cómo usar
Este aparato es solamente para uso doméstico.
ENSAMBLAJE Y FUNCIONAMIENTO
Importante: Antes de usar por primera vez, desarme el aparato y lave todas las piezas
según las instrucciones de limpieza.
CÓMO ARMAR SU EXTRACTOR DE JUGOS
Coloque la cubierta del colador encima de la cubierta del motor. Luego coloque el colador
dentro de su cubierta, presionándolo contra el adaptador.
Coloque la tapa sobre la cubierta del colador. Ajuste los ganchos de los seguros en las
ranuras de la tapa, luego presione el seguro derecho y el izquierdo asegurándose de que
encajen en su lugar.
Ajuste el recipiente para pulpa en el extractor de jugos, asegurándose de que la saliente del
recipiente entre en la ranura del electrodoméstico.
ADAPTADOR DE ENTRADA
La entrada se puede adaptar para varios ingredientes. Los alimentos redondos y grandes
como las manzanas pueden ser procesados sin adaptador, sin embargo, para los
ingredientes largos como las zanahorias es mejor colocar el adaptador.
El adaptador se ajusta alineando primero la ranura con la saliente de la entrada. Luego se
puede empujar el adaptador suavemente hacia abajo, girándolo hacia la izquierda hasta que
se tranque en su lugar.
Se proporciona un dispositivo aparte para empujar para usar con el adaptador.
Advertencia: Nunca use el dispositivo para empujar sin el adaptador ya que puede dañarse.
Para procesar un ingrediente redondo, retire el adaptador girándolo hacia la derecha y luego
levántelo de la entrada.
Para usar el dispositivo para empujar, primero alinee la ranura con la saliente de la entrada,
luego presione suavemente.
USO DE SU EXTRACTOR DE JUGOS
Este electrodoméstico está diseñado para extraer el jugo de frutas y verduras.
No use este electrodoméstico con ningún otro propósito.
Únicamente para uso doméstico en interiores.
Prepare el material que procesará lavándolo bien y pelándolo según sea necesario. Retire
todas las pepitas y semillas grandes. Puede ser necesario cortar los ingredientes grandes para
que pasen por el conducto de entrada.
Los ingredientes más pequeños pueden colocarse directamente en el conducto y empujarse
dentro del extractor de jugos con el dispositivo para empujar correspondiente.
Asegúrese de que el interruptor de velocidad esté en la posición “0” (apagado), luego
enchufe el cable en un tomacorriente.
Nota: Asegúrese de que el voltaje que se muestra en la parte inferior de la cubierta del
motor corresponda con el suministro de voltaje local.
Presione el interruptor para seleccionar la velocidad I o II según sea necesario. La velocidad
baja debe ser usada para frutas blandas y la velocidad alta para frutas más duras.
Verifique que el colector de pulpa esté en su lugar y coloque un recipiente adecuado bajo
el pico. Coloque los ingredientes en el conducto de entrada. El dispositivo para empujar
se puede usar para empujar suavemente los ingredientes por el conducto de entrada. No
sobrecargue la máquina. Demasiada presión puede ocasionar que el material se atasque en
el conducto de entrada.
Nota: El jugo puede seguir saliendo luego de que el electrodoméstico haya sido apagado.
Este electrodoméstico no se debe mantener en funcionamiento continuo durante más de
1 minuto por vez. Luego de 1 minuto de uso, se debe permitir que el electrodoméstico se
enfríe por lo menos durante 2 minutos antes de usarlo nuevamente.
En caso de una obstrucción, NUNCA USE LOS DEDOS NI NINGÚN OBJETO QUE NO
SEA EL DISPOSITIVO PARA EMPUJAR PARA DESPEJAR EL CONDUCTO DE ENTRADA.
Si los alimentos no pueden ser retirados, ponga el selector de velocidad en la posición “0”
(apagado) y DESENCHUFE EL CABLE DEL TOMACORRIENTE.
Retire la tapa como se describe en este instructivo y despeje la obstrucción. Vuelva a
colocar la tapa, a conectar el extractor de jugos al suministro de energía y continúe
haciendo jugo.
Cuando termine de hacer jugo, vuelva a poner el interruptor en la posición de “0”
(apagado) y permita que el motor se detenga. Debe dejar la jarra en su lugar hasta que el
jugo deje de salir del pico.
DESENCHUFE EL CABLE DE CORRIENTE DEL TOMACORRIENTE y desarme el extractor
de jugo. Vacíe la pulpa del recipiente colector y limpie todas las piezas tan pronto como
sea posible luego de terminar de procesar.
Nota: El extractor de jugos no funcionará a menos que todas las piezas estén
correctamente montadas.
Nota: El colador seguirá girando luego de que se haya apagado el electrodoméstico.
Nota: No se acerque a ninguna pieza que se mueva cuando esté en uso. Permita que el
motor se detenga por completo antes de retirar cualquier pieza del electrodoméstico.
CÓMO VACIAR EL RECIPIENTE PARA PULPA
Si el recipiente para pulpa se llena antes de que use todos los ingredientes, presione el
interruptor para seleccionar la posición "0" (apagado) y desenchufe el extractor de jugos.
Sostenga el recipiente para pulpa, quítelo de la cubierta del motor y deseche la pulpa.
Puede desechar la pulpa y regresar el filtro a su posición en la cubierta del motor.
Vuelva a conectar la unidad al suministro de energía y siga haciendo jugo.
Cuidado y limpieza
Este electrodoméstico no contiene piezas reparables por el consumidor. Para
servicio, acuda a personal de técnico calificado.
CÓMO CUIDAR SU EXTRACTOR DE JUGOS
Se debe limpiar bien el extractor de jugos luego de cada uso.
Asegúrese de que el electrodoméstico esté apagado y desenchufe la unidad del
suministro de energía antes de realizar la limpieza.
Nota:
Nunca sumerja la cubierta del motor en agua ni en ningún otro líquido.
Para limpiar la cubierta del motor, pásele un paño húmedo. Permita que se
seque por completo antes de volver a usarla o guardarla. Las piezas extraíbles del
ensamble del extractor de jugo deben ser lavadas, inmediatamente después de
cada uso, con un detergente suave en agua tibia. Estas piezas no se pueden lavar
en la máquina lavaplatos y deben ser lavadas a mano.
Use un cepillo para quitar los residuos de pulpa de los dientes de corte y los
orificios de filtrado del colador.
Luego de lavar, enjuague y permita que todas las piezas se sequen por completo al
aire antes de armar y guardar el extractor nuevamente.
Nunca use un cepillo de metal para limpiar el colador. Tenga cuidado al
manipular el colador ya que las cuchillas son afiladas.
Advertencia: No use el electrodoméstico si el colador giratorio está dañado.
1
13
15
14
2
4
5
6
7
12
11
8
10
11
9
3
How to Use
This appliance is for household use only.
Important: Before you use it for the first time, disassemble the unit and wash all parts as
instructed in the Care and Cleaning section.
ASSEMBLING YOUR JUICE EXTRACTOR
Place the strainer housing on the motor housing, then place the strainer into the strainer
housing, pressing it onto the strainer adaptor.
Place the cover on top of the strainer housing. Fit the hooks of the latches over the
recesses in the cover, and then push the right and left-hand latches down ensuring they
lock in place.
Fit the pulp container onto the juice extractor, making sure the rib on the container locates
into the slot in the appliance.
INLET ADAPTOR
The inlet can be adapted to suit various ingredients. Large round items such as apples can
be processed with no adaptor. However, long ingredients such as carrots work better with
the adaptor in place.
The adaptor is fitted by first aligning the groove with the rib in the inlet. The adaptor must
then be gently pushed down and rotated in an anti-clockwise direction until it locks in
place.
A separate pusher is provided for use with the adaptor.
Warning: Never use the pusher without the adaptor in place as damage may occur.
To process round ingredients remove the adaptor by rotating it in a clock-wise direction
then lift it from the inlet.
The pusher is used by first aligning the groove with the rib in the inlet the pushing it down
gently.
USING YOUR JUICE EXTRACTOR
This appliance is designed to extract juice from fruits & vegetables. Do not use this
appliance for any other purpose.
For indoor domestic use only.
Prepare material to be processed by washing thoroughly and peeling as required. Remove
all pips and large seeds. Large items may need to be cut into pieces to fit the inlet chute.
Smaller items may be placed directly into the chute and guided into the juice extractor
using the relevant pusher.
Make sure the speed switch is in the ‘’0’’ (OFF) position, then plug the cord-set into a
power outlet.
Note: Make sure that the voltage shown on the underside of the motor housing
corresponds with the local supply voltage.
Press the switch to select speed I or II as required. Low speed should be used for soft fruits
and high speed for harder fruits.
Check that the pulp collector is in place, and place a suitable container under the spout.
Place the ingredients into the inlet chute. The pusher can be used to gently guide the
ingredients down the inlet chute. Do not overload the machine. Too much pressure may
cause material to jam the inlet chute.
Note: Juice may continue to flow after the appliance has been turned off.
This appliance should not be operated continuously for more than 1 minute at a time.
After 1 minute’s use, the appliance should be allowed to cool at least 2 minutes before
using it again.
If a blockage occurs, NEVER USE FINGERS OR ANY OBJECT OTHER THAN THE
PUSHER TO CLEAR THE INLET CHUTE.
If the food cannot be dislodged, turn the speed selector to the “0” position (OFF) and
UNPLUG THE POWER CORD FROM OUTLET.
Remove the cover as described in this Use and Care Book and clear the blockage. Replace
the cover, re-connect the juice extractor to the electrical supply & resume juicing.
When juicing is completed, the switch should be returned to the “0” (OFF) position, and
allow the motor to come to a stop. The jug should be left in place until the juice stops
flowing from the spout.
UNPLUG POWER CORD FROM THE OUTLET, and disassemble the juice extractor.
Empty the pulp from the collector and clean all parts as soon as possible after you have
finished processing.
Note: The juice extractor will not operate unless all the parts are correctly fitted.
Note: The strainer will continue to rotate after the appliance has been turned off.
Note: Do not approach any parts that move in use. Allow the motor to come to a complete
stop before removing any part of the appliance.
EMPTYING THE PULP CONTAINER / STRAINER
If the pulp container (3) becomes full before all of the ingredients are used, press the switch
(15) to select the ''0'' (OFF) position and unplug the juice extractor.
Take hold of the pulp container pull it away from the motor housing and discard the pulp.
The pulp can be discarded and the strainer returned to its position in the motor housing.
Reconnect the unit to the power supply & recommence juicing.
Care and Cleaning
This product contains no user serviceable parts. Refer service to qualified service
personnel.
HOW TO TAKE CARE OF YOUR JUICE EXTRACTOR
The juice extractor must be cleaned thoroughly after each use. Make sure the
appliance is switched ‘OFF’ and unplug the unit from the power supply before
cleaning.
Note: Never immerse the motor housing in water or any other liquid.
To clean motor housing, wipe clean with a damp cloth. Allow to dry thoroughly
before re-using or storing. The removable parts of the juice extractor assembly
should be washed promptly after each use with a mild detergent in warm water.
These parts are not dishwasher safe and must be hand washed.
Use a brush to scrub pulp residue from the cutting teeth and strainer holes of the
strainer.
After washing, rinse and allow all parts to dry thoroughly before re-assembly and
storage.
Never use a metal brush to clean the strainer. Take care when handling the strainer
as the blades are sharp.
Warning: Do not use the appliance if the rotating strainer is damaged.
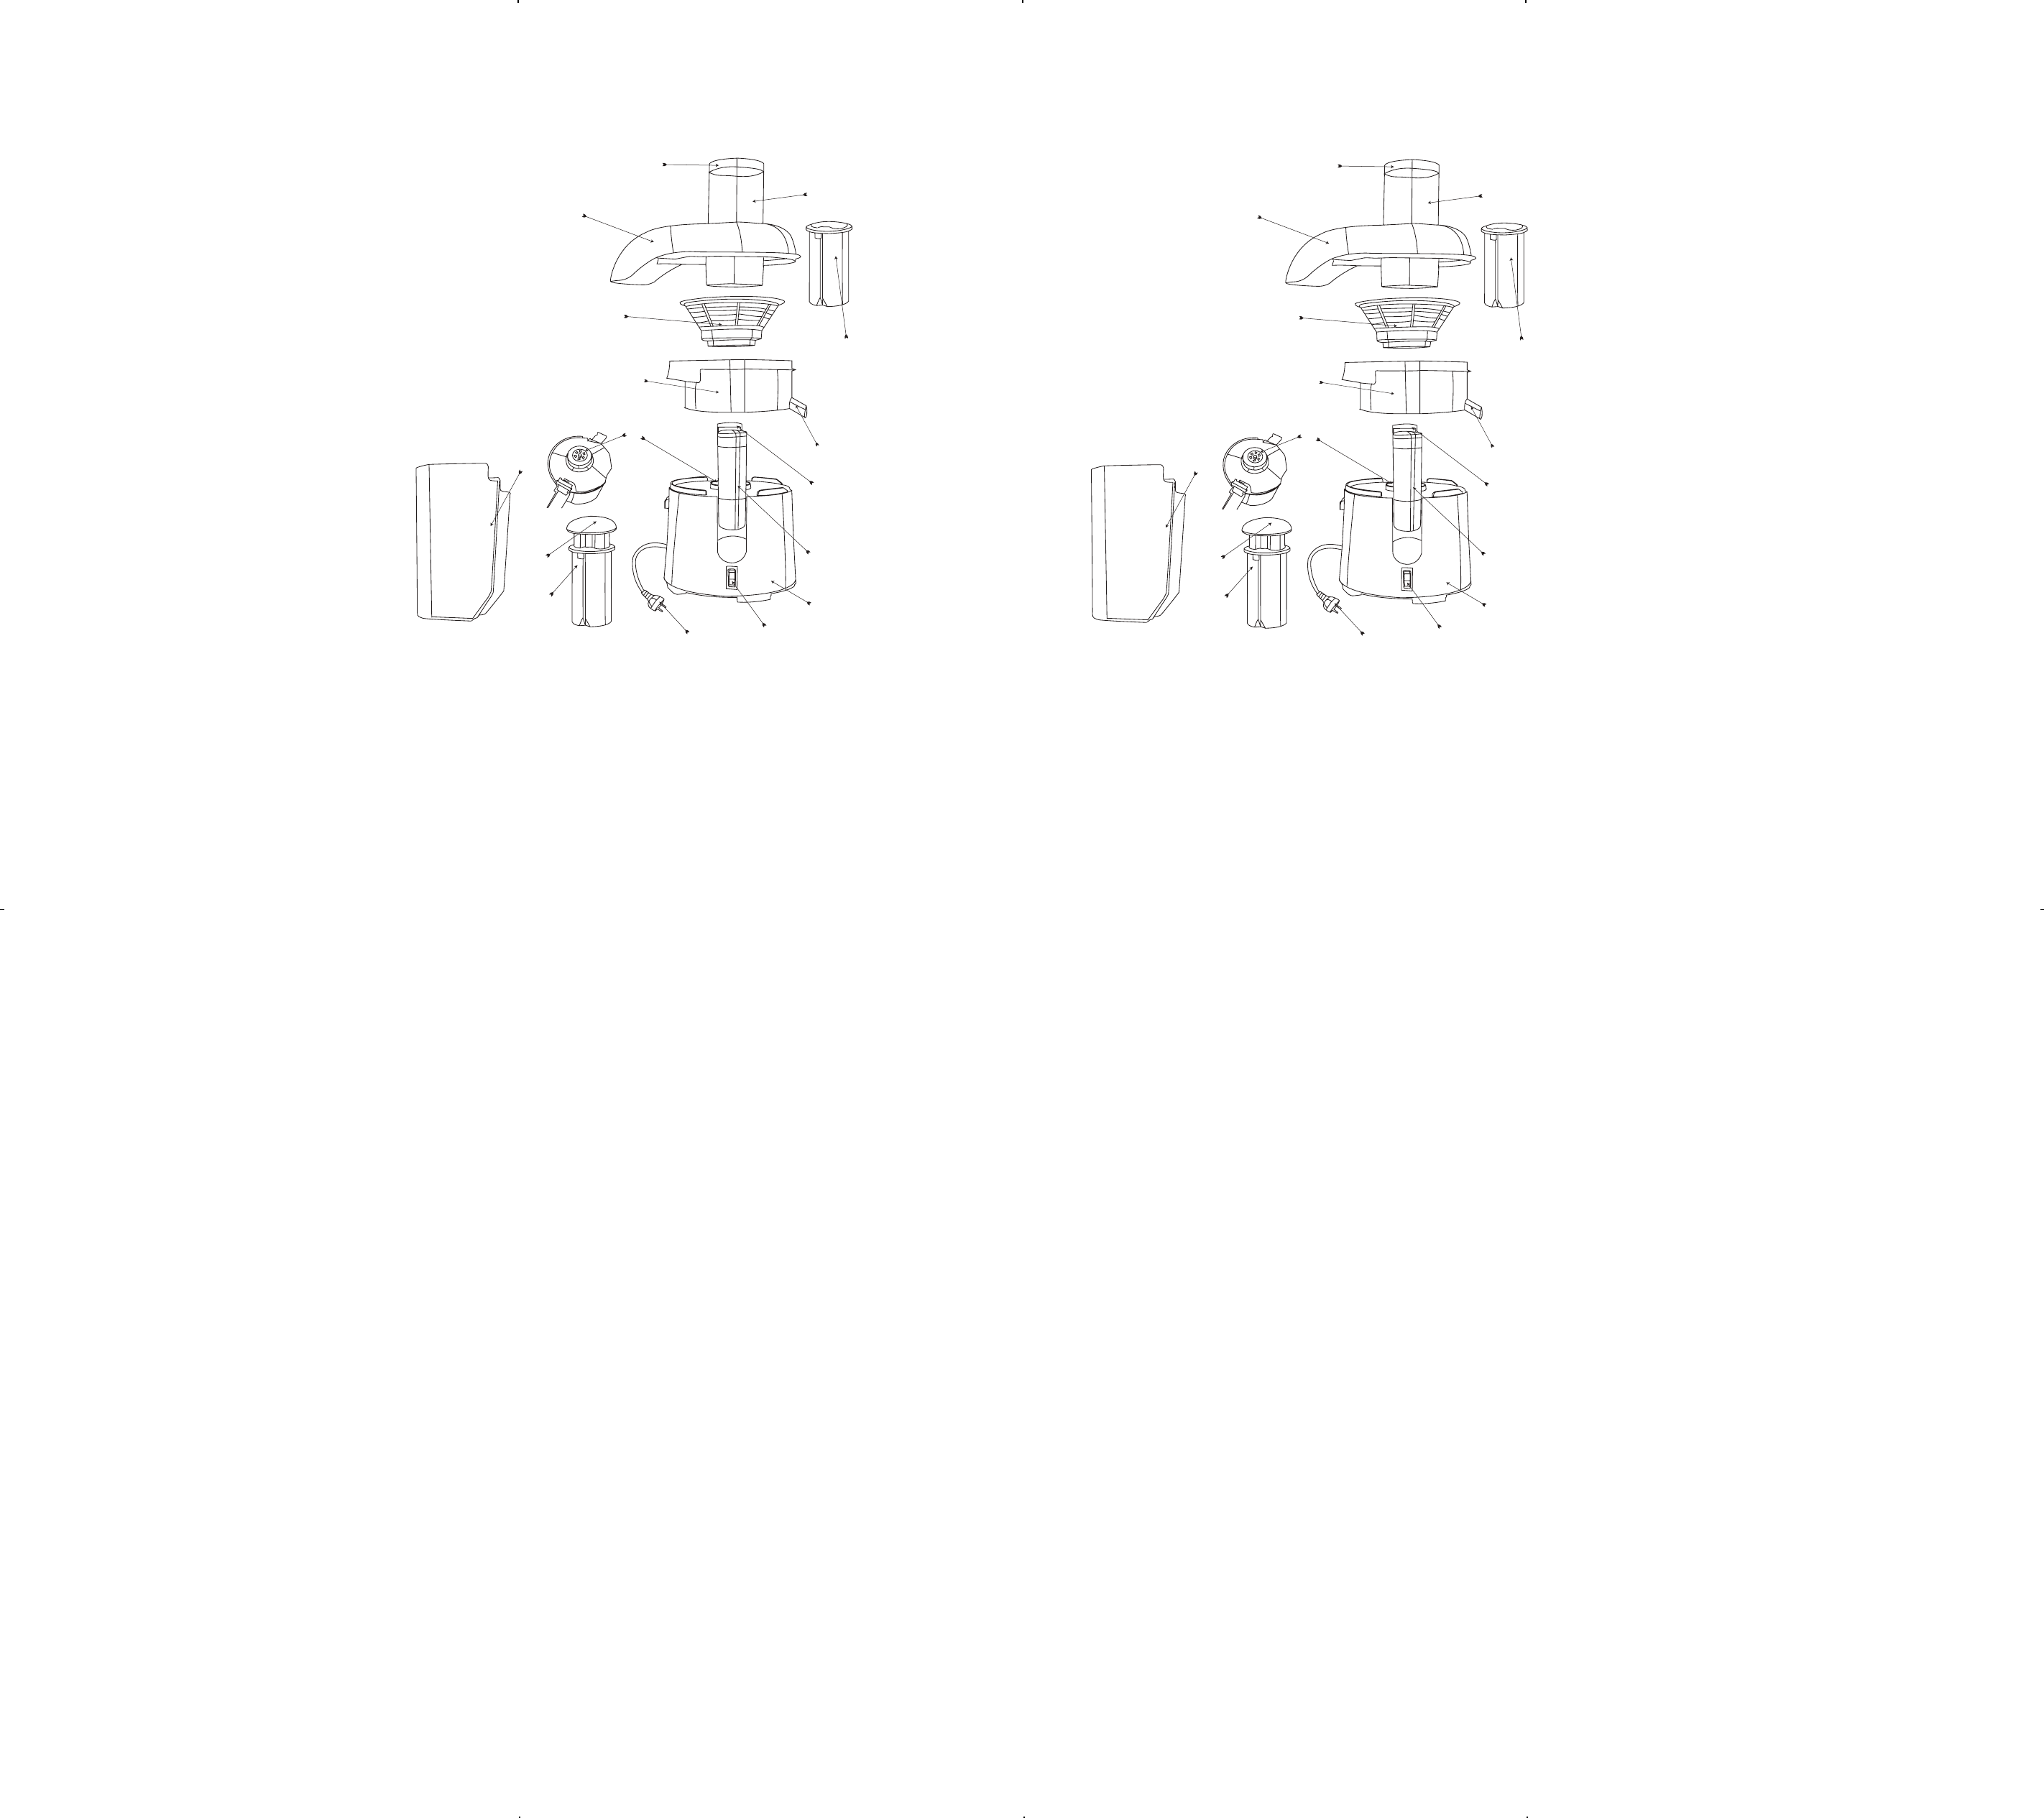
1. Cubierta del motor
2. Seguro - izquierdo
3. Seguro - derecho
4. Cubierta del colador
5. Recipiente para pulpa
6. Pico
7. Tapa
8. Conducto de entrada
9. Dispositivo para empujar
10. Dispositivo para empujar (redondo)
11. Adaptador para el conducto de entrada
12. Colador
13. Cable y enchufe
14. Adaptador para el colador
15. Interruptor
1. Motor housing
2. Latch (left)
3. Latch (right)
4. Strainer housing
5. Pulp container
6. Spout
7. Cover
8. Inlet chute
9. Pusher
10. Pusher (round)
11. Inlet chute adaptor
12. Strainer
13. Plug and cord set
14. Strainer adaptor
15. Switch
1
13
15
14
2
4
5
6
7
12
11
8
10
11
9
3
Product may vary slightly from what is illustrated.