


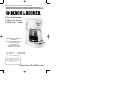

4
How to Use
This appliance is intended for household use only.
GETTING STARTED
1. Remove all stickers, packing material, and literature.
Important: For warranty verification, please do not remove line cord sticker.
2. Wash all parts as instructed in the Care and Cleaning section.
3. Pour cold water up to 4-cup level mark in the water reservoir.
Brew it through as instructed in "BREWING," but do not add coffee grounds to the paper filter.
When done, turn off the coffeemaker and discard the water from the carafe.
BREWING
1. Lift the one-piece cover. Use water markings on carafe to fill water reservoir with cold
water.
2. Place a paper filter into the brew basket. Add ground coffee, (we recommend one heaping
tablespoon for every 2 cups). Close the cover.
3. Place carafe on the "Keep Hot" plate and plug in the unit.
4. Press "ON/OFF" and the indicator light comes on, or for delayed brewing (Clock Models),
see "SETTING THE CLOCK/TIMER & AUTO-BREW." You don’t have to set the clock if you
want to brew coffee right away.
5. Replace the carafe on the "Keep Hot" plate when not serving to keep coffee hot.
6. Press "ON/OFF" to turn off unit.
The coffeemaker will keep coffee warm for 2 hours before it automatically shuts off.
SETTING THE CLOCK/TIMER & AUTO BREW (For Clock Models)
Plug in unit, clock flashes 12:00 a.m. until correct time is set. The coffeemaker works without
setting the clock.
1. To set current time of day: Press the HOUR button, little dot in the top left corner of the
display indicates "p.m." time. Press the MIN button. Once set, clock continues to keep
time unless coffeemaker is unplugged or a power failure occurs. Clock can only be reset
when in the flashing mode.
2. To set the Auto-Brew time: Press the PROG button and the light near the AUTO button
starts flashing indicating it is being programmed. Press the HOUR, then MIN buttons to set
the time you’d like coffee to automatically begin brewing (for example 7:15 a.m.). Press
the HOUR and MIN buttons to 7:15 a.m. Make sure the PM indicator light is not lit. When
finished, press the AUTO button a second time (hold the button down a few seconds) until
the AUTO light stops flashing and stays on to show the timer is activated.
3. Prepare the coffeemaker for brewing as instructed in "BREWING" but don’t turn
on the unit.
4. To check your pre-set auto time, press PROG and it will display. When the clock returns
to the current time of day, press AUTO to reactivate the timer. To automatically brew
coffee again at the same pre-set auto-on time, prepare coffeemaker for brewing again
and press the AUTO button.
Note: The Auto-Brew function can be canceled at any time by pressing the AUTO button a
second time or by pressing the OFF button twice. The AUTO light goes out.
Care and Cleaning
This product contains no user serviceable parts. Refer service to qualified service personnel.
CLEANING
1. Be sure the unit is off and cooled. Open the cover, remove the brew basket (lift straight
up), and discard the paper filter/grounds. Clean as follows: brew basket, carafe, and carafe
lid are all top rack dishwasher-safe; or they may be hand washed in warm, sudsy water.
See below for carafe care. The coffeemaker’s exterior, control panel area and "Keep Hot"
3
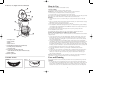
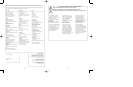
Product may vary slightly from what is illustrated.
5
4
3
2
³
ᕢ
ᕣ
ᕤ
ᕥ
ᕦ
ᕧ
ᕨ
ᕩ
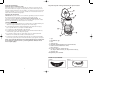
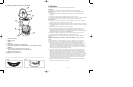
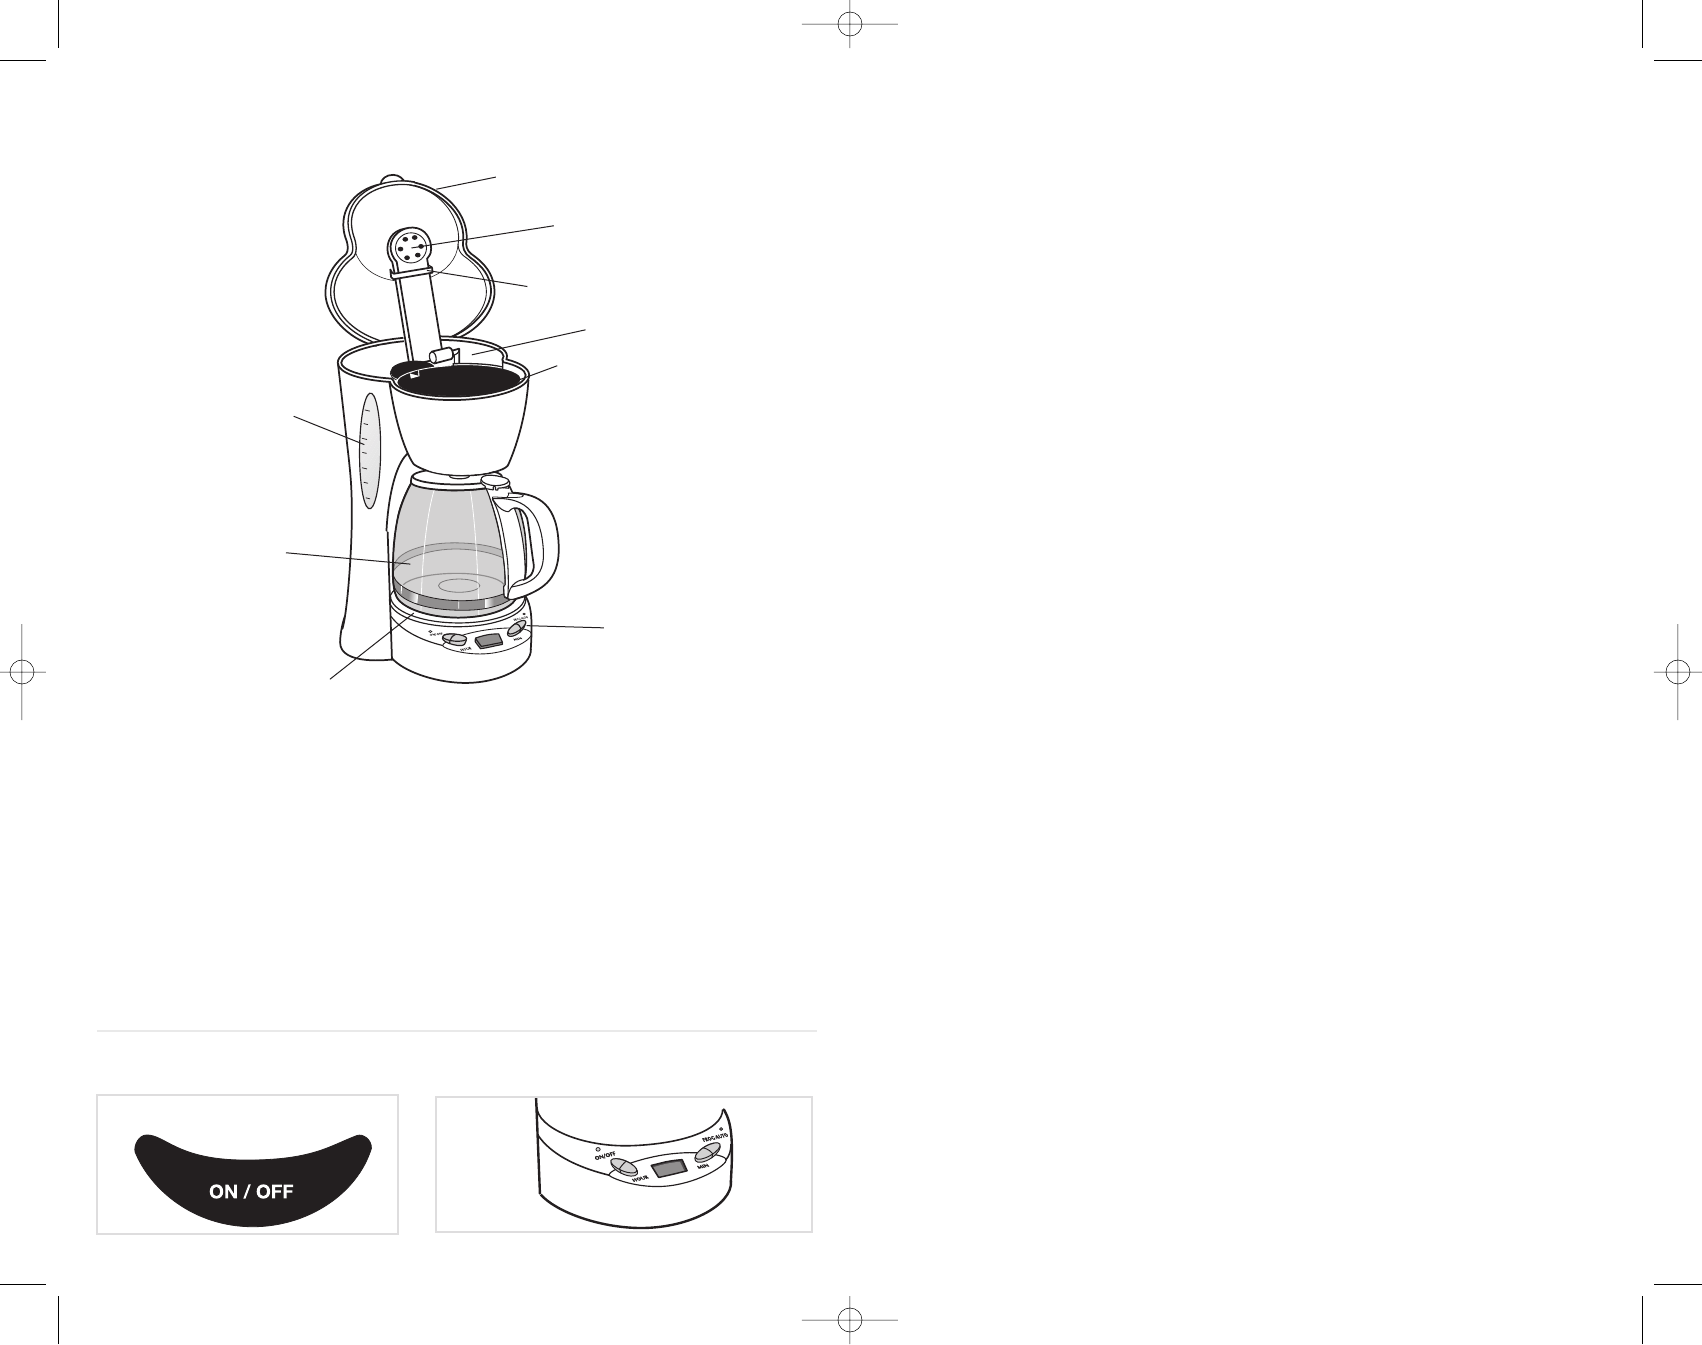
1. One-piece cover
2. Water spreader
3. Guide
4. Water reservoir
†5.Removable brew basket (Part # DCM525-01)
6. Control panel (see models illus.)
7. “Keep Hot” plate
†8.5-cup/25 oz. (740 ml) carafe w/lid
(Part # DCM575-02 (W)) (Part # DCM575-03 (B))
9. Water window
† Consumer replaceable
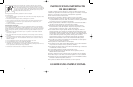
CONTROL PANELS
DCM575
DCM500
DCM500Pub177227RV02 4/20/05 10:41 AM Page 4