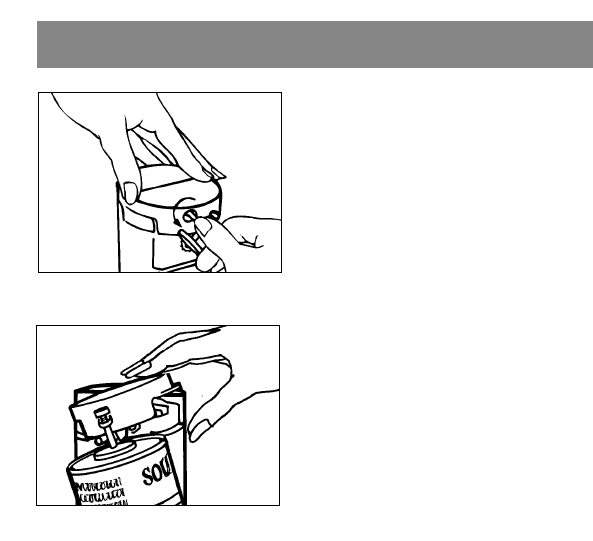
1. First, install the Magnet. Line
up the vertical tab on the
Magnet assembly with the ver-
tical hole on the Pierce Lever,
then push into the Pierce Lever,
and turn until it locks into posi-
tion. (Figure A)
2. Plug the cord into a standard,
120-volt electrical outlet.
3. Lift up the right side of the
Pierce Lever. Tip the can on an
angle so that the rim of the can
is under the support post. Lower
the Pierce Lever, making sure
the Cutter Blade is inside the
rim of the can.
(Figure B)
4. Press the Pierce Lever down
completely. The can will automatically be pierced and the cut-
ting action will begin. Because of the hands-free feature, it is
not necessary to hold the Pierce Lever down or to hold onto
the can during cutting. Keep in mind, however, that it may be
necessary to hold or steady the Can Opener Body when cut-
ting tall or heavy cans.
5. The Can Opener will automatically stop when the can is open.
6. If the Can Opener fails to cut the can lid completely, hold
the Pierce Lever down until the can is open.
7. You may stop the cutting action any time by lifting the
Pierce Lever.
8. To remove the can, hold it with one hand and raise the
Pierce Lever with the other hand. Discard the cut lid.
4
How To Use
Figure A
Figure B


