


8
7
8. When finished broiling.
• If the timer was on, the signal bell sounds, the On indicator light goes off and the oven
automatically turns off.
• If the timer was not on, turn the TIMER/TOAST selector from the Stay On position to the
Off position. The On indicator light goes off.
9. Using an oven mitt or pot holder, slide out broiling rack together with bake pan to remove
food.
Important: Always use an oven mitt or pot holder to remove food from the oven as the door and
the slide rack will be hot.
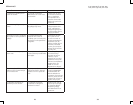
BROILING GUIDE
Note: When broiling foods, slide the bake pan/drip tray underneath the slide rack/broil rack using
the rack support rails. Insert rack into upper slot. Broiling times are approximate. For best results
do not undercook ground beef, fish or poultry.
FOOD AMOUNT TIME PROCEDURE
Chicken pieces 1-4 pieces 30-40 minutes Arrange pieces skin-side
down; turn after
15-25 minutes.
Continue broiling until
170°F (77 °C) on meat
thermometer, or juices
run clear.
Frankfurters 1-8 frankfurters 8-12 minutes For uniform browning,
turn frequently.
Hamburgers 1-4 (1/4 lb. 12-18 minutes Turn after 8 minutes;
(0,11 kg) each) continue broiling until
145°F (63 °C) on meat
thermometer, or done
as desired.
Beef steaks 1-2 (3/4" 18-25 minutes Turn after 10 minutes;
(19mm) thick) continue broiling until
145°F (63 °C) on meat
thermometer, or done
as desired.
Pork chops 1-4 (3/4" 20-30 minutes Turn after 12 minutes;
(19mm) thick) continue broiling until
160°F (71 °C) on meat
thermometer.
Fish steaks 1-4 (1" 10-18 minutes Broil until fish flakes
(26mm) thick) easily with a fork
or 145°F (63 °C) on meat
thermometer.
Open-faced 1-4 slices 7-10 minutes For crispier sandwich,
cheese sandwich toast bread first. Top
bread with tomato
and sliced cheese,
if desired. Broil until
tomato is hot and cheese
is melted.
KEEP WARM FUNCTION
1. Set temperature control to Min setting (minimum temperature).
2. Set cooking FUNCTION selector to Keep Warm position.
3. Set the timer to desired number of minutes or to Stay On position.
Care and Cleaning
This product contains no user serviceable parts. Refer service to qualified service personnel.
CLEANING YOUR OVEN
Important: Before cleaning any part, be sure the oven is off, unplugged, and cool. Always dry parts
thoroughly before using oven after cleaning.
1. Clean the glass door with a sponge, soft cloth or nylon pad and sudsy water. Do not use a
spray glass cleaner.
2. To remove the slide rack, open the door, pull the rack forward and out. Wash the slide rack in
sudsy water or in a dishwasher. To remove stubborn spots, use a polyester or nylon pad.
3. Wash the bake pan in sudsy water or in dishwasher. To minimize scratching, use a polyester or
nylon pad.
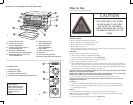
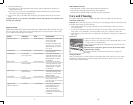
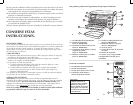
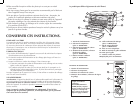
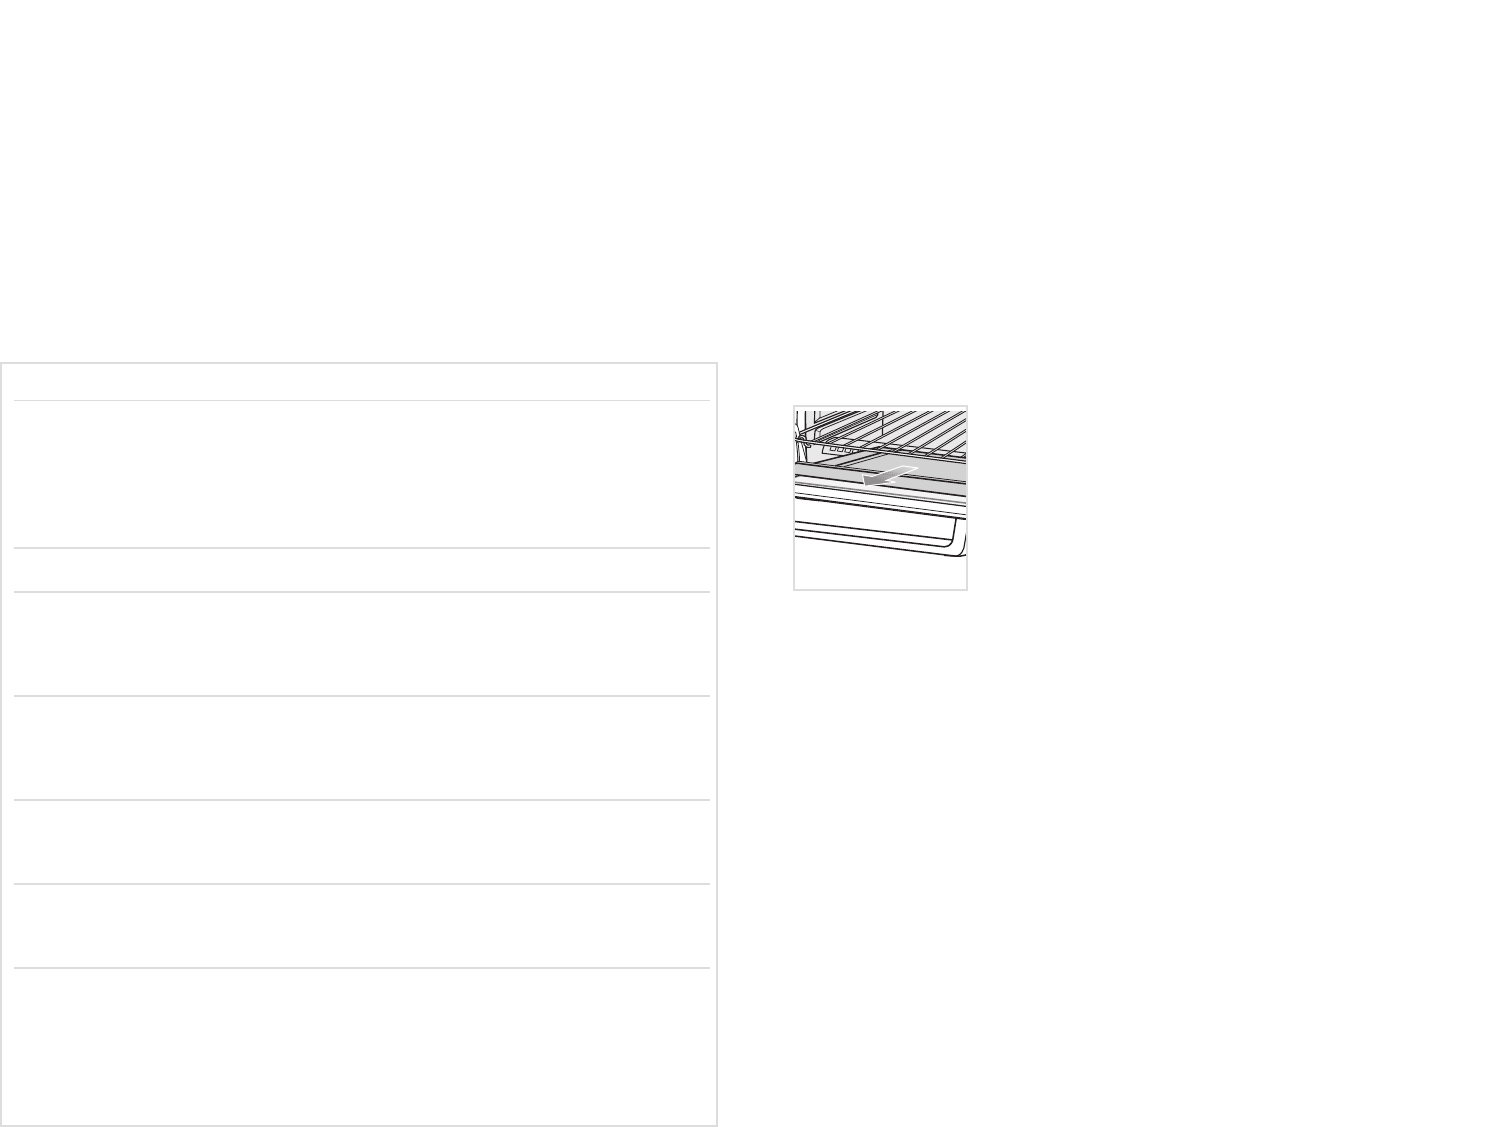
Crumb Tray
1. Open oven door and pull out crumb tray
(E).
2. Dispose of crumbs and wipe the tray with a dampened cloth, or wash
in sudsy water or in the dishwasher.
3. Be sure to dry thoroughly before inserting the tray back into the oven.
Exterior Surfaces
Important: The oven top surface gets hot, be sure the oven has cooled
completely before cleaning.
Wipe the top and exterior walls with a damp cloth or sponge. Dry
thoroughly.
Cooking Containers
Metal, ovenproof glass or ceramic bakeware without glass lids can be used in your oven. Follow
manufacturer’s instructions. Be sure the top edge of the container is at least 1" (2.54 cm) away
from the upper heating elements.
E