4
3
Product may vary slightly from what is illustrated.
ᕡ
ᕥ
ᕧ
ᕦ
ᕨ
ᕩ
µ
¸
ᕢ
ᕣ
How to Use
This appliance is for household use only.
1. Before first use, wash the cooking bowl, glass lid, steamer basket, condensation
catcher, serving scoop and rice measure in warm, soapy water. Rinse and dry well.
2. Place unit on a flat, stable surface.
Note: As the rice expands and cooks, steam will come out of the vent in the lid. Do not
place the rice cooker directly under your cabinets.
3. Measure desired amount of rice with the rice measure provided. Add butter, oil
and/or seasonings as desired.
Note: The rice measure provided is based on 5-1/2 oz. (150 g). Your rice cooker can
handle a maximum of 10 rice measures of dry rice — yielding approximately 20, 8 oz.
(227 g) cups of cooked rice.
Caution: To reduce the risk of electric shock, cook only in removable nonstick cooking
bowl provided.
4. Place rice in the cooking bowl. Add water. Use the water-level markings inside
the cooking bowl as a guide for adding the appropriate amount of water. For
example, for 4 measures of uncooked rice, fill with water to water-level marking 4.
Be careful not to add too much water as it may cause the unit to boil over. Use the
"BROWN RICE" markings when cooking brown rice and "OTHER RICE" for all other
varieties.
Note: Taste/hardness will vary depending on the quality/type of rice and length of time it is
cooked. For softer, fluffier rice, add a little more water. For firmer, crunchier rice, add a
little less water. See cooking guide (pages 5 and 6). You may need to experiment to suit
your taste.
5. Before placing the cooking bowl into the rice cooker, be sure the heating plate
and outside surface of the cooking bowl are clean and dry. Do not let loose rice
or particles fall into the rice cooker.
6. Insert cooking bowl into the rice cooker. You might have to turn it slightly to the left
and right to ensure proper contact with the heating plate.
7. Place the lid on the rice cooker.
Note: Always keep the lid on the rice cooker while cooking.
8. Plug into a standard electrical outlet. The WARM light comes on.
9. Press down the ON switch. The COOK light comes on and cooking begins. As the
rice expands and cooks, steam comes out through the steam vent on the lid.
Caution: Do not put your hand over the steam vent as you may get burned with the hot
steam.
10. Once rice is cooked, the COOK light turns off, the switch pops up and the rice
cooker automatically switches to the keep warm function. The WARM light comes
on and stays on, indicating serving temperature is maintained.
Note: The unit will stay in the keep warm cycle until it is unplugged. Do not try to prevent
the rice cooker from switching to the keep warm cycle. Do not immediately press the ON
switch again after it has begun the keep warm cycle.
11. After the switch pops up, leave the lid on for at least 15 minutes to further steam the
rice. If holding rice for longer than 30 minutes, stir occasionally to prevent browning
of rice on the bottom of cooking bowl.
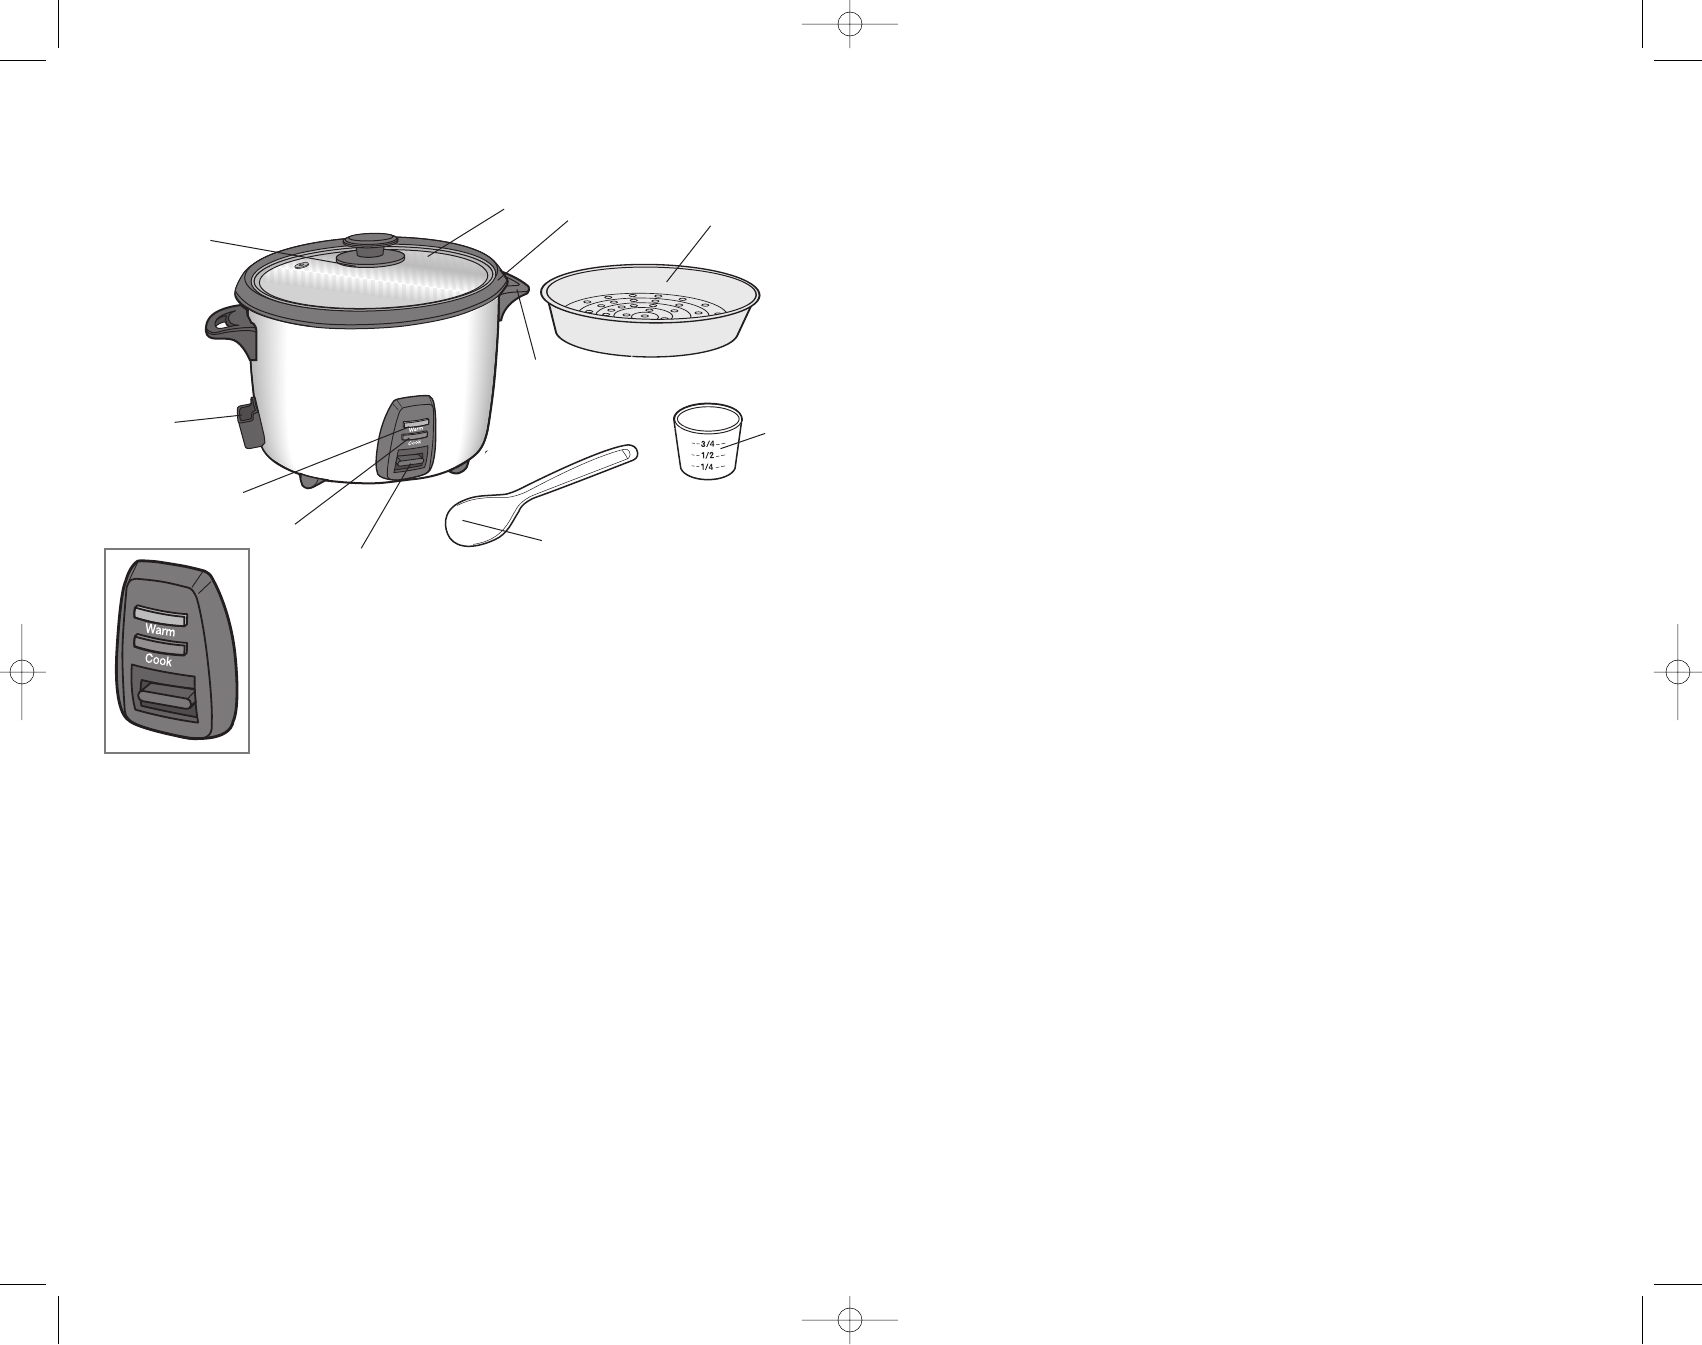
†1. Tempered glass lid with steam vent (Part # RC866-03)
†2. Cooking bowl with water level marks (Part# RC866-05)
†3. Steamer basket (Part# RC866-47)
4. Cool-touch side handles
†5. Rice measure (Part # RC865-44)
†6. Serving scoop (Part # RC865-43)
7. “On” switch
8. Cook indicator light
9. Warm Indicator light
†10.Condensation catcher (Part# RC865-33)
11. Lid hanger (not shown)
† Consumer replaceable/removable parts
ᕤ
RC866Pub10000002756R1 2/28/06 7:11 AM Page 4


