


8
7
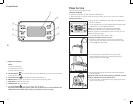
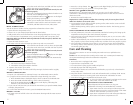
5. Place the carafe on the base and slide it all the way back
until it does not go any further (G).
Important: The carafe must be positioned correctly for unit
to function properly.
6. If the unit is unplugged, plug into electrical outlet. To set
the time, refer to Setting the clock.
7. Press the ON/OFF button. The appears on the digital
display; the brewing cycle begins.
8. When cycle is nished, the unit shuts off automatically.
9. Discard the water from the carafe and rinse the carafe,
carafe lid, and lter basket in warm, sudsy water.
READY TO BREW COFFEE
You do not have to set the clock or program the coffeemaker to brew coffee.
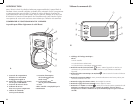
1. Open the brew compartment cover.
2. Insert a No. 4 cone-shaped paper lter into the brew basket.
3. Add ground coffee (we recommend one or two heaping tablespoons for every cup).
4. To close the brew compartment cover, press down gently until it snaps into place.
Important: Make sure the brew basket is positioned correctly into place; otherwise the
cover will not close.
5. Open the water reservoir cover.
6. Fill water reservoir with cold water up to the 8-cup mark. Do not overll.
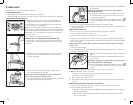
7. Place the lid onto thermal carafe as shown in Figure
(H).
8. Place the carafe on the base and slide it all the way back
until it does not go any further.
Important: The carafe must be positioned correctly for unit
to function properly.
9. Press the ON/OFF button. The displays on the digital
display and the brewing cycle begins.
10. When brewing cycle is nished, the unit automatically
shuts off.
Tip: Once the coffee has nished brewing:
a. Stir it before serving to blend the avors.
b. Discard the coffee grounds left in the lter.
11. Remove the carafe to pour coffee.
12. After pouring coffee, close the carafe lid by turning it clockwise until it is tightly
locked.
BREWING COFFEE ANYTIME
1. Prepare your coffeemaker as instructed in steps 1-8 under Ready to Brew Coffee.
2. To program and set a time for the coffeemaker to begin brewing your coffee:
a. Press the PROG button; the digital display shows 12:00 PM as the default time.
b. Press the HOUR and MIN buttons to select a time for brewing.
c. Press the AUTO/ON button; the appears on the display, indicating that
the brew cycle will start at the set time.
3. If you want to verify the time you selected for AUTO brew, just press the PROG button
to display the preset time.
4. To cancel the AUTO brew function, press the ON/OFF button twice.
BREWING 1-4 CUPS
1. Fill water reservoir half full as the unit will continue brewing until the water reservoir
is empty.
2. Press the 1-4 Cups button. The appears on the digital display; the brew cycle begins.
3. To stop the brewing cycle, press the 1-4 Cup button again.
SNEAK-A-CUP
®
INTERRUPT FEATURE
The Sneak-A-Cup
®
interrupt feature allows you to pour a cup of coffee while the
coffeemaker is still brewing by temporarily stopping the ow of coffee into the carafe for
about 30 seconds.
1. Remove the carafe from the unit.
Important: To avoid a possible overow after removing carafe, be sure to place it back
under brew basket in 30 seconds or less.
2. To prevent the lid from falling off while pouring coffee, make sure the arrow on the lid
aligns with the arrow on the carafe.
3. When nished pouring coffee, replace carafe under brew basket. The brewing process
continues.
USING YOUR PERFECT POUR
®
THERMAL CARAFE
• For best performance, rinse the carafe with hot water before brewing. This brings up the
temperature and improves the carafe’s thermal properties.
• The carafe spout is specially designed to deliver a dripless pour so you can serve coffee
without any messy drips.
• Coffee is brewed directly into carafe through the closed brew thru lid. Always check that
lid is properly in place when brewing. Coffee may overow if lid is not properly in place.
• The carafe keeps coffee hot up to 4 hours so you can leave it away from coffeemaker
for serving. Always check that lid is properly closed in place when not in use, this will
ensure that coffee stays hot.
Care and Cleaning
This appliance contains no user-serviceable parts. Refer service to qualied service
personnel.
Caution: Do not overexpose the control panel to water. It is not waterproof. Water may
cause permanent damage and make coffeemaker inoperable.
CLEANING
1. Be sure the unit is unplugged and cooled.
2. Open the brew compartment cover.
3. To remove brew basket, grip the handle and pull out.
4. Discard the paper lter with the grounds.
5. Wash the brew basket and carafe lid in the dishwasher, top-rack only or hand-wash in
warm, sudsy water.
6. Wipe the exterior of the thermal carafe and coffeemaker with a soft damp cloth. Do not
use abrasive cleaners or scouring pads. Never immerse the coffeemaker in water.
7. Insert brew basket into compartment and close the cover.
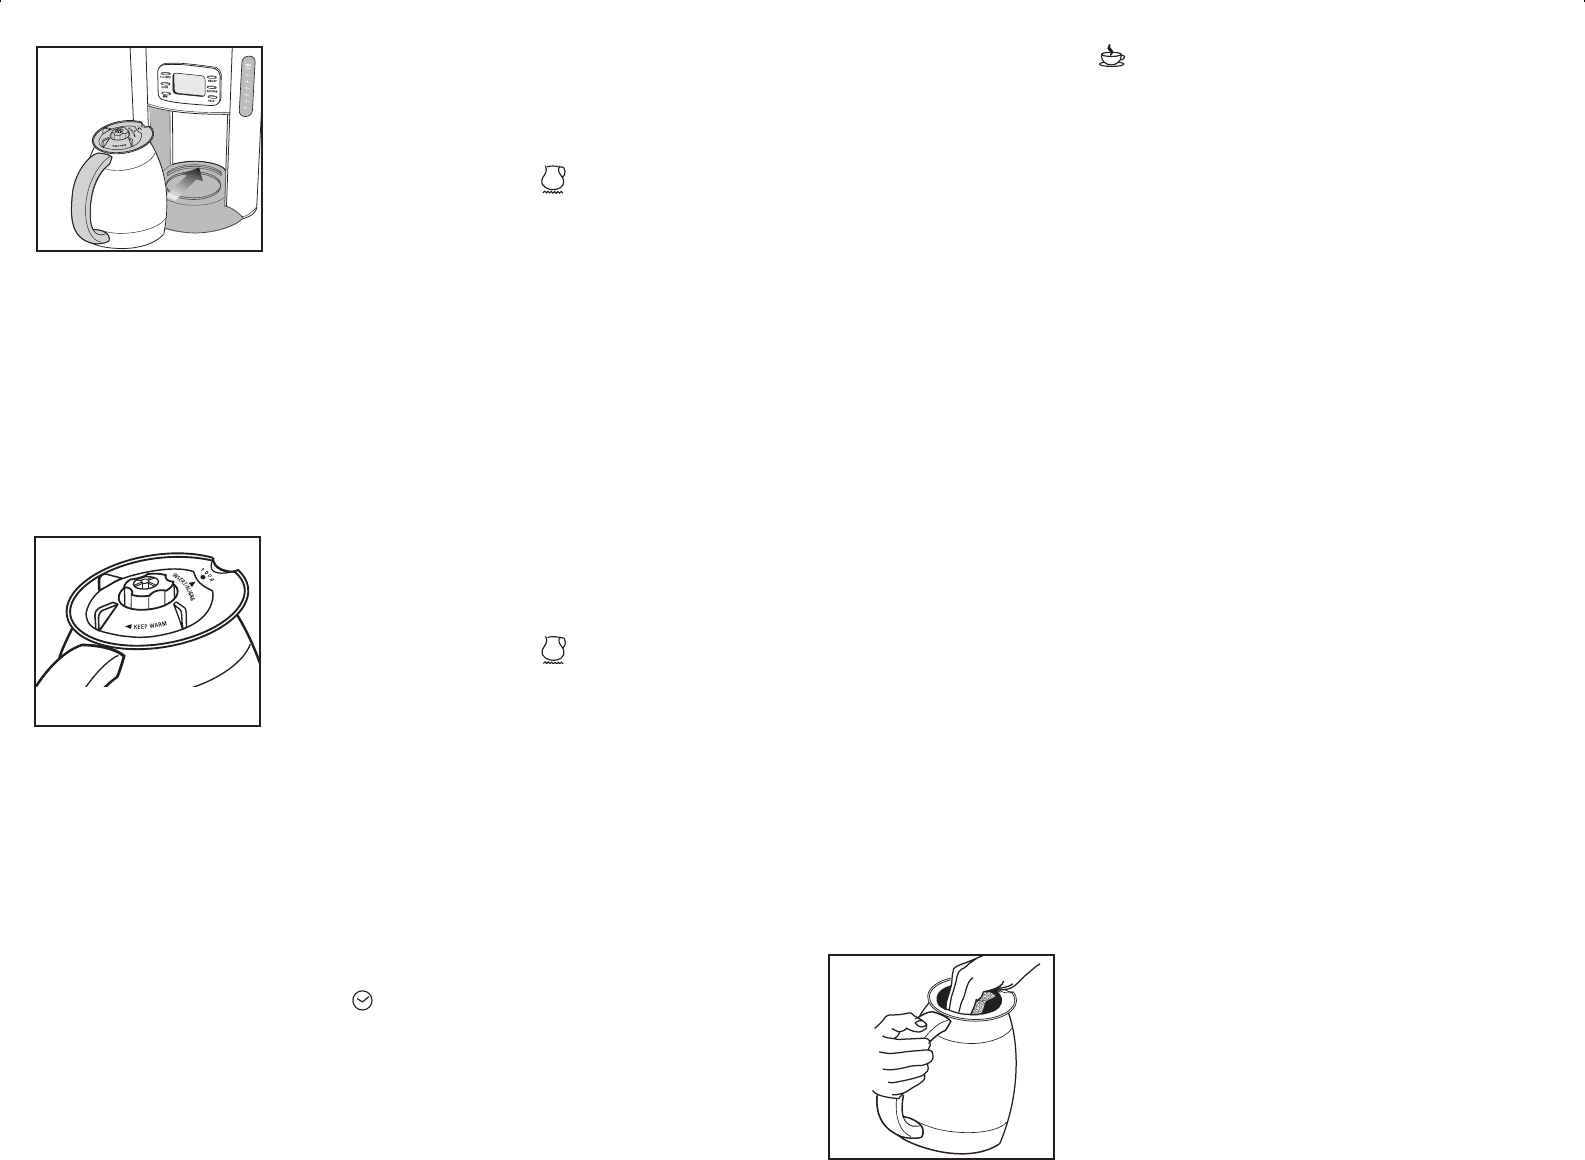
8. To clean the inside of the thermal carafe
(J), wash in warm
sudsy water, rinse well and allow to air dry.
MAINTAINING YOUR COFFEEMAKER
Mineral deposits left by hard water can clog your
coffeemaker. Cleaning is recommended one a months.
1. Open water reservoir cover and pour white vinegar into
the water reservoir up to the 4-cup level mark on the water
window. Add cold water up to the 6-cup line.
2. Open brew compartment cover and insert paper lter into
brew basket. Close brew compartment cover.
G
H
J