


How to Use
This product is for household use only.
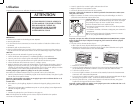
$ " 65 *0 /
THIS OVEN GETS HOT. WHEN
IN USE, ALWAYS USE OVEN
MITTS OR POT HOLDERS
WH EN TOUCHING ANY OUTER
OR INNER SURFACE OF THE
OVEN
GETTING STARTED
• Remove packing materials and any stickers.
• Remove the slide rack and bake pan from oven.
• Wash in sudsy water, or in the dishwasher.
• Replace slide rack in oven.
• Select a location for the unit. Do not place unit under cabinets or too close to the wall to allow
heat to flow without damaging counter space.
TOASTING
It is not necessary to preheat the oven for toasting.
1. Set temperature control to 450 Broil/Toast position.
2. Open oven door. Insert the slide rack into the
bottom slot.
3. Place the toast directly on the slide rack and close the door.
4. Set the cooking FUNCTION selector to Toast.
5. Set the TIMER/TOAST shade selector as desired. For best results, select the medium setting for
your first cycle, then adjust lighter or darker to suit your taste. The On indicator light comes on
and stays on during the toasting cycle. When toasting is done, the signal bell sounds, the oven
automatically shuts off and the On indicator light goes off.
Important: When using the TIMER/ TOAST function, always turn the dial past 20 and then
turn back or forward to desired setting.
Helpful Tip: for Multiple Toasting Cycles for best results, when making three or more consecutive
batches of toast, allow a short cool down period between toasting cycles.
6. Open oven door and using oven mitt or pot holder, slide out rack to remove toast.
Important: Always use an oven mitt or pot holder to remove food from the oven as the door
and the slide rack will be hot.
Useful Tips:
• You must turn Off the TIMER/TOAST shade selector if you want to discontinue toasting.
• When making more toast immediately after one toasting cycle, set the toast shade selector
to a slightly lighter setting.
BAKING
1. Consult the Baking Guide (pages 5 and 6) for the type of food you want to cook.
Note: For best results, when baking or cooking, always preheat the oven at least 10 minutes
at the desired temperature setting.
2. Open oven door. Insert the slide rack into the
bottom slot.
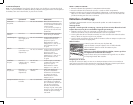
4
3
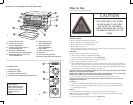
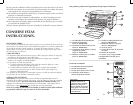
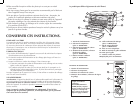
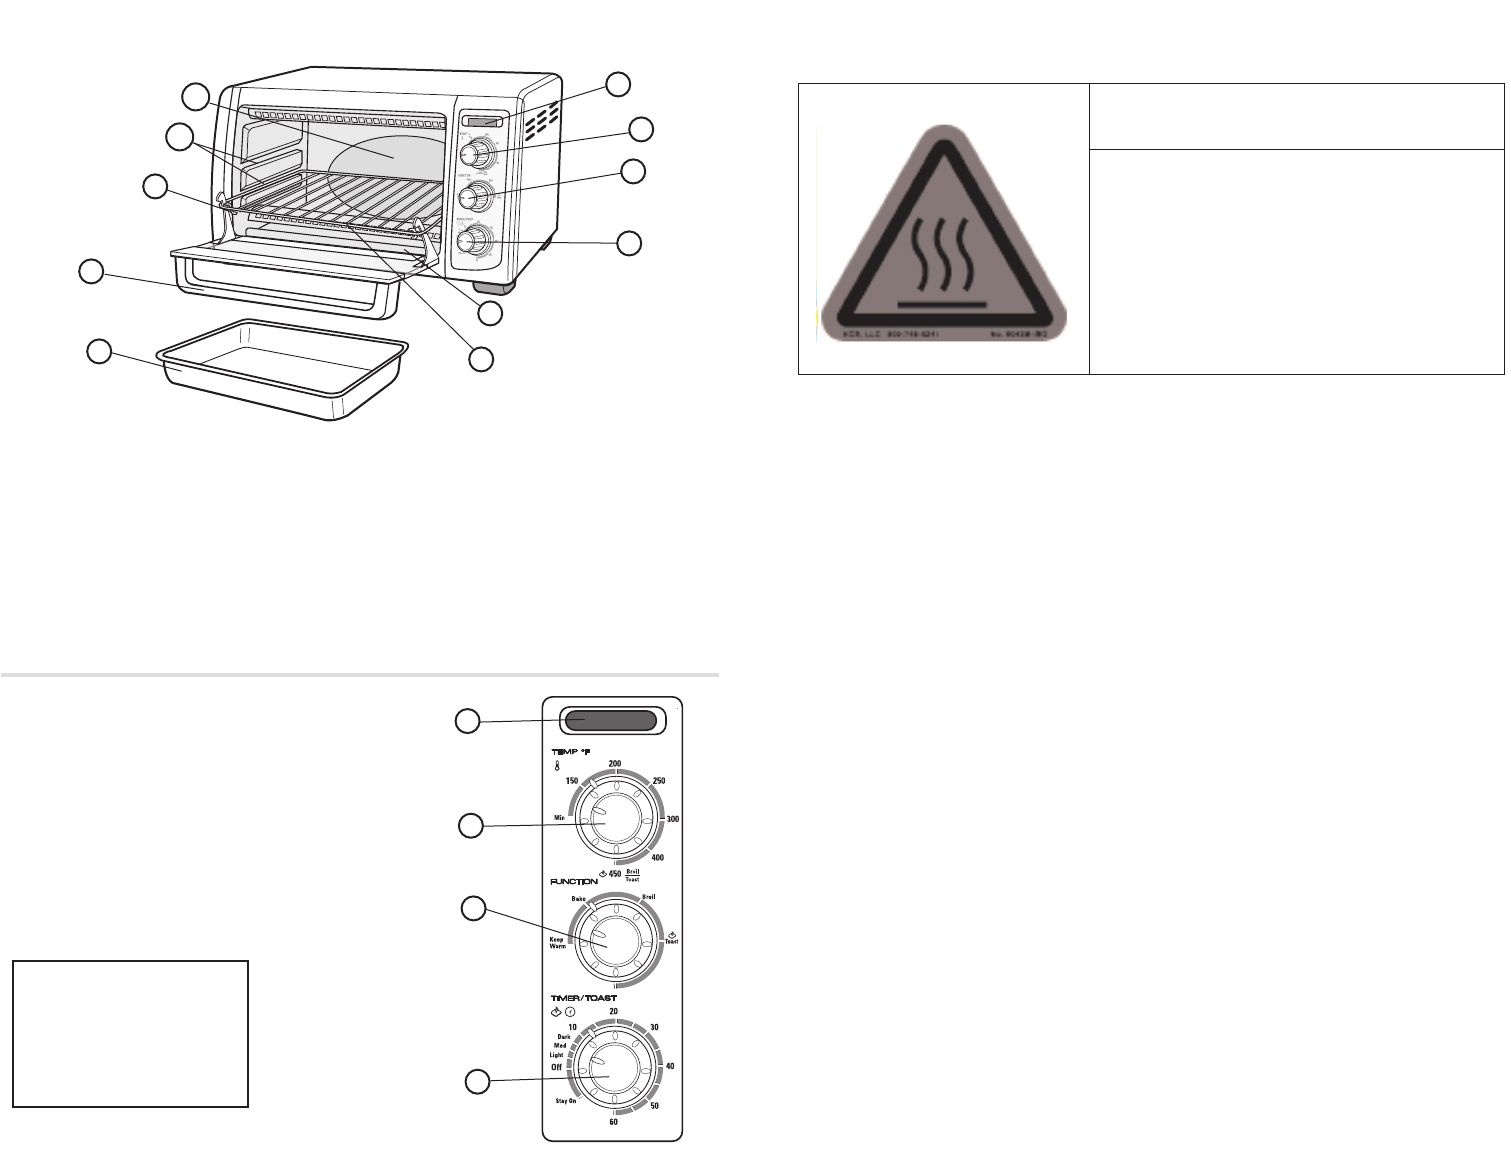
Product may vary slightly from what is illustrated.
1. Power indicator light
† 2. Temperature control
(Part# TRO4050-04)
† 3. Cooking FUNCTION selector
(Part# TRO4050-05)
† 4. 60-minute TIMER/TOAST
shade selector (Part# TRO4050-06)
† 5. Removable slide-out crumb tray
(Part# TRO4050-01)
† 6. Slide rack/broil rack
(Part# TRO4050-02)
† 7. Bake pan/drip tray
(Part# TRO4050-03)
8. Door handle
9. Slide rack support rails
10. Rack slots
11. Extra-deep curved interior
†Consumer replaceable/removable parts
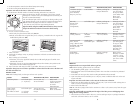
CONTROL PANEL
1. On indicator light
2. Temperature control
3. Cooking FUNCTION selector
4. 60-minute bake TIMER/TOAST shade selector
A
1
2
3
4
5
6
7
8
9
10
11
B
1
2
3
4
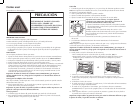
Important:
When using the
TIMER/ TOAST function,
always turn the dial past
20 and then turn back or
forward to desired
setting.
.