


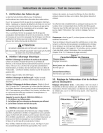

7. Test for Gas Leaks.
Leak testing is to be conducted by the installer according to
the instructions given in this section,
Turn on supply line gas shut off valve, Apply a non-corrosive
leak detection fluid to all joints and fittings in the gas connec-
tion between the supply line shut-off valve and the range,
Include gas fittings and joints in the range if connections
were disturbed during installation. Bubbles appearing
around fittings and connections indicate a leak.
If a leak appears, turn off supply line gas shut-off valve and
tighten connections. Retest for leaks by turning on the
supply line gas shut-off valve. When leak check iscomplete
(no bubbles appear), test iscomplete. Wipe off all detection
fluid residue.
NEVERCHECKFOR LEAKSWITH A FLAHE. |
O NOT CONTINUE TO THE NEXTSTEPUNTIL ALL LEAKS I
AREELIHINATED. j/
8. Test Electric Ignition°
Test Cooktop Burner Ignition, Select a rangetop burner
knob. Push down and turn to the flame symbol. If the
ignitor/spark module is operating correctly, it will click. Once
the air has been purged from the supply lines, the burner
should light within four (4) seconds. After burner lights, turn
knob to the off position.
Test each rangetop burner in this fashion.
Test Broil Burner Ignition, Set cooking mode to Hi Broil.
The burner will ignite after 30-75 seconds.
Test Bake Burner Ignition, Set the oven to bake at 350°
R After 30-75 seconds, the burner will ignite. The burner
will stay lit until the 350° F is reached and then shut off.
From this point forward, the burner will cycle on and off to
maintain the temperature.
Call Bosch Service ([8OOo944o2gO4} if:
1, Any of the burners do not tight,
2. The broil burner or bake burner does not stay lit,
3. The bake burner does not cyde,
9. Test/Adjust Fmameo
The combustion quality of the flame for each burner must be
visually inspected. If your range is a gas range, the bake
burner and broil burner flames must also be visually in-
spected. The flame should be blue with yellow tips. It
should carry over, or surround, the entire burner and should
not lift or blow offthe burner.
To inspect, turn the burner on. See Figure 7 for appropriate
flame characteristics. To view the bake burner, the oven
bottom cover must be removed; remove two rear thumb
screws, slide forward and out.
If the flame iscompletely or mostly yellow, the corresponding
air shutter and/or the orifice must be adjusted. Verify that
the orifice is all the way tightened. If the flame is still yellow,
adjust the air shutter. After adjustment, retest.
Note; With LP use, some yellow tipping on outer cones is
normal.
All burners must also be inspected for carryover. The flame
should completely surround the burner. If the cooktop
burners do not carry over, the bypass jet must be adjusted
(See step 4, page 4). If the broil or bake burner does not
carry" over, adjust the corresponding air shutter (see steps 10
and 11, below and next page).
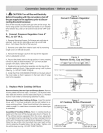
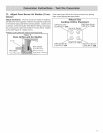
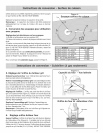
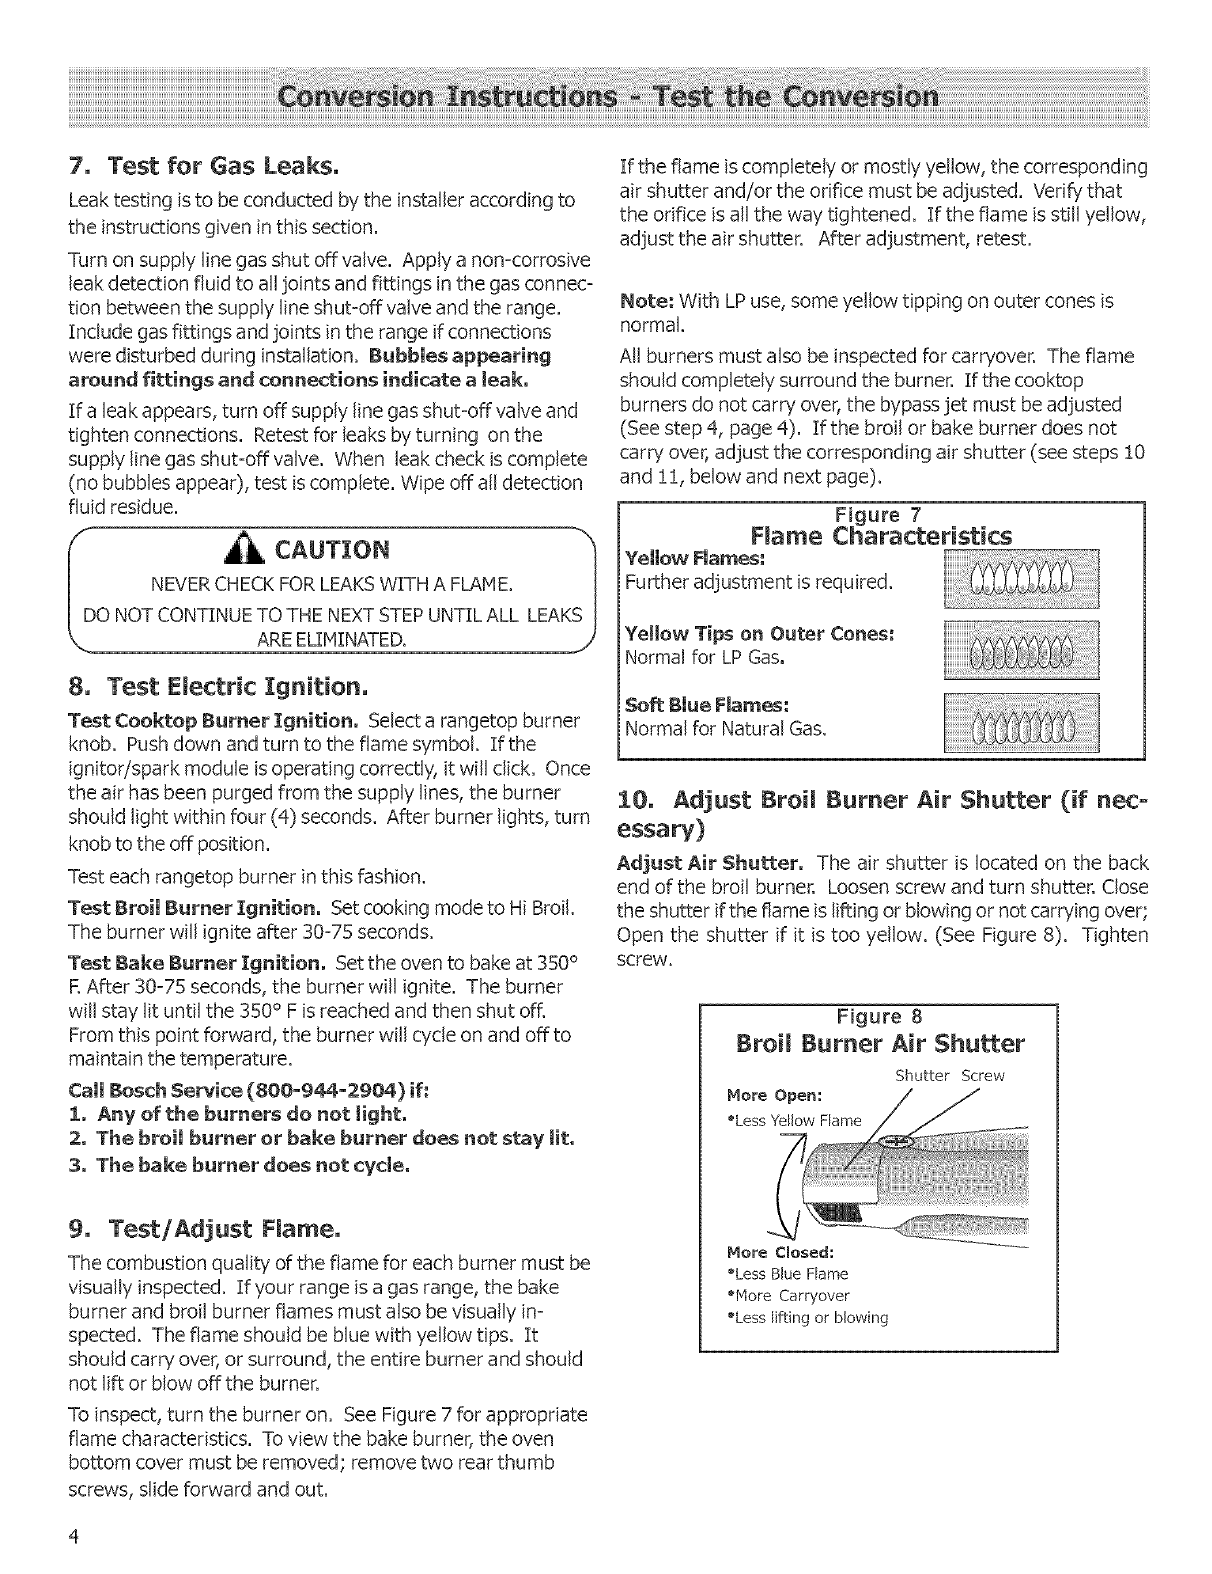
Figure 7
Flame Characteristics
Yellow Haines:
Further adjustment is required.
Yellow Tips on Outer Cones:
Normal for LP Gas.
Soft II}[ue Flames:
Normal for Natural Gas.
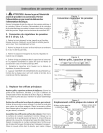
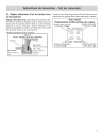
11}, Adjust l}roi[ Burner Air Shutter (if nec-
essary)
Adjust Air Shutter, The air shutter is located on the back
end of the broil burner. Loosen screw and turn shutter. Close
the shutter if the flame is lifting or blowing or not carrying over;
Open the shutter if it is too yellow. (See Figure 8). Tighten
SCreW.
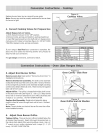
Figure 8
Broil Burner Air Shutter
Shutter Screw
More Open:
%ess Yellow Flame
More Closed:
%ess Blue Flame
_Hore Carryover
%ess [i_ing or blowing