


English
14
C
PLUMBING PREPARATION
(continued)
Drain Plumbing
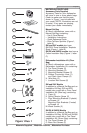
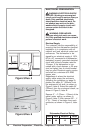
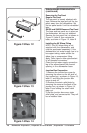
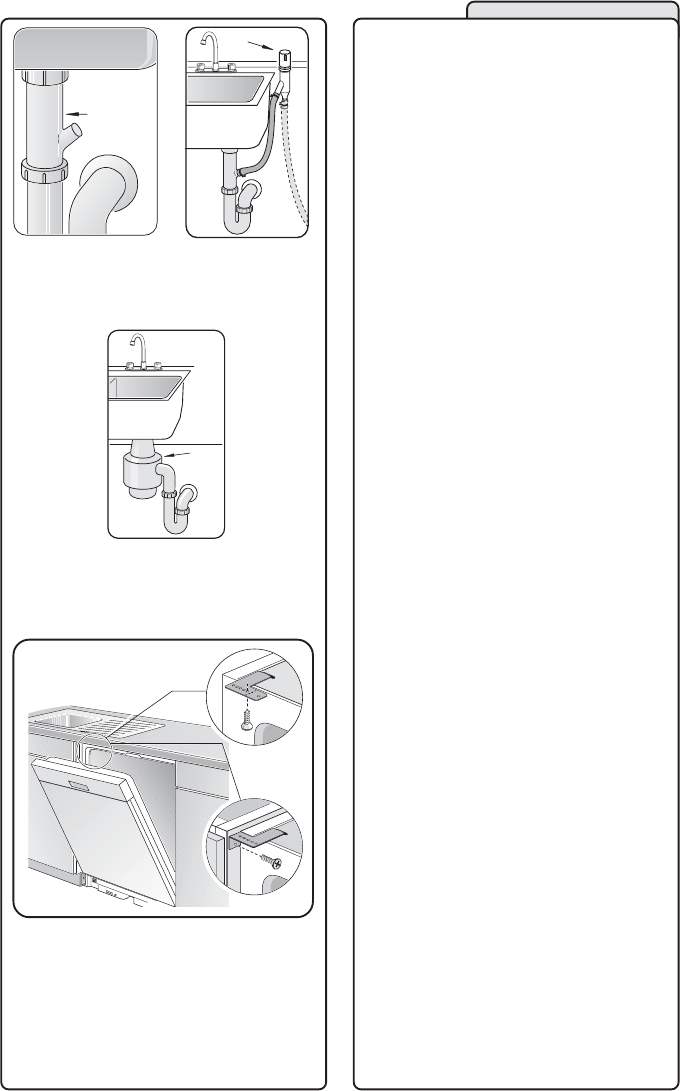
Dishwasher Connection Piece
If the dishwasher is to drain either directly
into the household drain plumbing or through
an air gap, install a dishwasher connection
piece under the sink, as shown in Figure 8,
letter A.
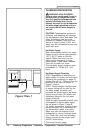
Installing an Air Gap
If local ordinances require an air gap, as
shown in Figure 9, letter B, install it accord-
ing to the manufacturer’s instructions.
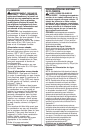
Disposer
If a disposer is to be installed, as shown in
Figure 10, letter C, install it according to the
manufacturer’s instructions. Whether the
disposer is newly installed or existing,
remove the disposer’s dishwasher drain
connection plug.
DISHWASHER PREPARATION
Dishwasher preparation involves four tasks:
• Installing the Mounting Brackets
• Removing the Toe Panel
• Installing the 90° elbow fitting
• Junction Box Preparation
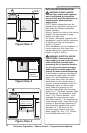
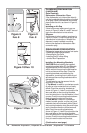
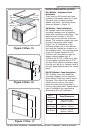
Installing the Mounting Brackets
CAUTION: Before installing the supplied
mounting brackets (letter E in the Materials
Supplied section of this manual), decide
which method of securing the dishwasher
into its enclosure will be used. Once the
mounting brackets are installed on the
dishwasher, removing them is difficult and
will damage the mounting brackets and the
dishwasher.
The dishwasher can be secured into its
enclosure in two ways:
1) Top Mount is used for countertops made
of wood or other materials that can easily
drilled. Orient the mounting brackets as
shown in Figure 11, letter A, and position the
two small tabs on the mounting brackets
over the two slots on the dishwasher’s front
corners. Push the mounting brackets down
firmly to insert the tabs into the slots.
2) Side Mount is used for countertops
made of marble, granite, or other very hard
materials that cannot be easily drilled. Bend
the mounting brackets along the small holes
and in the same direction as the two small
tabs. Orient the mounting brackets as
shown in Figure 11, letter B, and position the
two small tabs on the mounting brackets
over the two slots on the dishwasher’s front
corners. Push the mounting brackets down
firmly to insert the tabs into the slots.
(Continued on next page)
Figure 8
Ilus. 8
Figure 9
Ilus. 9
Figure 10/Ilus. 10
A
B
Dishwasher Preparation | Préparatio du Lave-Vaiselle | Preparación - La Lavadora
A
B
Figure 11/Ilus. 11