


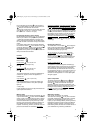

Installing the water filter cartridge
Unpack the water filter cartridge . Then put the fil-
ter cartridge for 10 minutes in a receptacle filled with
water.
Remove the space compensator from the tank
and replace it by the water filter cartridge. Make sur
e
to keep the space compensator as it could be needed
if you do not use the water filter any longer at a future
point in time or for decalcification.
After having installed a new water filter cartridge
always run a cycle of the maximum number of cups
of clean cold water through the unit before brewing
coffee.
In order to ensure the proper functioning of the
filter cartridge, exchange it after 2 months of regu-
larly using the coffeemaker. In order to remind you
to replace the filter in time, you may set the dial
incorporated in the tank cover to the month when
the cartridge has to be exchanged.
Dial for water fi
lter exchange
After having installed a new filter cartridge, set the
dial for 2 months later by turning it from the
reverse side of the tank cover.
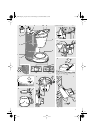
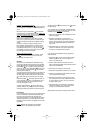
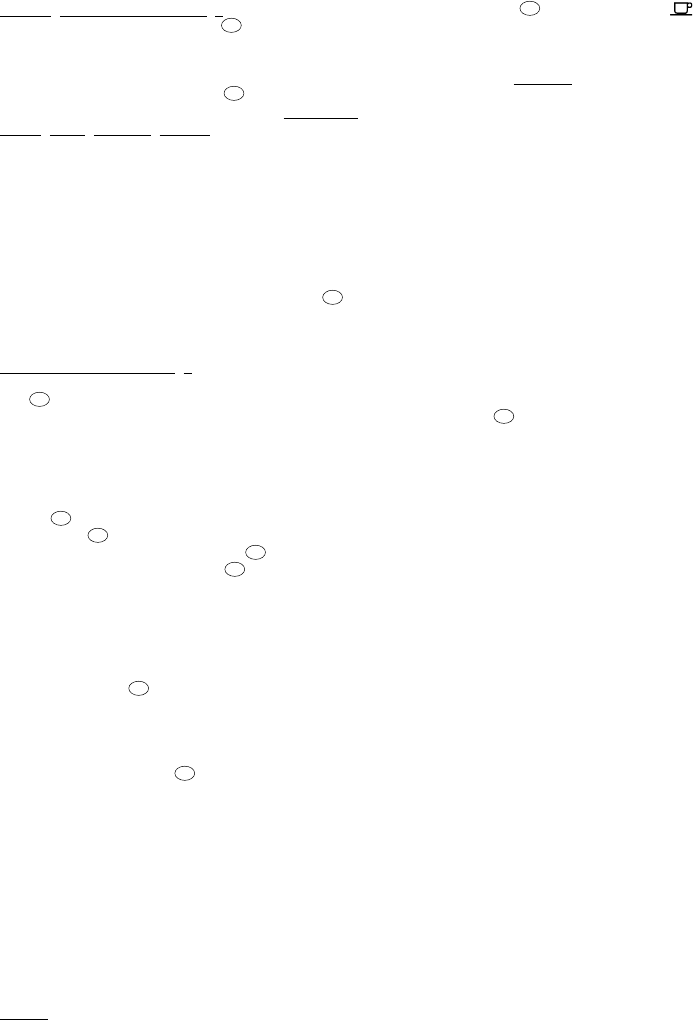
Cleaning
Always turn the coffeemaker off and pull the plug
out of the outlet before cleaning. Swing out the filter
basket and pull it off upwards from the filter sup-
port bracket (e). To replace, set the rectangular
opening in the rim of the filter basket on top of the
nose of the filter support bracket until the filter
basket snaps in place (e).
To wash, take the lid off the carafe (d). The carafe, lid
and filter basket can be cleaned in the dishwasher.
All other parts should be cleaned with a damp cloth
only. After cleaning, put the lid back on the carafe
(d).
Clean the hotplate with liquid cleansers only. Do
not use abrasive cleansers. The coffeemaker must
never be cleaned under running water and must
never be immersed in water.
The filter support bracket can be taken off for
cleaning. Swing it out, push it up and pull it off diag-
onally downwards (f). To replace, insert the top first.
Decalcifying
If you have hard water and you use your coffeemaker
without a water filter, it should be decalcified regu-
larly. When using the water filter cartridge and
exchanging it regularly, you normally will not need to
decalcify. However, if your coffeemaker takes much
longer than normal to brew, the appliance should be
decalcified.
Notice:
Replace the water filter with the space
compensator for any decalcifying procedure.
The flavor selector must be set to the symbol
for decalcifying.
You can either use a commercially available decalci-
fying agent which does not
affect aluminum or white
distilled vinegar (available at foodstores).
1. Follow the instructions of the manufacturer of the
decalcifying agent.
2. Repeat this procedure as many times as
necessary until the flow rate returns to normal
(approx. 50 seconds per cup including dripping).
Use a newly prepared decalcifying solution for
each cycle.
3. After decalcifying run at least two cycles of the
maximum number of cups of clean cold water
through the unit before brewing coffee.
If you are using white distilled vinegar, please pro-
ceed as follows:
1. Fill the tank to the 6 cup level with the white
distilled vinegar. Do not mix the vinegar with
water or any other liquid.
2. Set the carafe with the lid in place on the hot-
plate, snap the filter basket (without a filter) in place
and turn on the appliance.
3. Allow half of the vinegar to flow through.
4. Switch off the appliance and leave for 10 minutes.
5. Switch on the appliance again and allow the rest
of the vinegar to flow through.
6. Repeat this procedure as many times as neces-
sary until the flow rate of the coffeemaker returns
to normal (approx. 50 secs. per cup). Use fresh
vinegar for each cycle.
7. After decalcifying run at least two cycles of the
maximum number of cups of clean cold water
through the unit before brewing coffee.
Specifications are subject to change without notice.
4a
4
4b
4b
8
7
8
7
9
7
5
3
6
3111163_KF_140_NA Seite 6 Donnerstag, 23. November 2000 7:52 07