


Operating Instructions
• Do not operate continuously for
more than 1 minute.
• If pieces of unprocessed food
remain, or if there are any lumps,
continue pureeing the food,
however, mash the food pieces or
lumps by slightly raising and then
lowering the stick blender over
those pieces.
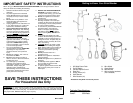
Multi-Mixer Assembly
CAUTION: Ensure that the
appliance is unplugged from the
electrical power source before
changing attachments. Do not
immerse the mixer gear box in water.
1. To attach the mixer gear box to the
power pack, line up arrow on the
power pack and mixer gear box.
2. Push power pack onto mixer gear
box until seated.
3. While grasping mixer gear box
rotate it 90º clockwise until the
arrow on the power pack aligns with
the “Square” on the mixer gear box.
4. To disassemble mixer gear box and
power pack rotate mixer gear box
90º counterclockwise.
Attaching the Attachments to the
Gear Box
CAUTION: Ensure that the
appliance is unplugged from the
electrical power source before
changing attachments. Do not
immerse the gear box in water.
Select the desired attachment, either
the dough hooks, wire beaters or
whisk and assemble to gear box as
noted below:
Note: When inserting dough hooks or
beater attachments, make sure to
insert the piece with the ring on the
shaft into the larger opening of the gear
box.
5
1. After attaching the desired
accessory into the gear box, plug
the mixer into power source.
2. Hold the power pack with one hand
and press and hold the On/Off
switch with your index finger.
3. Ensure that there are no
obstructions and that the
accessories are moving freely in the
mixing container.
4. When finished using the unit,
unplug the unit before removing the
accessories.
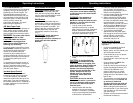
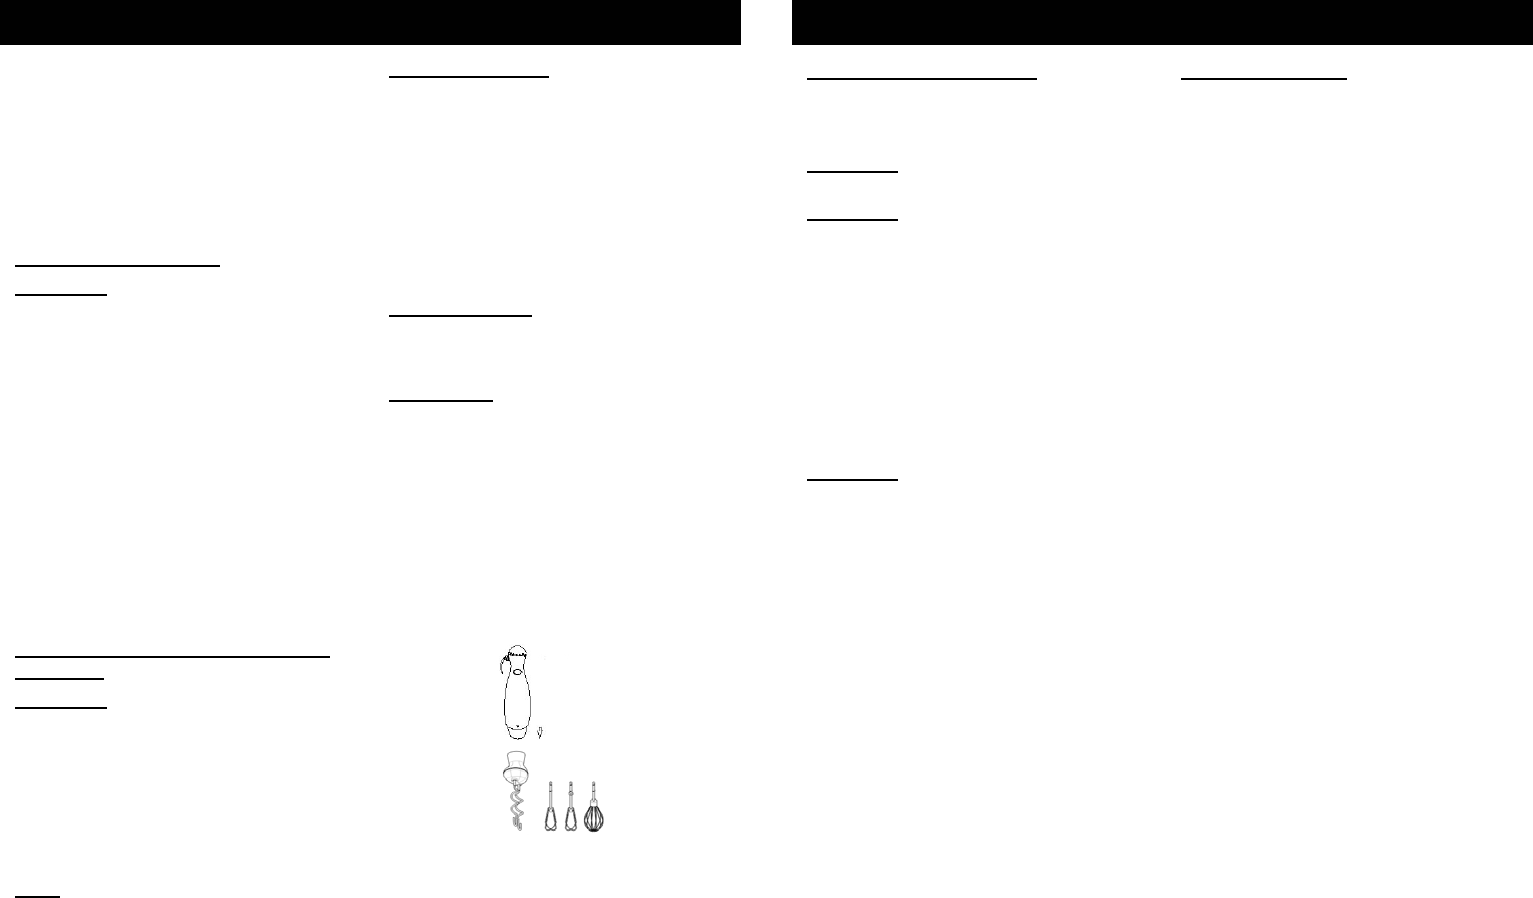
Dough Hooks (x2):
For use with light dough ONLY.
• Insert stem end of dough hooks (one
at a time) into opening in base of
gear box.
• Rotate slightly while pressing gently
until dough hook “clicks” into place.
• Repeat for second dough hook.
• Ensure that dough hooks are well
seated in mixer gear box.
Wire Beaters (2):
Follow same installation procedure as
above.
Wire Whisk:
This attachment is used for beating air
into mixtures such as egg whites, yolks
or creams.
• To install, place stem of wire whisk
into either of the openings in the
mixer gear box.
• Rotate wire whisk while pushing
gently until wire whisk “clicks” into
place.
• Ensure that wire whisk is well seated
in gear box.
Maintenance & Cleaning
Always disconnect unit from power
source before cleaning or changing
accessories.
CAUTION: Never immerse the
power pack, cord, or plug in water.
CAUTION: Do not immerse the
mixer gear box in water.
1. The unit and the various
attachments should be cleaned
after each use.
2. All accessories and glass beaker
can be cleaned with warm soapy
water.
3. Use a damp cloth or sponge to
clean the housing of the power
pack. Do NOT immerse in water or
any other liquid.
CAUTION: Use extreme caution
when cleaning the metal stick
blender because blades are SHARP.
Maintenance & Cleaning Instructions
6
Storing Your Unit
You may store your unit on the wall
bracket provided. DO NOT wrap
power cord around unit. Coil the
cord in loose loops and tie with a tie
wrap or twist tie.