


4
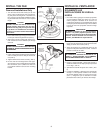
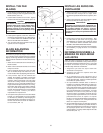
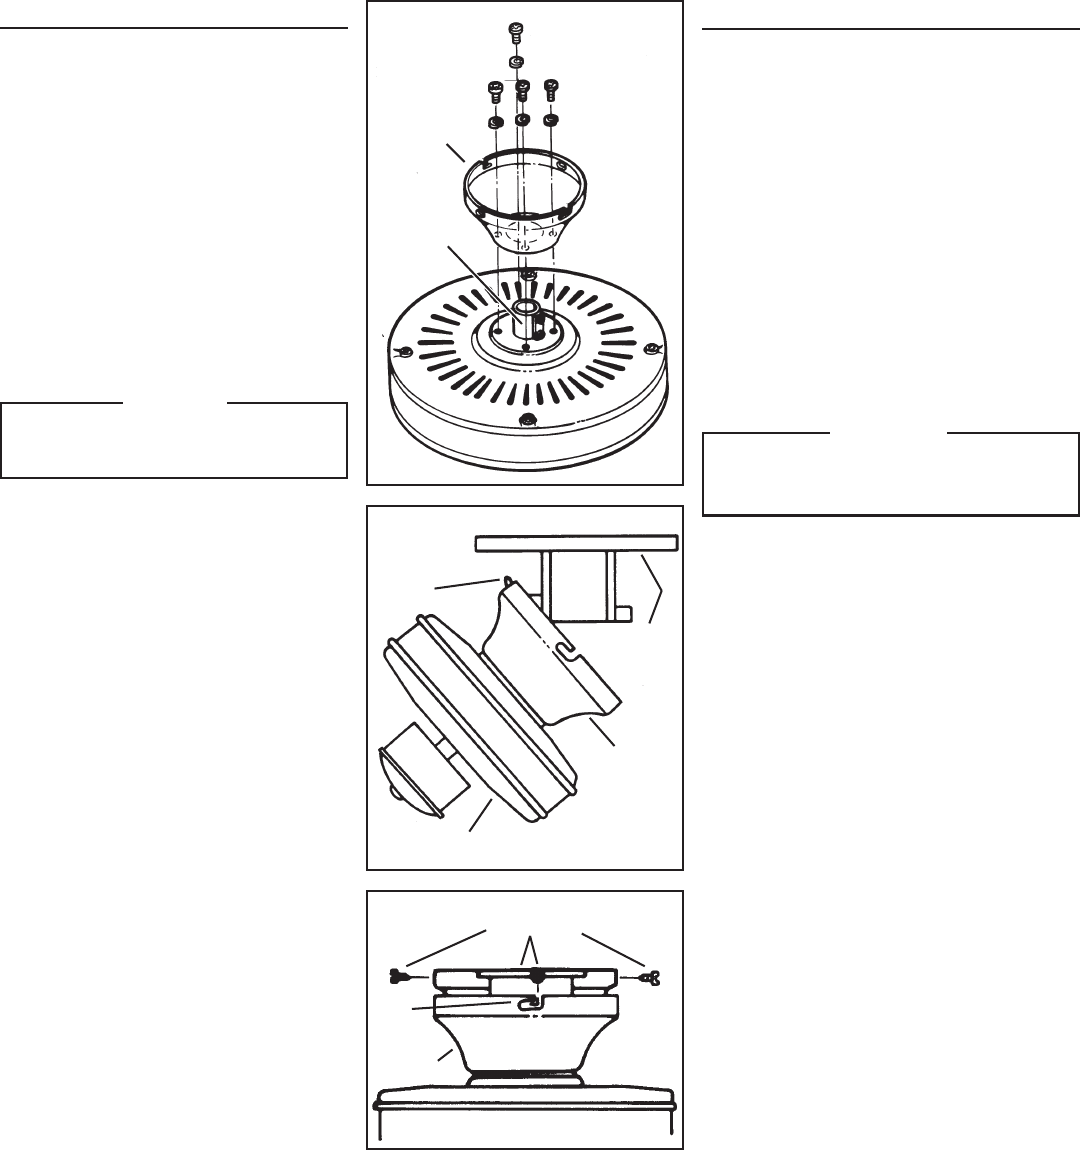
FIG. 9
HOOK
GANCHO
MOUNTING
BRACKET
MENSULA DE
MONTAJE
CANOPY
CUPOLA
MOTOR ASSEMBLY
CONJUNTO MOTOR
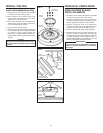
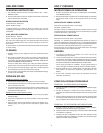
FIG. 10
SCREWS (4)
TORNILLOS (4)
CANOPY
CUPOLA
SLOT
RANURA
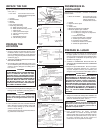
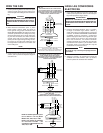
FIG. 8
SCREWS (4)
TORNILLOS (4)
CANOPY
CUPOLA
COUPLING
ACOPLE
INSTALL THE FAN
Low Profile Installations Only
1. Remove the four screws around the coupling
from top of the motor housing. (FIG. 8)
2. Place canopy on top of motor housing, align
the four holes and reinstall the four screws.
Tighten all four screws securely.
3. Place motor assembly onto mounting bracket.
The hole in the canopy should hang on the hook
on the mounting bracket. (FIG. 9)
4. Cut motor wires to proper length.
5. After making electrical connections, (See page
5), push canopy up onto mounting bracket and
turn motor so slots in canopy engage two
screws. (FIG. 10) Tighten both screws, then in-
stall two other screws. Tighten all four screws
securely.
CAUTION
At least four screws must be used to fasten
the canopy/motor assembly to the mounting
bracket.
INSTALE EL VENTILADOR
INSTALACIONES DE BAJO
PERFIL SOLAMENTE
1. Saque los cuatro tornillos de alrededor del acople
en el tope de la carcasa del motor. (FIG. 8)
2. Coloque la cúpola en el tope de la carcasa del mo-
tor, alinee los cuatro agujeros y reponga los cuatro
tornillos. Apriete bien todos los cuatro tornillos.
3. Coloque el conjunto motor en la ménsula de
montaje. El hueco de la cúpola deberá insertar en
el gancho de la ménsula de montaje. (FIG. 9)
4. Corte los alambres del motor al largo requerido.
5. Después de hacer las conexiones eléctricas (vea
la pág. 5) empuje la cúpola hacia la ménsula de
montaje y dé vuelta el motor hasta que la ranura de
la cúpola enganche los dos tornillos. (FIG. 10)
Apriete ambos tornillos y luego instale los otros dos
tornillos. Apriete bien los cuatro tornillos.
PRECAUCION
Por lo menos cuatro tornillos deben usarse para
sujetar el conjunto cúpola/motor a la ménsula
de montaje.