


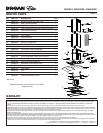
MODELS EW5630SS • EW5636SS
Page 5
L
C
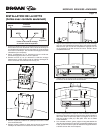
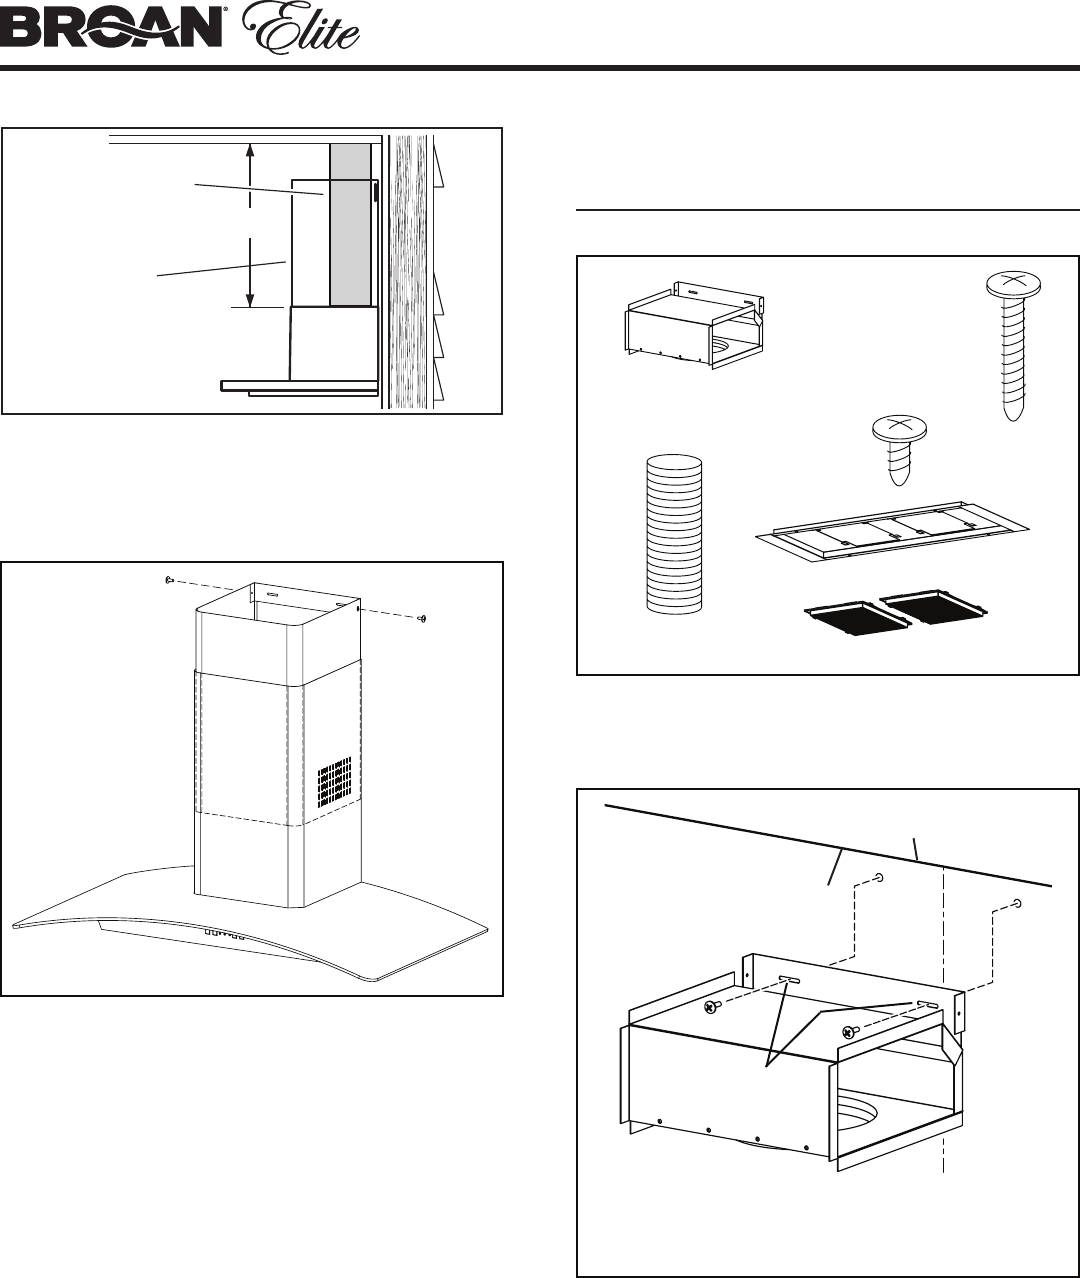
INSTALL THE HOOD
(Non-Ducted Hoods Only)
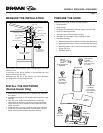
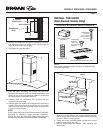
NON-DUCT KIT MODEL RKE56 CONTENTS
FLEXIBLE DUCT
NON-DUCTED RECIRCULATION FILTERS
NON-DUCT PLENUM
ASSEMBLY
4 MOUNTING
SCREWS
(.188” x .375”
Cross Recessed
Flat Head)
FILTER TRAY
2 MOUNTING
SCREWS
(4mm x 38mm
Cross Recessed
Pan Head)
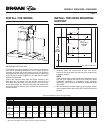
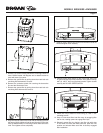
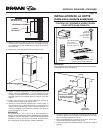
Flush with
the ceiling
Center of
installation
Upper flue mounting
bracket slots
Ceiling
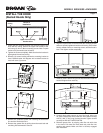
DUCT LENGTH
DECORATIVE
FLUE
6” ROUND
STEEL DUCT
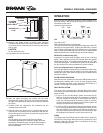
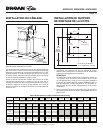
10. Measure and install steel ductwork to hood duct connector
and ductwork rough-in on ceiling or wall. Use duct tape to
make all joints secure and air tight.
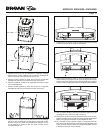
11. Plug power cord into wall outlet.
12. Slide the upper decorative flue section into the lower
decorative flue section. NOTE For ducted applications, the
louvers on the upper flue should be hidden by positioning
the louvers down, inside of the lower flue.
13. Carefully place the upper/lower flue assembly into the
recessed area of the hood.
14. Slide the upper flue upward until it is aligned with its mounting
bracket. The bracket should be inside the flue. Secure the
upper flue to the upper flue mounting bracket using (2) 4mm
x 12mm mounting screws.
NOTE
9-10 ft. ceilings may require Flue Extension Model FXNE56SS
depending on installation height (purchase separately).
Discard the upper and lower flues supplied with your hood
and replace them with Flue Extension Model FXNE56SS.
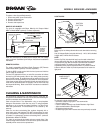
NOTE
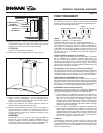
Non-ducted installations require Non-Duct Kit, Model RKE56
(purchase separately).
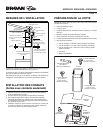
1. Center the non-duct plenum over the hood location and flush
with the ceiling. Secure the non-duct plenum to the wall using
(2) 4mm x 38mm mounting screws.
2. Tighten the screws completely. Make sure that the non-duct
plenum is tight against the wall.
3. Remove damper
flaps from damper / duct connector and
discard flaps.