


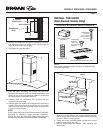
MODELS EW5630SS • EW5636SS
Page 8
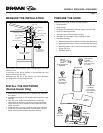
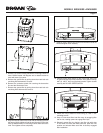
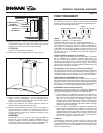
To replace a fuse (by qualified person(s):
1. Disconnect power at service entrance.
2. Remove decorative flues.
3. Remove control cover.
4. Remove and inspect fuse.
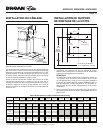
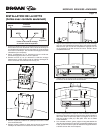
MAKE-UP AIR DAMPER
The hood is compatible with Broan Make-Up Air Damper Model
MD6T or Model MD8T (optional). Purchase separately.
Make the connection to the Make-Up Air Damper with low voltage
wiring, as shown. See Make-Up Air Damper instructions for additional
information.
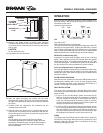
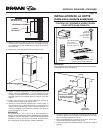
REMOTE CONTROL
The hood is compatible with Broan Radio Frequency (RF) Remote
Control Model BCR1 (optional). Purchase separately.
To link the BCR1 remote control with the hood, press and hold the
LIGH T button for 3-seconds.
The blue LED indicators will turn on and off in succession to indicate
the hood is in RF linking mode. When in the linking mode, press any
key on the RF remote. An audible beep will be heard at the hood, and
the hood LED’s will stop blinking if a successful link is accomplished.
If the remote control did not successfully link with the hood, the linking
mode will be deactivated after 12 seconds, and the LED’s will stop
the sequential blinking. Refer to the BCR1 instructions for additional
information.
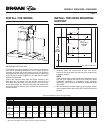
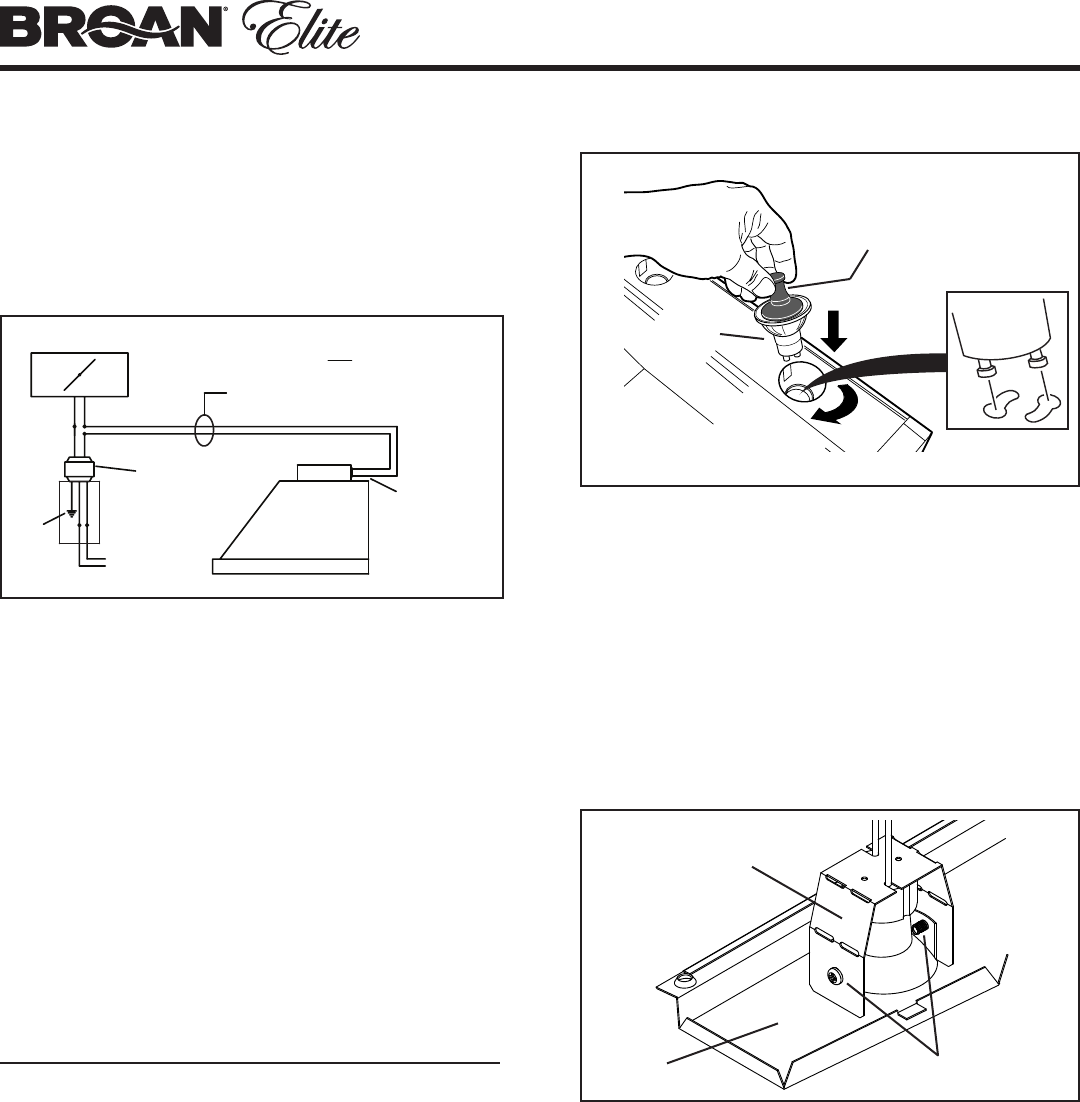
(1)
PUSH IN
(2)
ROTATE
CLOCKWISE
SUCTION
CUP TOOL
HALOGEN
BULB
LAMP SOCKET
BRACKET
SCREWS
LIGHT
PANEL
CLEANING & MAINTENANCE
For performance, appearance, and health reasons, clean filter, fan
and grease-laden surfaces. Use only a clean cloth and mild detergent
solution on stainless and painted surfaces.
Clean all-metal filters in the dishwasher using a non-phosphate
detergent. Discoloration of the filter may occur if using phosphate
detergents, or as a result of local water conditions - but this will not
affect filter performance. This discoloration is not covered by the
warranty.
Clean the non-duct recirculating filter surfaces frequently with a
damp cloth and a mild detergent. DO NOT immerse filters in water
or put in dishwasher. Change the non-duct recirculating filters every
6 months. For replacement non-duct recirculating filters - purchase
S99010365 or Model FILTERE56.
The motor is permanently lubricated and never needs oiling. If the
motor bearings make excessive or unusual noise, replace the blower
assembly with an exact service replacement.
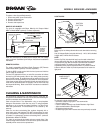
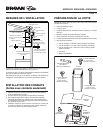
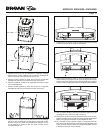
LIGHT BULBS
WARNING
Bulbs may be hot. Always allow bulbs to cool down before removing
them.
Use (2) Halogen Bulbs (included with hood) - 120 V, 35 W, shielded
halogen bulbs - MR16 with GU10 base.
NOTE
Suction Cup Tool (included with hood) can be used to install and
remove light bulbs. Align pins on bulb with large diameter opening
on socket, then
push
bulb in towards hood and rotate clockwise
until firmly seated. The position of the bulb socket (depth) is
adjustable and may require adjustment when: a) certain brands of
bulbs are difficult to install. b) the bulb protrudes too far below the
light panel.
To change the depth of bulb sockets:
- Remove 2 screws on light panel – set screws aside
- Remove Light Panel.
- Loosen 2 Screws holding Lamp Socket Bracket to Light Panel.
- Adjust socket/bracket to desired depth.
- Re-tighten screws securely.
- Re-attach light panel with 2 screws that were previously set aside.
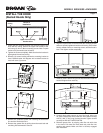
MAKE-UP AIR DAMPER
HOOD
24V
TRANSFORMER
(INCLUDED)
GRD
DRY CONTACT
TERMINAL
BUSHING
FOR LOW
VOLTAGE
CONNECTION
MAKE UP DAMPER CONNECTION
(switched low voltage)
20 GAUGE BELL WIRE FOR LOW
VOLTAGE CONNECTION ON
TOP OF HOOD
120 VAC
60 HZ