


MODELS EW5830SS • EW5836SS
Page 6
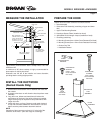
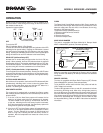
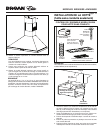
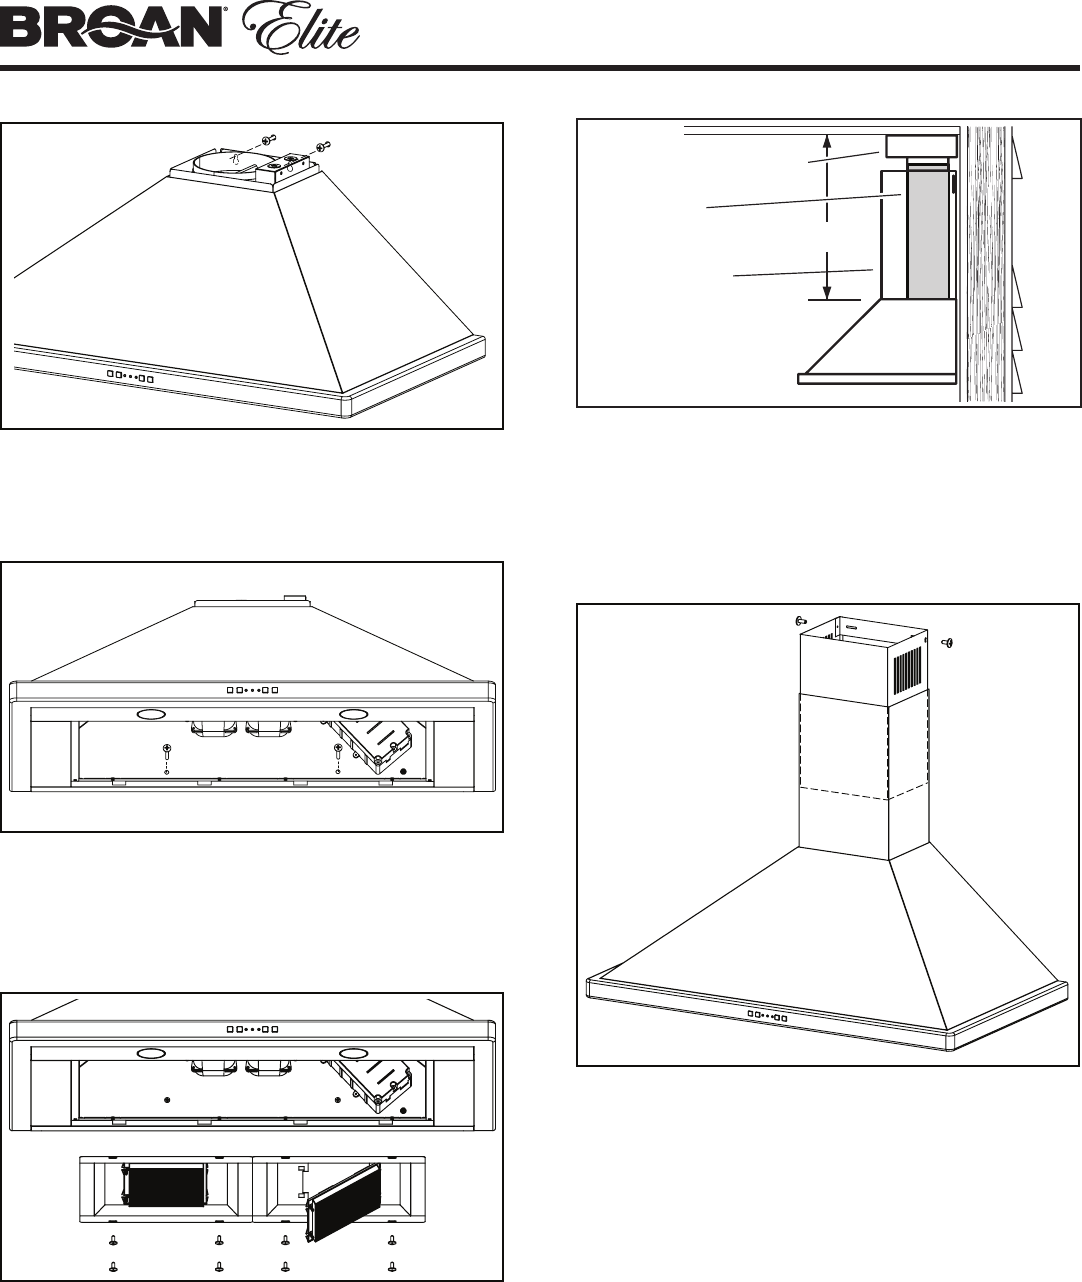
6. Align the two outer keyhole slots on the hood with the
mounting screws that were partially tightened into the wall
framing. Ensure that hood is seated entirely on mounting
screws and that hood is level. Then tighten screws completely.
7. Install (2) 4mm x 38mm long screws into the holes inside the
hood and tighten them securely.
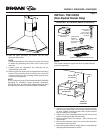
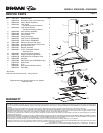
8. Attach (2) filter trays to bottom of hood using (8) .188” x .375”
mounting screws.
9. Snap in 2-non-duct filters into filter trays by engaging filter
tab on side, rotating upward, and pressing firmly on (2) filter
clips.
10. Reinstall grease filters by aligning rear filter tab with slots
in the hood. Pull down the metal latch tab, push filters into
position and release. Make sure filters are securely engaged
after installation.
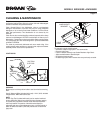
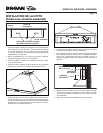
11. Measure and install section of flexible metal ductwork
(included with RKE58) to hood duct connector and bottom
of non-duct plenum. Use duct tape to make all joints secure
and air tight.
CAUTION
Do not use plastic duct.
12. Plug power cord into wall outlet.
13. Slide the upper decorative flue section into the lower
decorative flue section.
NOTE
For non-ducted applications, the upper flue should be
oriented so the louvers are towards the ceiling.
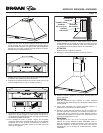
14. Carefully place the upper/lower flue assembly into the
recessed area of the hood.
15. Slide the upper flue upward until it is aligned with the non-
duct plenum. The non-duct plenum should be inside the flue.
Secure the upper flue to the non-duct plenum using (2) 4mm
x 12mm mounting screws.
NOTE
9-10 ft. ceilings may require Flue Extension Model
FXNE58SS depending on installation height (purchase
separately). Discard the upper and lower flues supplied with
your hood and replace them with Flue Extension Model
FXNE58SS.
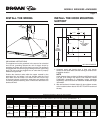
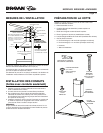
DUCT LENGTH
DECORATIVE
FLUE
6” ROUND
FLEXIBLE
METAL DUCT
NON-DUCT
PLENUM