


24
SERVICE (cont.)
LAMP CORD CONNECTOR
If continuity is present as described, the lamp cord
connector is operating properly.
If continuity is not present as described, replace the
lamp cord connector.
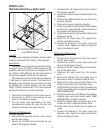
Removal and Replacement:
1. Disconnect the lamp cord assembly from the lamp
cord connector.
2. Remove the six #8-32 screws securing the rear
cover to the dispenser.
3. Disconnect the lamp cord connector wires from
the dispenser main wiring harness.
4. Remove nut and washer securing the lamp cord
connector to the dispenser. Remove and set aside
the insulating washers and discard nut, washer and
lamp cord connector.
5. Remove new nut and washer from new lamp cord
connector.
6. Install the insulating washers to the hole in the top
of the dispenser. Push new lamp cord connector
through the holes in the insulating washers and
secure with the new nut and washer.
7. Reconnect the wires on the cord connector to the
dispenser main wiring harness.
8. Connect the lamp cord to the lamp cord connec-
tor.
9. Install the rear cover to the dispenser and secure
with six #8-32 screws.
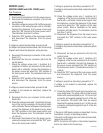
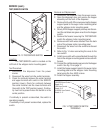
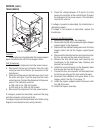
FIG. 20 LAMP CORD CONNECTOR
P1928
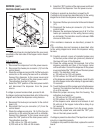
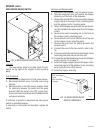
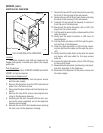
FIG. 19 LAMP CORD CONNECTOR
P1923
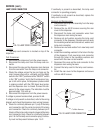
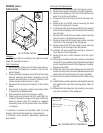
Location:
The lamp cord connector is located on top of the
dispenser.
Test Procedures:
1. Disconnect the dispenser from the power source.
2. Disconnect the lamp cord from the lamp cord con-
nector.
3. Disconnect the plug on the dispenser main harness
from the connector from the lamp cord connector.
4. Check the voltage across the two pin holes on the
main harness plug with a voltmeter and Day/Night
switch in the “DAY” position and the “ON/OFF” switch
in the “ON” position. Verify that the dispenser hop-
per is full and in place, the dispenser probe contact
is making contact with the CDS liquid level probe,
and the dispenser door is closed. Connect the dis-
penser to the power source. The indication must be
approximately 12.6 volts ac.
5. Disconnect the dispenser from the power source.
If voltage is present as described, proceed to #6.
If voltage is not present as described, refer to the wiring
diagram and check the dispenser main wiring harness.
6. Check for continuity between pin 1 (red) of the lamp
cord connector and the center terminal of the lamp
cord connector. Check for continuity between pin 2
(black) of the lamp cord connector plug and the lamp
cord connector body. Check for continuity between
pins 1 & 2 of the lamp cord connector plug. Continu-
ity must not be present between pins 1 & 2.
To Main Harness
29793 061599