5
CLEANING
WARNING - Unplug the grinder before the removal of any panel or grind chamber-housing parts.
1. Clean all exterior surfaces using a damp cloth rinsed in any mild, nonabrasive, liquid detergent. Care should
be taken not to scratch the grinder with any abrasive material.
2. Empty all beans from hopper(s). Plug in the grinder, place an empty bag behind the dispense chute or trifecta
brew cup. Press and release the “START” switch. Run a few cycles until all coffee in the grind chamber is
dispensed and disconnect the grinder from the power source. Remove the bag or brew cup.
WARNING - Prior to cleaning the grind chamber, unplug the grinder.
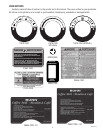
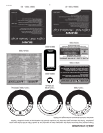
3. Remove the two screws and remove the dial plate and selector knob assembly.
4. Slide the burr auger rotor/spring assembly off the motor shaft and disassemble for cleaning.
5. Remove the two screws securing the stationary burr to the grind chamber.
6. Remove the four screws at the top of the chute and remove the chute. Using a pair of pliers, remove the C-
clips securing the flapper arm to the chute. Remove the flapper securing pins carefully (noting the location
of each flapper spring).
7. Wash all parts in a mild solution of detergent with hot water and a stiff non-metallic bristle brush. Rinse all
parts thoroughly and allow them to air dry before reinstalling.
8. Carefully clean the grind chamber, dial plate assembly, chute opening and dial plate opening with a dry stiff
non-metallic bristle brush. Wipe with a clean cloth that has been soaking in a mild solution of detergent and
hot water. Reinstall the spring and rotor with burr onto the motor shaft.
9. Align the slot in the motor shaft with the rotor and reinstall shear plate. Reinstall rotor cup and grind selector
dial plate to the burr housing. Refer to the “Adjustment” section of the Operating and Service manual for
burr adjustments.
BASE RELOCATION
1. Disconnect the grinder from the power source.
2. Tip the machine gently, on its back, so it rests with approximately one inch of the bottom overhanging the
work surface.
3. Remove the drawer from the base assembly.
4. Place the base against the grinder bottom and align the four sets of holes.
5. Securely fasten the base to the grinder bottom using the four screws and washers provided.
6. Raise the grinder to the upright position.
7. Insert the drawer into the base assembly.
43254 080510
PREVENTIVE MAINTENANCE
Bunn-O-Matic
®
Corporation recommends that preventive maintenance be performed at regular intervals. Maintenance
should be performed by a qualified service technician. For Technical Service, contact Bunn-O-Matic
®
Corporation at
1-800-286-6070.
NOTE: Replacement parts or service caused by failure to perform required maintenance is not covered by warranty.
6-Month
Weekly Cleaning plus replace the dechaffer assembly.
1-Year
1. On grinders with slide plates check the slide plates and clean.
2. Inspect and clean/replace burrs and grind chamber if necessary.
3. Adjust the burrs and grind time to your specifications for particulate size and throw weight.


