Page 5
10792 091701
ADJUSTING BREW VOLUMES (cont.)
to be removed from the total brew time period; then immediately press and hold down the START or BREW
switch until three clicks are heard. Release the switch. (Failure to release the switch within two seconds after
the third click causes the volume setting to be aborted and previous volume setting will remain in memory).
Allow the brew cycle to finish in order to verify that the desired volume has been achieved.
2. Setting batch sizes. To set a batch volume, first check that the SET/LOCK switch is in the “SET” position on
the circuit board. Press and hold the START or BREW switch until three distinct clicks are heard (approxi-
mately 10 seconds) and then release the switch. (Failure to release the switch within two seconds after the
third click causes the volume setting to be aborted and previous volume setting will remain in memory). View
the level of the liquid being dispensed. When the desired level is reached, turn the ON/OFF switch to “OFF”
(lower). The brewer remembers this volume and will continue to brew batches of this size until the volume
setting procedure is repeated.
NOTE: When brewing tea, batch volumes will decrease due to absorption by the tea leaves.
3. Setting programming disable feature. If it becomes necessary to prevent anyone from changing brew times
once programmed, you can set the SET/LOCK switch to the “LOCK” position. This will prevent any program-
ming to be done until switch is once again placed in the “SET” position.
CLEANING
CAUTION - Clean and sanitize your iced coffee brewer daily
1. Remove and thoroughly clean the entire brew funnel. The funnel must be free from any coffee particles or
residue.
2. Disconnect the brewer from the power source. Remove and thoroughly rinse the sprayhead. Wipe the
sprayhead panel clean with a damp cloth.
3. Insert the deliming spring into the sprayhead fitting until no more than one inch is visible and move it in and
out 5 or 6 times. Insert the spring into the airvent hole in the sprayhead panel and move it in and out 5 or 6
times. Reattach the sprayhead.
4. Wash the entire outside surface of the brewer with a clean damp cloth.
CAUTION - Do not keep brewed coffee overnight. The dispenser must be cleaned and sanitized daily.
OPERATING CONTROLS
A. Lighted On/Off Switch
ON - Placing the switch in the lighted upper position allows the start switch to activate a brew cycle.
OFF - Placing the switch in the lower position stops the brew cycle. Stopping a brew cycle after it has been
started will not stop the flow of water into the funnel until the tank syphons down to its proper level.
NOTE - The switch should always be placed in the “OFF” position after a brew cycle and whenever the brewer is
unattended.
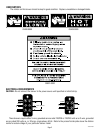
B. Full/Half Batch Selector Switch
Full - Placing the switch in the upper position produces a full batch of room temperature coffee from the brew
cycle.
Half - Placing the switch in the lower position produces half of a full batch of room temperature coffee from the
brew cycle.
C. Start Switch
Starts a brew cycle when the lighted On/Off switch is in the “ON” position.


