


SOLENOID VALVE
MAINTENANCE
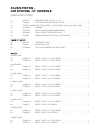
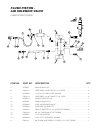
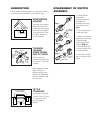
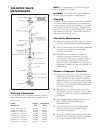
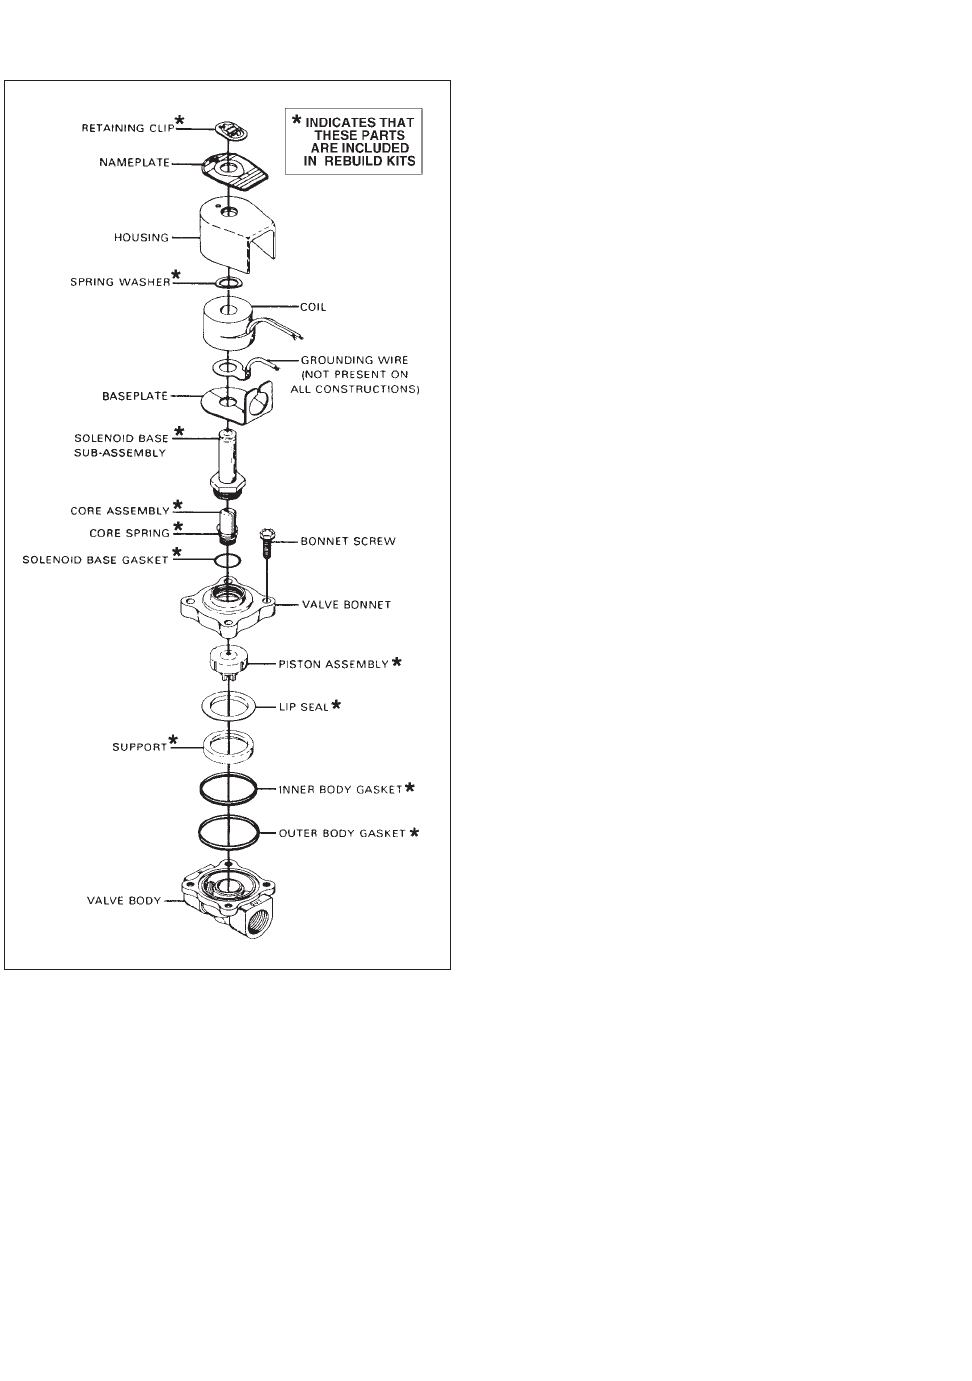
Solenoid Valve Exploded View Drawing
Ordering Information
Parts marked with an asterisk (*) in the Solenoid
Valve Exploded View Drawing are supplied in the
Rebuild Kits.
Valve# Rebuild Replacement
(Description) Kit# Coil#
KE54834-9
(2", 120V/60 Hz.)
SE50400 SE50401
KE54834-6
(1", 120V/60 Hz.)
SE50402 SE50401
KE54834-7
(1", 120V/60 Hz.)
SE50403 SE50404
KE54834-3
(3/4", 120V/60 Hz.)
SE50405 SE50406
KE54834-5
(3/4", 120V/60 Hz., HW)
SE50407 SE50401
KE54834-2
(3/8", 120V/60 Hz.)
SE50408 SE50404
KE54834-8
(1 1/4", 120V/60 Hz.)
SE50409 SE50404
KE54834-4
(3/4", 120V/60 Hz.)
SE50410 SE50404
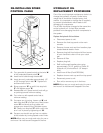
NOTE: It is not necessary to remove the valve
from the pipeline for repairs.
WARNING: Turn off electrical power supply and
depressurize valve before making repairs.
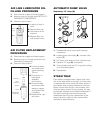
Cleaning
All solenoid valves should be cleaned periodically.
The time between cleanings will vary depending
on the medium and service conditions. In general,
if the voltage to the coil is correct, sluggish valve
operation, excessive noise or leakage will indicate
that cleaning is required . Clean valve strainer or
filter when cleaning the valve.
Preventive Maintenance
1. Keep the medium flowing through the valve as
free from dirt and foreign material as possible.
2. While in service, the valve should be operated
at least once a month to insure proper
opening and closing.
3. Depending on the medium and service
conditions, periodic inspection of internal
valve parts for damage or excessive wear is
recommended. Thoroughly clean all parts.
Replace worn or damaged parts. However, for
best results, replace all parts as supplied with
a Rebuild Kit.
Causes of Improper Operation
1.
Faulty Control Circuits:
Check the electrical
system by energizing the solenoid. A metallic
"click" signifies that the solenoid is operating.
Absence of the "click" indicates loss of power
supply . Check for loose or blown fuses, open
circuited or grounded coil, broken lead wires
or splice connections.
2.
Burned-Out Coil:
Check for open-circuited
coil. Replace coil as necessary. Check supply
voltage; it must be the same as specified on
nameplate.
3.
Low Voltage:
Check voltage across the coil
lead. Voltage must be at least 85% of
nameplate rating.
4.
Incorrect Pressure:
Check valve pressure.
Pressure to valve must be within range
specified on nameplate.
5.
Excessive Leakage:
Disassemble valve and
clean all parts. If leakage continues, replace
all parts as supplied with a Rebuild Kit.