R E M O V I N G S L I C E D O R
S H R E D D E D F O O D
19
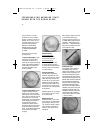
Before you do anything, wait for
the disc to stop spinning
When it does, remove the cover
first. Hold the pusher assembly
with your fingers away from the
locking tabs on back and turn it
clockwise. Lift, and the pusher
assembly and cover will come off
together.
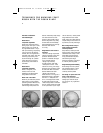
Remove the slicing or shredding
disc before removing the work
bowl. Place two fingers under
each side of the disc and lift it
straight up. Then turn the bowl
clockwise to unlock it from the
base, and lift it straight up to
remove it.
You can place the disc on top of
the inverted work bowl cover, to
minimize drips and spills.
PICK UP 4 COLOR
PHOTOS FROM FILM
PICK UP 4 COLOR
PHOTOS FROM FILM
PICK UP 4 COLOR
PHOTOS FROM FILM
03CU13135 DLC-8S IB 11/16/04 6:05 PM Page 22


