


Manual abstract:
Carefully lift the coffee maker from the remaining inserts. Remove the plastic bag from the coffee maker. We suggest you save all packing materials in the
event that future shipping of the machine is needed. Keep all plastic bags away from children. heat are sealed in. Now, you can program your coffee maker to
start brewing when you want. Simply set the desired brew time, fill the reservoir with water, put in your filter, add ground coffee and press the "ON" button.
In minutes, you'll have a wonderfully fresh pot of coffee. We know the Cuisinart® Automatic Brew and Serve will bring you years of pleasure. Nothing is more
satisfying than a rich cup of your favorite brew.
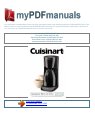
DESCRIPTION OF PARTS Your thermal carafe coffee maker brews fresh, filtered coffee in minutes. The thermal carafe contains a vacuum-sealed glass inner
liner which delivers heat retention superior to other containers used with drip coffee makers and helps keep full coffee flavor. Reservoir Cover Thermal
Carafe Swing-Out Filter Basket Brew-Through Lid Water Level Indicator Pause & Serve Programmable Control Panel Carafe Platform Cord Storage
TABLE OF CONTENTS Important Safeguards Unpacking Instructions Introduction Using the Programming Feature Coffee Preparation About the Thermal
Carafe Cleaning and Maintenance Features and Benefits Warranty p.1 p.2 p.
2 p.2 p.3 p.4 p.4 p.
5 p.6 PREPARATION FOR USE Before first use, clean the thermal carafe coffee maker by completing a brew cycle as described below without using coffee
or coffee filter. INTRODUCTION The Cuisinart® Automatic Brew and Serve Coffee Maker is a coffee lover's dream. It delivers the freshest coffee in the
world. The secret? The patented lid. Coffee brews and pours through without ever having to open or turn the lid. Flavor and USING THE PROGRAMMING
FEATURE To Set The Clock To set the time, press and hold the hour or minute button for two seconds. "Time set" starts flashingn the upper left hand corner
of the LCD screen. WARNING RISK OF FIRE OR ELECTRIC SHOCK DO NOT OPEN WARNING: TO REDUCE THE RISK OF FIRE OR ELECTRIC
SHOCK, DO NOT REMOVE THE BASE PANEL! NO USER SERVICEABLE PARTS INSIDE REPAIR SHOULD BE DONE ONLY BY AUTHORIZED
SERVICE PERSONNEL ONLY 2 Press the hour button to advance the clock to the desired time. The hour numeral moves in one hour increments.
When passing 12 am, the "PM" indicator will illuminate in the lower left hand corner of the LCD screen. Press the "minute" button to advance the minutes to
the desired time. Minutes move in one second increments. When complete, press the hour button again, or wait for 15 seconds and your time change will be
accepted. To Program the Brew Time To program the brew time, press and hold the program button for two seconds. The "prog" symbol starts flashing in the
lower right corner of the LCD screen. Press the hour button to advance the clock to the desired time. The hour numeral moves in one hour increments. When
passing 12 am, the "PM" indicator will illuminate in the lower left hand corner of the LCD screen. Press the "minute" button to advance the minutes to the
desired time.
Minutes move in one second increments. When complete, press the "prog" button, or wait for 15 seconds and your set time will be accepted. To Activate the
Auto Brew Cycle To activate the auto brew mode, depress the "auto on" button. The "auto" symbol will illuminate in the upper right hand corner of the LCD
screen. The unit will now begin the brewing cycle at the programmed time.
When the programmed time initiates the cycle, the red "ON" indicator light will show that the brewing cycle has started. NOTE: The unit will continue to
attempt to brew at the programmed time, each day, until the Auto On button is turned off. The red "ON" indicator light will illuminate each time the attempt to
brew is made. If there is no water in the reservoir, the unit will automatically shut off one minute later. cover; pour water into reservoir opening.
Markings on water level indicator show amount of water needed to make desired number of cups of coffee. TO AVOID OVERFLOW, DO NOT FILL ABOVE
8-CUP MARK. Close reservoir cover. 3. Before thermal carafe is returned to platform, prewarm carafe by running warm water through carafe..
Your user manual
CUISINART DTC-850
Powered by TCPDF (www.tcpdf.org)