


4
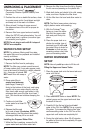
UNPACKING & PLACEMENT
1. Remove your Cuisinart
®
®
Countertop Filtration System carefully from
the box.
2. Position the unit on a stable flat surface, close
to a main power outlet. Avoid direct sunlight
and keep out of the reach of children.
3. Allow at least 3 inches of space around
the sides and rear of the unit for proper air
circulation.
4. Remove filter from upper tank and carefully
follow the SETUP instructions below. You will
need a large bowl, a pitcher (or another type
of container), and a glass.
NOTE: Do not plug in unit until ALL steps of
SETUP are complete.
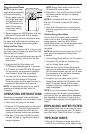
WATER FILTER SETUP
NOTE: For optimum filtering and flow rates,
the water filter must be prepared and installed
exactly as follows:
Preparing the Water Filter
1. Remove the filter from its packaging.
NOTE: The filter may contain a small amount
of loose carbon dust. It may also appear moist,
have a faint smell of plastic or a slight yellowish
tint – these are all normal. DO
NOT wash filter with soap or
water.
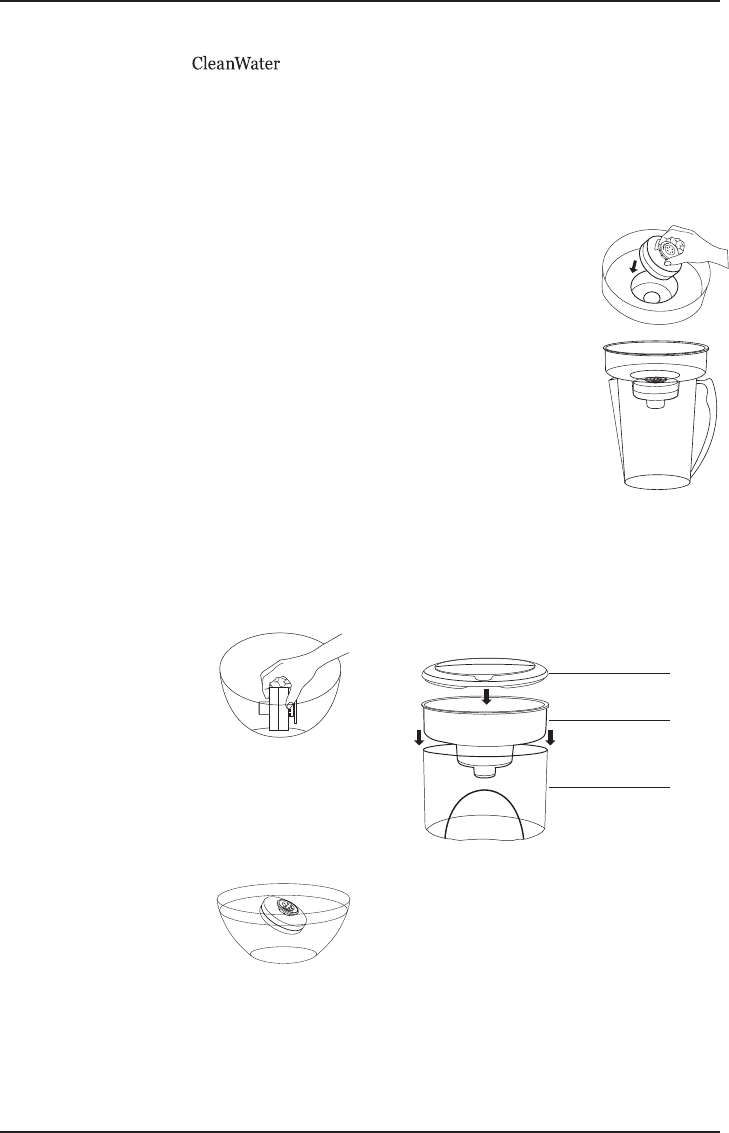
2. Place water filter in
empty bowl sideways
(see image). Pressing it
firmly to the bottom of the bowl, and being
careful not to pour water directly onto the
filter, slowly add enough cold water to fully
submerge and cover the filter by at least 1
inch. (You should see bubbles escaping the
filter.)
3. Continue to hold filter
under water for at least 30
seconds.
4. Release the filter and
let it soak at least 15 minutes. NOTE:
While soaking, the filter should be partially
submerged and may tilt to one side.
Installing the Prepared Water Filter
1. While the filter is soaking, remove the lid,
upper water tank and lower water tank.
2. Remove the filter timer from the lid by flipping
the lid over and pressing on the plastic tab.
3. Wash both tanks and plastic lid in mild, soapy
water, and rinse. Replace the filter timer.
4. Lift the filter from the bowl and allow water to
drain.
NOTE: The filter's loose carbon dust may
slightly darken water while soaking.
5. With the Cuisinart
®
logo
facing up, insert the water
filter into the upper water
tank and push firmly into
place.
6. Place the upper tank on a
pitcher (or another type of
container) and fill with cold
tap water. Allow to drain for
5 minutes to flush out any
remaining carbon dust, then
pour out remaining water.
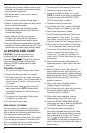
WATER DISPENSER
SETUP
NOTE: Use only cold tap water to fill the unit.
Filling the Upper and Lower Tanks
1. Place the upper tank onto the lower tank and
cover with the lid.
2. Place assembled tanks on base. NOTE: The
vertical groove on the upper tank must face
the back of the unit.
3. Carefully lift the flip top lid and add cold
water to the FILL line. NOTE: This is a gravity
fill system. To increase the filtering flow rate,
continue adding water to the FILL line of the
upper tank until tanks are completely full.
4. During the initial setup, allow 30–40 minutes
for water to filter into and completely fill upper
and lower tanks.
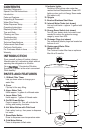
Lid
Upper
water tank
Lower
water tank